RSS

3scale policy development – part 2 generate a policy scaffold

In first part of our multi-part blog series about 3scale policy development we looked into the setup of a development environment. Now we have a functioning development environment we can start the actual development of the 3scale policy. In this part we will take a look and use the scaffolding utility provided by APIcast to generate a policy scaffold.

The first thing we are going to do is create a new git branch of the APIcast source we have cloned in the previous part. This is an optional step, but developing a new feature or changing code in general in a new branch is a good habit to get into. So create a new branch and start up our development container.

$ git checkout -b policy-development-blog
Switched to a new branch 'policy-development-blog'
$ make development

To generate the scaffold of our policy we can use the apicast utility located in the bin/ directory of our development container.
So in the development container issue the following command:

$ bin/apicast generate policy hello_world

where hello_world is the name of the policy.

bash-4.2$ bin/apicast generate policy hello_world
source: /home/centos/examples/scaffold/policy
destination: /home/centos

exists: t
created: t/apicast-policy-hello_world.t
exists: gateway
exists: gateway/src
exists: gateway/src/apicast
exists: gateway/src/apicast/policy
created: gateway/src/apicast/policy/hello_world
created: gateway/src/apicast/policy/hello_world/hello_world.lua
created: gateway/src/apicast/policy/hello_world/init.lua
created: gateway/src/apicast/policy/hello_world/apicast-policy.json
exists: spec
exists: spec/policy
created: spec/policy/hello_world
created: spec/policy/hello_world/hello_world_spec.lua
bash-4.2$

As you can see from the output of the generate policy command a few files have been created. These artifacts related to our policy are located in three different directories:

  • t/ – this directory contains all Nginx integration tests
  • src/gateway/apicast/policy – this directory contains the source code and configuration schemas of all policies. Our policy resides in the subdirectory of hello_world
  • spec/policy – this directory contains the unit tests of all policies. The unit tests for our policy resides in the subdirectory of hello_world

So the policy scaffolding utility not only generates a scaffold for our policy, but also the files for a configuration schema, unit tests and integration tests. Let’s have a look at these files.

The source code of our policy residing in the directory src/gateway/apicast/policy/hello_world contains three files.

  • init.lua – all policies contain this init.lua file. It contains 1 line importing (require in Lua) our policy. It should not be modified.
  • aplicast-policy.json – The APIcast gateway is configured using a json document. Policies requiring configuration also use this json document. The apicast-policy.json file is a json schema file were configuration properties for the policy can be defined. We will look into configuration properties and this file in more detail in our next part of our policy development blog series.


{
  "$schema": "http://apicast.io/policy-v1/schema#manifest#",
  "name": "hello_world",
  "summary": "TODO: write policy summary",
  "description": [
      "TODO: Write policy description"
  ],
  "version": "builtin",
  "configuration": {
    "type": "object",
    "properties": { }
  }
}
  • hello_world.lua – This is the actual source code of our policy, which at the moment does not contain much.


-- This is a hello_world description.
local policy = require('apicast.policy')
local _M = policy.new('hello_world')
local new = _M.new
--- Initialize a hello_world
-- @tparam[opt] table config Policy configuration.
function _M.new(config)
  local self = new(config)
  return self
end
return _M

The first two lines import the APIcast policy module an instantiate a new policy with hello_world as an argument. This returns a module itself which is implemented using a Lua table. Lua is not an Object Oriented language from itself but tables (and especially metatables) can mimic objects. The third line stores a reference to a function new which is defined below. The new function takes a config variable as argument, but as of now nothing is done with is. The new method simply returns itself. Finally the module representing our policy is returned. This is done so other components importing this policy module retrieve the table and can invoke all functions and variables stored in the policy.
We won’t cover all the files in details here since we are going to touch these in upcoming series when we flesh out our policy with functionality.
But as a final verification to see if we have something working let’s run the unit tests again.

The keen observer can see the number of successes in the unit test outcome has increased from 749 to 751 after we generated the scaffold for our policy.

In the next part we will take a closer look at the json configuration schema file and how we can read the configuration values from the json configuration as well as ENV vars to use in our policy.

 
Leave a comment

Posted by on 2019-03-22 in API Management


Tags: , , , , , , ,

3scale policy development – part 1 setting up a development environment

3scale policy development – part 1 setting up a development environment

In this multi part blog series we are going to dive into the development, testing and deployment of a custom 3scale APIcast policy. In this initial part we are going to setup a development environment so we can actually start the development of our policy.

But before we begin, let’s first take a look what a 3scale APIcast policy is. We are not going into too much detail here, since better and more detailed descriptions about 3scale APIcast policies already exist.

For those unfamiliar 3scale is a full API Management solution of Red Hat. It exists of an API Manager used for account management, analytics and overall configuration. A developer portal used for outside developers for gaining access to API’s and viewing the documentation. And the API gateway named APIcast. The APIcast gateway is based on Nginx and more specifically Openresty, which is a distribution of Nginx compiled with various modules, most notable the lua-nginx-module.

The lua-nginx-module provides the ability to enhance a Nginx server by executing scripts using the Lua programming language. This is done by providing a Lua hook for each of the Nginx phases. Nginx works using an event loop and a state model where every request (as well as the starting of the server and its worker processes) goes through various phases. Each phase can execute a specific Lua function.

An overview of the various phases and corresponding Lua hooks was kindly in the README of the lua-nginx-module: https://github.com/openresty/lua-nginx-module#directives

Since the APIcast gateway uses Openresty 3scale provided a way to leverage these Lua hooks in the Nginx server using something called policies. As described in the APIcast README:

“The behaviour of APIcast is customizable via policies. A policy basically tells APIcast what it should do in each of the nginx phases.”

A detailed explanation of policies can be found in the same README: https://github.com/3scale/apicast/blob/master/doc/policies.md

Setting up the development enviroment

As was clear from the introduction, APIcast policies are created in the Lua programming language. So we need to setup an environment to do some Lua programming. Also, an actual APIcast server would be very nice to perform some local tests.

Luckily the guys from 3scale made it very easy to setup a development environment for APIcast using Docker and Docker Compose.

Pre-requisites:

This means both Docker and Docker compose must be installed.

The version of Docker I currently use is:

Docker version 18.09.2, build 6247962

Instructions for installing Docker can be found on the Docker website.

With Docker compose version:

docker-compose version 1.23.1, build b02f1306

Instructions for installing Docker-compose can also be found on the Docker website.

Setting up the APIcast development image:

Now that we have both Docker and Docker-compose installed we an setup the APIcast development image.

Firstly the APIcast git repostitory must be cloned so we can start the development of our policy. Since we are going to base our policy on the latest 3scale release we are switching to the stable branch of APIcast.

$ git clone https://github.com/3scale/apicast.git

when done switch to a stable branch, I am using 3.3

$ cd apicast/

$ git checkout 3.3-stable

To start the APIcast containers using Docker-compose we can use the Make file provided by 3scale. In the APIcast directory simply execute the command:

$ make development

The Docker container starts in the foreground with a bash session. The first thing we need to do inside the container is installing all the dependencies.

This can also be done using a Make command, which again must be issued inside the container.

$ make dependencies

It will now download and install a plethora of dependencies inside the container.

The output will be very long, but if everything went well you should be greeted with an output that looks something like this:

Now as a final verification we can run some APIcast unit tests to see if we are up and running and ready to start the development of our policy.

To run the Lua unit tests run the following command inside the container:

$ make busted

Now that we can successfully run unit tests we can start our policy development!

The project’s source code will be available in the container and sync’ed with your local apicast directory, so you can edit files in your preferred environment and still be able to run whatever you need inside the Docker container.

The development container for APIcast uses a Docker volume mount to mount the local apicast directory inside the container. This means all files changed locally in the repository are synced with the container and used in the tests and runtime of the development container.

It also means you can use your favorite IDE or editor develop your 3scale policy.

Optional setup an IDE for policy development:

The use of an IDE or text editor and more specifically which one is very personal so there is definitely no one size fits all here. But for those looking for a dedicated Lua IDE ZeroBraneStudio is a good choice.

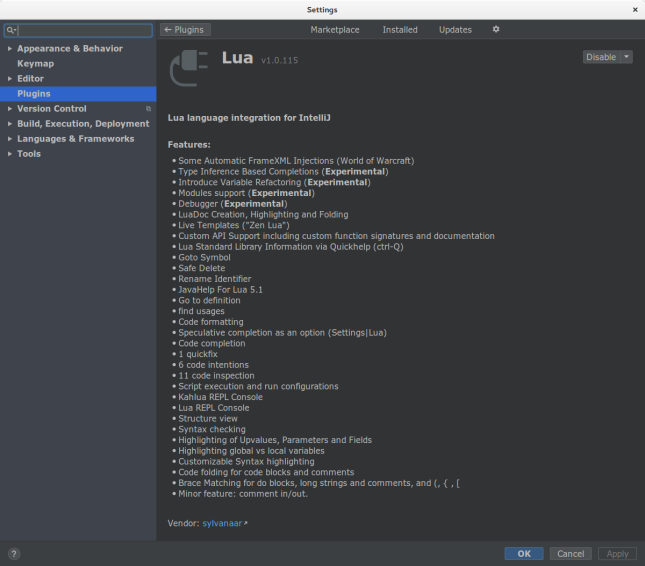
Since I come from a Java background I am very used to working with IntelliJ IDEA, and luckily there are some plugins available that make Lua development a little bit nicer.

These are the plugins I installed for developing Lua code and 3scale policies in particular:

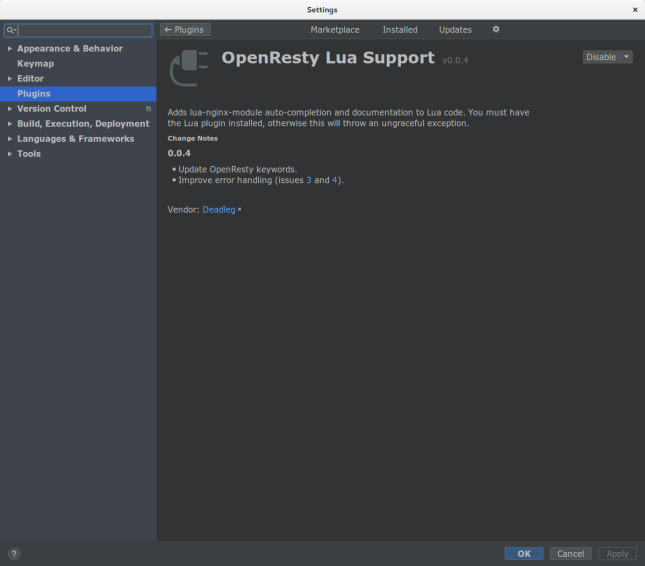
And for Openresty/Nginx there is also a plugin:

As a final step, but this is more relevant if you are also planning on developing some Openresty based applications locally (outside the APIcast development container), you can install Openresty, based on the instructions on their website.

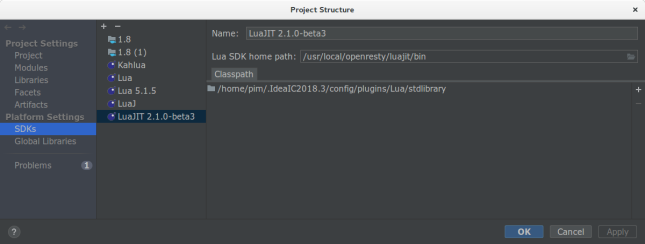
What I did was I linked the Lua runtime engine of Openresty, which is LuaJIT, to the SDK of my IntelliJ IDEA so that I am developing code against the LuaJIT engine of Openresty.

As I already mentioned these steps are not required for developing policies in APIcast, and you definitely do not need to use IntelliJ IDEA. But having a good IDE or Text editor, whatever your choice, can make your development life a little bit easier.

Now we are ready to create a 3scale APIcast policy, which is the subject of the next part!

 
Leave a comment

Posted by on 2019-03-01 in API Management


Tags: , , , , , , ,

Authenticating a JMS consumer with 3Scale, Camel and ActiveMQ

3Scale is an API Management platform used for authenticating an throttleing API calls among many, many other things. Now when thinking of API’s most people think of RESTfull API’s these days. And altough 3Scale primarily targets RESTfull API’s it is also possible to use other types of API’s as this blog will demonstrate. In this post we will use a Camel JMS subscriber in combination with ActiveMQ and authenticate requests against the 3Scale API Management platform.

First let’s look at the 3Scale setup.

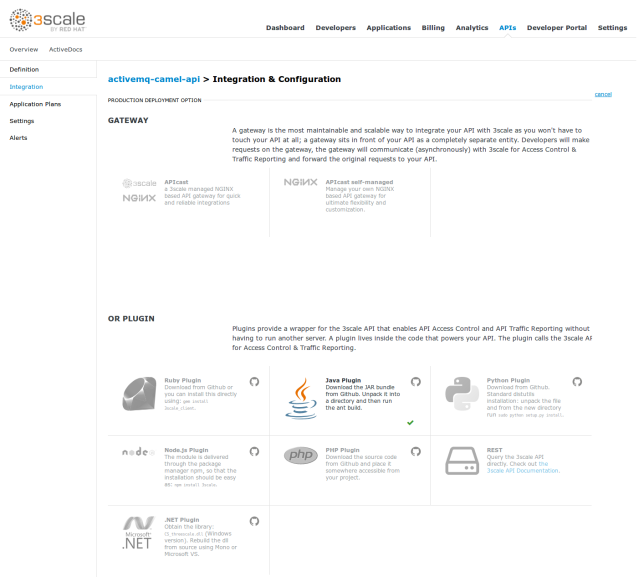
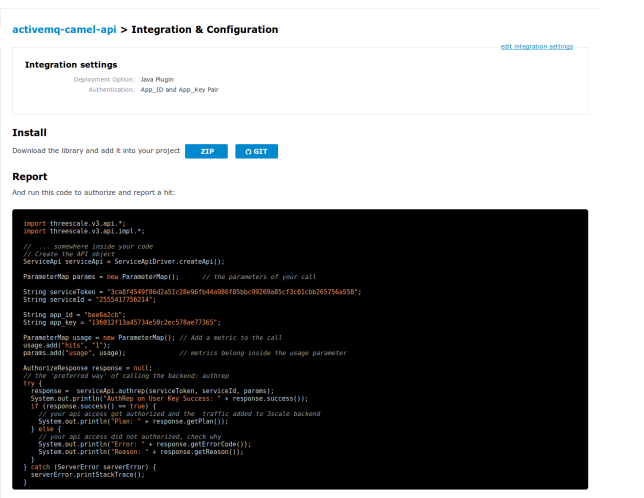
The first step is to create a new service, however normally one would select one of the APICast API Gateway options for handling the API traffic. This time however we are selecting the Java plugin option, since Camel is based on Java. Obviously the same principles could be applied in one of the other programming languages for which plugins are available.   

The next step is to go to the integration page. But, where normally we would configure the mapping rules of our RESTfull API, we now get instructions to implement the Java plugin.


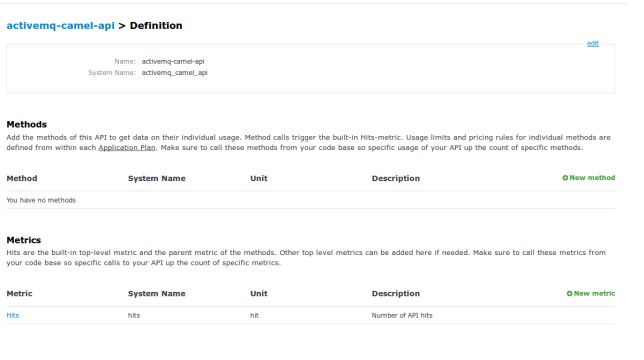
It is good to note the rest of the 3Scale setup is completely default. De default Hits metric is used as shown below, although custom methods could easily be defined.


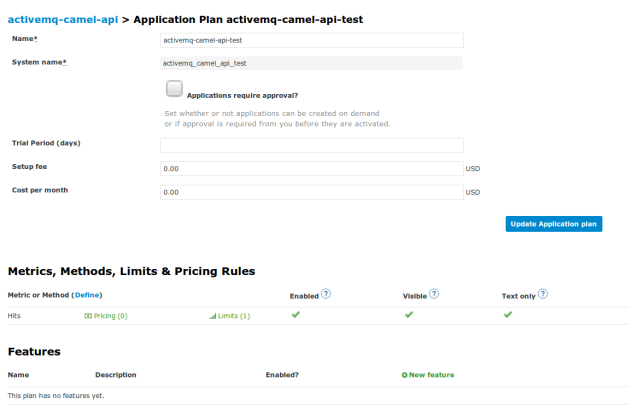
For this example one application plan with a rate limit has been configured.

Integrating the 3Scale Java plugin with Apache Camel

Apache Camel has numerous ways of integrating custom code and creating customizations. For this example a custom processor is created, although a bean, or component would work also.

The first step is to import the 3Scale java plugin dependency via Maven, by adding the following to the pom.xml file:


<dependency>
    <groupId>net.3scale</groupId>
    <artifactId>3scale-api</artifactId>
    <version>3.0.4</version>
</dependency>

Now we can integrate the 3Scale Java plugin in our Camel processor, which is going to retrieve the 3Scale appId and appKey, used for authentication from JMS headers. With the appId and appKey the 3Scale API is called for authentication. However this is not the only thing we need to pass in our request towards 3Scale. To authenticate against 3Scale selecting the correct 3Scale account and service we need to pass the ServiceId of the service we created above and pass the accompanying service token. Since these are fixed per environment we retrieve these values from a properties file. Finally we need to increment the hits metric. Once all these parameters are passed in the request we can invoke 3Scale and authenticate our request. If we are authenticated and authorized for this API we finish the processor, following the Camel Route execution. However, when we are not authenticated we are going to stop the route and any further processing.
The entire processor looks like this:

package nl.rubix.eos.api.camelthreescale.processor;

import org.apache.camel.Exchange;
import org.apache.camel.Processor;
import org.apache.camel.RuntimeCamelException;
import org.apache.deltaspike.core.api.config.ConfigProperty;
import threescale.v3.api.AuthorizeResponse;
import threescale.v3.api.ParameterMap;
import threescale.v3.api.ServerError;
import threescale.v3.api.ServiceApi;
import threescale.v3.api.impl.ServiceApiDriver;

import javax.inject.Inject;
import javax.inject.Named;

@Named("authRepProcessor")
public class AuthRepProcessor implements Processor {

  @Inject
  @ConfigProperty(name = "SERVICE_TOKEN")
  private String serviceToken;

  @Inject
  @ConfigProperty(name = "SERVICE_ID")
  private String serviceId;

  @Override
  public void process(Exchange exchange) throws Exception {
    String appId = exchange.getIn().getHeader("appId", String.class);
    String appKey = exchange.getIn().getHeader("appKey", String.class);

    AuthorizeResponse authzResponse = authrep(createParametersMap(appId, appKey));

    if(authzResponse.success() == false) {
      exchange.setProperty(Exchange.ROUTE_STOP, true);
      exchange.getIn().setHeader("authz:errorCode", authzResponse.getErrorCode());
      exchange.getIn().setHeader("authz:reason", authzResponse.getReason());
    }

  }

  private ParameterMap createParametersMap(String appId, String appKey) {
    ParameterMap params = new ParameterMap();
    params.add("app_id", appId);
    params.add("app_key", appKey);

    ParameterMap usage = new ParameterMap();
    usage.add("hits", "1");
    params.add("usage", usage);

    return params;
  }

  private AuthorizeResponse authrep(ParameterMap params) {

    ServiceApi serviceApi = ServiceApiDriver.createApi();

    AuthorizeResponse response = null;

    try {
      response = serviceApi.authrep(serviceToken, serviceId, params);
    } catch (ServerError serverError) {
      serverError.printStackTrace();
      throw new RuntimeCamelException(serverError.getMessage(), serverError.getCause());
    }
    return response;
  }
}

We simply use this processor in our Camel route to add the 3Scale functionality:

package nl.rubix.eos.api.camelthreescale;

import io.fabric8.annotations.Alias;
import org.apache.activemq.camel.component.ActiveMQComponent;
import org.apache.camel.builder.RouteBuilder;
import org.apache.camel.cdi.ContextName;

import javax.inject.Inject;

@ContextName("activemq-camel-api")
public class ActiveMqCamelApi extends RouteBuilder{

  @Inject
  @Alias("jms")
  private ActiveMQComponent activeMQComponent;

  @Override
  public void configure() throws Exception {
      from("jms:queue:test")
        .log("received message")
        .process("authRepProcessor")
        .log("request authenticated and authorized");
  }
}

When looking at the logs we can see the request is authenticated when we send a request with the correct appId and appKey in the JMS headers. When looking at the logs we can see the request is passing the processor:

2018-03-10 20:28:40,294 [cdi.Main.main()] INFO  DefaultCamelContext            - Route: route1 started and consuming from: Endpoint[jms://queue:test]
2018-03-10 20:28:40,295 [cdi.Main.main()] INFO  DefaultCamelContext            - Total 1 routes, of which 1 are started.
2018-03-10 20:28:40,295 [cdi.Main.main()] INFO  DefaultCamelContext            - Apache Camel 2.17.0.redhat-630187 (CamelContext: activemq-camel-api) started in 0.512 seconds
2018-03-10 20:28:40,318 [cdi.Main.main()] INFO  Bootstrap                      - WELD-ENV-002003: Weld SE container STATIC_INSTANCE initialized
2018-03-10 20:29:37,157 [sConsumer[test]] INFO  route1                         - received message
2018-03-10 20:29:38,307 [sConsumer[test]] INFO  route1                         - request authenticated and authorized

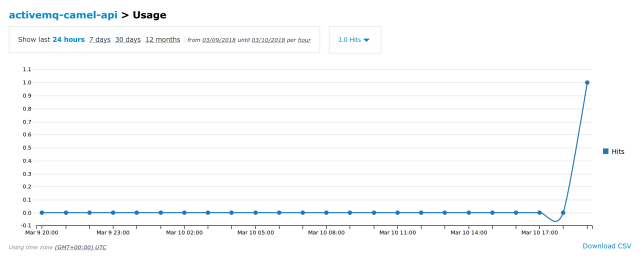
And off course we can see the metrics in 3Scale:

Now this processor discards the message when the authentication by 3Scale fails, but it is off course possible to send the unauthorized messages towards a special error queue, or make the entire route transactional and simply do not send an ACK when authentication fails.

The entire code of this example is available on Github.

 
Leave a comment

Posted by on 2018-03-10 in API Management


Tags: , , ,

Camel setting exchange headers in a custom dataformat

Apache Camel is a great framework with dozens (hundreds even) components, dataformats and expression languages. However one of the thing that makes Camel even greater is the various ways to provide your own customizations to these items. In this blog we are going to create a custom dataformat used in the marshal and unmarshal statements within a Camel route.

Creating your custom data format is pretty straightforward, all we have to do is provide an implementation of the Dataformat interface which looks like this:


public interface DataFormat {
void marshal(Exchange var1, Object var2, OutputStream var3) throws Exception;
Object unmarshal(Exchange var1, InputStream var2) throws Exception;
}

Within the marshal method you can take whatever is on the Exchange or the body of the exchange, which is put in the second argument and serialize it into an OutputStream object. The unmarshal method however threw me off a bit by also taking the exchange as an argument. Let me explain.
The Object returned from the unmarshal method is, normally, put in the exchange body. But what if you for some reason need to put some parts of the original message into exchange headers instead of the body. I initially thought that I could leverage the exchange object being passed as an argument into the unmarshal method. However this did not seem to work. It seems the exchange object is only used as in imput of the unmarshal method as a parameter but this is not the same reference as the exchange object used in the route downstream.

Message to the rescue!

One elegant way to set both the exchange body and headers is to use the Camel Message interface. Where we can both set the exchange body and headers.


public interface Message {
...
void setHeader(String var1, Object var2);
...
Map<String, Object> getHeaders();
void setHeaders(Map<String, Object> var1);
...
void setBody(Object var1);
<T> void setBody(Object var1, Class<T> var2);
…

Returning the message object from the unmarshal method in the custom dataformat respects the message object and places this on the exchange using the Camel typeconversion method.

Samples

In order to demonstrate this we create two of the silliest of dataformats. The string reverser. One returning the body, the other returning the message.

We begin by implementing the unmarshal method returning a String:


@Override
public Object unmarshal(Exchange exchange, InputStream inputStream) throws Exception {
String originalBody = exchange.getIn().getBody(String.class);
String reversedBody = new StringBuilder(originalBody).reverse().toString();

//The statement below does nothing
exchange.getIn().setHeader("MyAwesomeHeader", reversedBody);

return reversedBody;
}

However the setHeader on the exchange is ignored as we can see in the log:


2018-01-10 17:53:01,656 [main ] INFO route1 - original body: Hello world

2018-01-10 17:53:01,659 [main ] INFO route1 - the body contains: dlrow olleH

2018-01-10 17:53:01,660 [main ] INFO route1 - the headers contain: {breadcrumbId=ID-15-9530-37168-1515603181324-0-1}

Even Modifiying the unmarshal method to return the exchange does not help:


@Override
public Object unmarshal(Exchange exchange, InputStream inputStream) throws Exception {
String originalBody = exchange.getIn().getBody(String.class);
String reversedBody = new StringBuilder(originalBody).reverse().toString();
//The statement below does nothing
exchange.getIn().setHeader("MyAwesomeHeader", reversedBody);
return reversedBody;
}

}


2018-01-10 17:50:08,847 [main ] INFO route1 - original body: Hello world

2018-01-10 17:50:08,849 [main ] INFO route1 - the body contains: Hello world

2018-01-10 17:50:08,850 [main ] INFO route1 - the headers contain: {breadcrumbId=ID-15-9530-36027-1515603008530-0-1}

lastly we create a dataformat returning a Camel Message:


@Override
public Object unmarshal(Exchange exchange, InputStream inputStream) throws Exception {
//set the message to the original message of the Exchange. This preserves the body and all headers previously present on the exchange.
Message response = exchange.getIn();

String originalBody = exchange.getIn().getBody(String.class);
String reversedBody = new StringBuilder(originalBody).reverse().toString();

response.setBody(reversedBody, String.class);
response.setHeader("MyAwesomeHeader", reversedBody);

return response;
}

Now when we look at the log we can see our header being set:


2018-01-10 17:56:04,135 [main ] INFO route2 - original body: Hello world
2018-01-10 17:56:04,138 [main ] INFO route2 - the body contains: dlrow olleH
2018-01-10 17:56:04,139 [main ] INFO route2 - the headers contain: {breadcrumbId=ID-15-9530-37739-1515603363797-0-1, MyAwesomeHeader=dlrow olleH}

Example code can be found on GitHub-Mark-120px-plus

 
Leave a comment

Posted by on 2018-01-10 in JBoss Fuse


Tags: , ,

Openshift Fuse health checks with Jolokia

I recently ran into a problem where I needed to create an Openshift healthcheck for a Fuse container. Normally all Fuse containers exposed an http endpoint which was used in the healthcheck. However additional security requirements dictated the use of client certificates. Currently it is not possible to create a healthcheck with a two-way-ssl connection.

As another way to monitor if all Camel routes are started I decided to leverage the JMX beans exposed by Jolokia. For those who are unfamiliar with Jolokia, it essentially is JMX over json/http.


The problem was that by default the Jolokia endpoint is secured with basic authentication, and the password is generated for each created container in Openshift.

However, the Jolokia password for each container is available in the base image (FIS 2 fis-java base image was used) of each container: /opt/etc/jolokia.pw

This file can be used to execute the curl request to the Jolokia endpoint:

curl -k -v https://jolokia:`cat /opt/jolokia/etc/jolokia.pw`@localhost:8778/jolokia/exec/org.apache.camel:context=myCamelContext,type=routes,name=%22myJettyEndpoint%22/getState%28%29

In the above example the state of the “myJettyEndpoint” camel endpoint is requested.

 
Leave a comment

Posted by on 2017-11-24 in JBoss Fuse, Openshift


Tags: , , , ,

Openshift limits explained

Openshift is a Paas platform offered by Red Hat based mainly on Docker and Kubernetes. One of the concepts behind it is that Ops can set boundaries for Dev. For example by providing a list of supported technologies in the form of base images.
One other way Ops can further control the Paas cluster is to impose various limits on the components running in Openshift.

However, Openshift currently has three different ways of setting restrictions on different levels which do interconnect in an implicit way. Which sometimes can become difficult to setup in a proper way and people end up with Pods never leaving the “Pending” state. So in this blogpost we are going to take look at the different limits or restrictions available in Openshift and how they influence each other.

But to understand the restrictions better it is good to know some basic Openshift concepts and components on which these limits act. Although I highly recommend to start experimenting with restrictions and limits after you become familiar with Openshift.

Below are the components of Openshift influenced by the restrictions. (source: https://docs.openshift.com/enterprise/3.0/architecture/core_concepts/index.html)

Containers

The basic units of OpenShift applications are called containers. Linux container technologies are lightweight mechanisms for isolating running processes so that they are limited to interacting with only their designated resources. Many application instances can be running in containers on a single host without visibility into each others’ processes, files, network, and so on. Typically, each container provides a single service (often called a “micro-service”), such as a web server or a database, though containers can be used for arbitrary workloads.

The Linux kernel has been incorporating capabilities for container technologies for years. More recently the Docker project has developed a convenient management interface for Linux containers on a host. OpenShift and Kubernetes add the ability to orchestrate Docker containers across multi-host installations.

Pods

OpenShift leverages the Kubernetes concept of a pod, which is one or more containers deployed together on one host, and the smallest compute unit that can be defined, deployed, and managed.

Namespaces

A Kubernetes namespace provides a mechanism to scope resources in a cluster. In OpenShift, a project is a Kubernetes namespace with additional annotations.

Namespaces provide a unique scope for:

  • Named resources to avoid basic naming collisions.
  • Delegated management authority to trusted users.
  • The ability to limit community resource consumption.

Most objects in the system are scoped by namespace, but some are excepted and have no namespace, including nodes and users.

The Kubernetes documentation has more information on namespaces.


Openshift limits and restrictions

There are three different types of limits and restrictions available in Openshift.

  • Quotas
  • Limit ranges
  • Compute resources

Quotas

Quotas are boundaries configured per namespace and act as a upper limit for resources in that particular namespace. It essentially defines the capacity of the namespace. How this capacity is used is up to the user using the namespace. For example if the total capacity us used by one or one hundred pods is not dictated by the quota, except when a max number of pods is configured.

Like most things in Openshift you can configure a quota with a yaml configuration. One basic configuration for a quota looks like:

apiVersion: v1
kind: ResourceQuota
metadata:
  name: namespace-quota
spec:
  hard:
    pods: "5" 
    requests.cpu: "500m" 
    requests.memory: 512Mi 
    limits.cpu: "2" 
    limits.memory: 2Gi 

This quota says that the namespace can have a maximum of 5 pods, and/or a max of 2 cores and 2 Gb of memory, the initial “claim” of this namespace is 500 millicores and 512 Mb of memory.

Now it is important to note that by default these limits are imposed to “NonTerminating” pods only. Meaning that for example build pods which terminate eventually are not counted in this quota.

Explicitly this can be configured by adding a scope to the yaml spec:


apiVersion: v1
kind: ResourceQuota
metadata:
  name: namespace-quota
spec:
  hard:
    pods: "5" 
    requests.cpu: "500m" 
    requests.memory: 512Mi 
    limits.cpu: "2" 
    limits.memory: 2Gi 
scopes:
- NotTerminating

There are also other scopes available, like Best effort and guaranteed.

Limit ranges

One other type of limit is the “limit range”. A limit range is also configured on a namespace, however a limit range defines limits per pod and/or container in that namespace. It essentially provides CPU and memory limits for containers and pods.

Again, configuring a limit range is also done by a yaml configuration:


apiVersion: "v1"
kind: "LimitRange"
metadata:
  name: "resource-limits" 
spec:
  limits:
    -
      type: "Pod"
      max:
        cpu: "2" 
        memory: "1Gi" 
      min:
        cpu: "200m" 
        memory: "6Mi" 
    -
      type: "Container"
      max:
        cpu: "2" 
        memory: "1Gi" 
      min:
        cpu: "100m" 
        memory: "4Mi" 
      default:
        cpu: "300m" 
        memory: "200Mi" 
      defaultRequest:
        cpu: "200m" 
        memory: "100Mi"

Here we can see both Pod and Container limits. These limits define the “range” (hence the term limit range) for each container of pod in the namespace. So in the above example each Pod in the namespace will initially claim 200 millicores and 6Mb of memory and can run with a max of 1 GB of memory and 2 cores of CPU. The actual limits the Pod or container runs with can be defined in the Pod or Container spec which we will discover below. However the limit range defines the range of these limits.

Another thing to note is the default and defaultRequest limits in the Container limit range. These are the limits applied to a container who do not specify further limits and hence get assigned the default.

Compute resources

The last of the limits is probably the easiest to understand, compute resources are defined on the Pod or the Container spec, in for example the deploymentconfig or the replication controller. And define the CPI and Memory limits for that particular pod.

Lets look at an example Yaml:


apiVersion: v1
kind: Pod
spec:
  containers:
  - image: nginx
    name: nginx
    resources:
      requests:
        cpu: 100m 
        memory: 200Mi 
      limits:
        cpu: 200m 
        memory: 400Mi 

In the above spec the Pod will initially claim 100 millicores and 200 Mb of memory and will max out at 200 millicores and 400 Mb of memory. Note whenever a Limit range is also provided in the namespace where the above Pod runs and the compute resources limits here are within the limit range the Pod will run fine. If however the limits are above the limits in the limit range the pod will not start.

Scopes

All limits have a request and a max which define further ranges the Pod can operate on. Where the request is by all intense and purposes “guaranteed” (as long as the underlying node has the capacity). This gives the option to implicitly set different QoS tiers.

  1. BestEffort – no limits are provided whatsoever. The Pod claims whatever it needs, but is the first one to get scaled down or killed when other Pods request for resources.
  2. Burstable – The request limits are lower than the max limits. The initial limit is guaranteed, but the Pod can, if resources are available, burst to its maximum.
  3. Guaranteed – the request and max are identical, so it directly claims the max resources, even though the pod might not initially use all resources they are already claimed by the cluster, and therefore guaranteed.

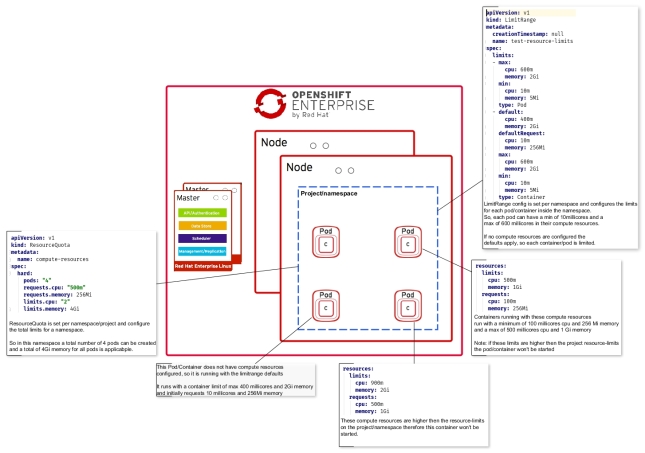
Below is an overall view of the three different Openshift limits.


Leave a comment

Posted by on 2017-08-25 in Openshift


Tags: , , , , , ,

AES-256 message encryption in Apache Camel

This blog post shows how to encrypt and decrypt the payload of the message using Apache Camel. The cryptografic algorithm used in this example is AES-256 since this was an explicit request from security. The key used in the example was obtained from a keystore.

For extra security purposes AES encryption can be extended by using a so called Initialization Vector, which is similar as a NONCE a random number used per request. In this example a random 16 bit byte[] is used.

For more information about AES encryption: https://en.wikipedia.org/wiki/Advanced_Encryption_Standard

For more information about Initialization Vectors: https://en.wikipedia.org/wiki/Initialization_vector

To encrypt and decrypt messages Camel has made an abstraction independend of the algorithm used for encryption and decryption. This abstraction is called the CryptoDataFormat and can be used as any other data format. The CryptoDataFormat is well documented here: http://camel.apache.org/crypto.html However, the use with the AES-256 encryption algorithm is less well documented so, hopefully this post helps someone.


Generating the key and the keystore

The first step is to generate the key we are going to use for encryption AND decryption (remember this is symmetric encryption, meaning the same key is used for encryption als for decryption opposed to PKI which is an assymmetric encryption technique).

For generating the key we can use keytool. The example below I conviently borrowed from this blogpost: https://dzone.com/articles/aes-256-encryption-java-and

keytool -genseckey -keystore aes-keystore.jck -storetype jceks -storepass mystorepass -keyalg AES -keysize 256 -alias jceksaes -keypass mykeypass

To retrieve the key from the keystore I created some helper method, nothing special so far.

public static Key getKeyFromKeystore(KeyConfig keyConfig) {

  String keystorePass = keyConfig.getKeystorePass();
  String alias = keyConfig.getAlias();
  String keyPass = keyConfig.getKeyPass();
  String keystoreLocation = keyConfig.getKeystoreLocation();
  String keystoreType = keyConfig.getKeystoreType();

  InputStream keystoreStream = null;
  KeyStore keystore = null;
  Key key = null ;

  try {
    keystoreStream = new FileInputStream(keystoreLocation);
    keystore = KeyStore.getInstance(keystoreType);

    keystore.load(keystoreStream, keystorePass.toCharArray());
    if (!keystore.containsAlias(alias)) {
      throw new RuntimeException("Alias for key not found");
    }

    key = keystore.getKey(alias, keyPass.toCharArray());

  } catch (Exception e) {
    e.printStackTrace();
  }

  return key;
}

The KeyConfig object is just a POJO containing some String values retrieved from a propertyfile.

Since we are going to use an Initialization Vector for extra security we create a helper method for this as well, which returns a 16 bit byte array:

public static byte[] generateIV() {
  byte[] iv = new byte[16];
  new Random().nextBytes(iv);

  return iv;
}

With the helper methods in place we can turn our attention to some Camel code…

Encrypting and decrypting using a Camel Route

The first thing we need is a CryptoDataFormat. Since we are using CDI for the bootstrapping we are going to use a PostConstruct annotated method to create a CryptoDataFormat. The trick is to set the encryption algorithm to “AES/CBC/PKCS5Padding” and enter a AES-256 key.

@PostConstruct
public void setupEncryption() {
  cryptoFormat = new CryptoDataFormat("AES/CBC/PKCS5Padding", EncryptionUtils.getKeyFromKeystore(keyConfig), "SunJCE");
}

When using a CryptoDataFormat in Apache Camel we can simply use the marshal and unmarshal statements within the Camel route. However, since we are creating a message specific Initialization Vector we need to set in as well. For this we can use the helper method we created earlier. Another way would be to use a proccessor.

.setHeader("iv", method("nl.rubix.eos.poc.util.EncryptionUtils", "generateIV"))
.bean(cryptoFormat, "setInitializationVector(${header.iv})")
.marshal(cryptoFormat)

Since the example uses the same instance of the CryptoDataFormat decryption is as simple as:

.unmarshal(cryptoFormat)

In practice it won’t often be feasible to use the same intance of the CryptoDataFormat for both encryption and decrypion. When decrypting the exact same key and Initialization Vector must be used to initialize the CryptoDataFormat instance used for decryption as was used for encryption. Since this is symmetric encryption. The key used for encrypion must be available to the party which performs the decryption. This opposed to assymmetric public/private key signage. This is inherently part of the AES encryption protocol.

The complete code repo can be found here: 

java.security.InvalidKeyException: Illegal key size

For reasons unknown to mankind Oracle decided not to include key sizes of 256 in the standard JRE despite the fact we are living in the 21st century. This results in a Caused by: java.security.InvalidKeyException: Illegal key size exception. To resolve this the so called “Unlimited Strength Juristriction Policy” files must be downloaded and extracted to the JRE.

Since Oracle has a tendency to change download links it won’t be posted here. But searching the internet will provide plenty of examples on how to download and install.

 
Leave a comment

Posted by on 2017-07-10 in JBoss Fuse


Tags: , , , , , ,

Camel Split using a custom Iterator

One of the more commonly used EIP’s in Camel is the Splitter, you can find the documentation here http://camel.apache.org/splitter.html

Usually the splitter is used for tokenizing some message or splitting collections into single messages. But what if you need something more specific? It is good to know that the splitter can either split on Java collection types as well as Iterators. In this blog we are going to create a custom Iterator helper class and method. The business use of this example will be rather questionable, but since we have the opportunity to fully integrate a custom Java method the potential is limitless.

The first thing to do is create a Class and method which return an Iterator.

import javax.inject.Named;
import java.util.Iterator;
import java.util.NoSuchElementException;

/**
 * Created by pim on 6/30/17.
 */
@Named("myCustomIterator")
public class MyCustomIterator {

    public Iterator getIterator(Exchange exchange) {
        final String exampleMsg = exchange.getIn().getBody(String.class);

        if (exampleMsg == null)
            throw new NullPointerException();

        return new Iterator<Character>() {
            private int index = 0;

            public boolean hasNext() {
                return index < exampleMsg.length();
            }

            public Character next() {

                if (!hasNext())
                    throw new NoSuchElementException();
                return exampleMsg.charAt(index++);
            }

            public void remove() {
                throw new UnsupportedOperationException();
            }
        };

    }
}

Once we have our custom Iterator we can incorporate it in our Camel route and more specifically use it in our splitter.

package nl.rubix.eos.camel;

import javax.inject.Inject;
import javax.inject.Named;

import org.apache.camel.Endpoint;
import org.apache.camel.builder.RouteBuilder;
import org.apache.camel.cdi.ContextName;
import org.apache.camel.cdi.Uri;

/**
 * Configures all our Camel routes, components, endpoints and beans
 */
@ContextName("myIteratorSplitter")
public class MyIteratorSplitterRoute extends RouteBuilder {

    @Inject
    @Named("myCustomIterator")
    MyCustomIterator myCustomIterator;

    @Override
    public void configure() throws Exception {
        // you can configure the route rule with Java DSL here

        from("direct:start")
            .log("${body}")
            .split().method("myCustomIterator", "getIterator")
                .log("${body}")
            .end();
    }

}

Now when we run this example with the string “camelisawesome” we see the following log entries:


2017-06-30 14:18:35,830 [main ] INFO DefaultCamelContext - Route: route1 started and consuming from: Endpoint[direct://start]
2017-06-30 14:18:35,830 [main ] INFO DefaultCamelContext - Total 1 routes, of which 1 are started.
2017-06-30 14:18:35,835 [main ] INFO DefaultCamelContext - Apache Camel 2.17.0.redhat-630187 (CamelContext: myIteratorSplitter) started in 0.329 seconds
2017-06-30 14:18:35,849 [main ] INFO Bootstrap - WELD-ENV-002003: Weld SE container camel-context-cdi initialized
2017-06-30 14:18:35,877 [main ] INFO route1 - camelisawesome
2017-06-30 14:18:35,887 [main ] INFO route1 - c
2017-06-30 14:18:35,887 [main ] INFO route1 - a
2017-06-30 14:18:35,888 [main ] INFO route1 - m
2017-06-30 14:18:35,888 [main ] INFO route1 - e
2017-06-30 14:18:35,889 [main ] INFO route1 - l
2017-06-30 14:18:35,889 [main ] INFO route1 - i
2017-06-30 14:18:35,889 [main ] INFO route1 - s
2017-06-30 14:18:35,890 [main ] INFO route1 - a
2017-06-30 14:18:35,890 [main ] INFO route1 - w
2017-06-30 14:18:35,891 [main ] INFO route1 - e
2017-06-30 14:18:35,891 [main ] INFO route1 - s
2017-06-30 14:18:35,891 [main ] INFO route1 - o
2017-06-30 14:18:35,892 [main ] INFO route1 - m
2017-06-30 14:18:35,893 [main ] INFO route1 - e
2017-06-30 14:18:35,898 [main ] INFO CamelContextProducer - Camel CDI is stopping Camel context [myIteratorSplitter]

Using the custom Iterator enables you to create a custom splitter.

 
Leave a comment

Posted by on 2017-06-30 in JBoss Fuse


Tags: , , ,

Playing around with Camel AsyncProcessor

One of the most frequently used constructs in Apache Camel is the Processor (http://camel.apache.org/processor.html), it is used ofter for invoking custom code or performing message translations. The API of the processor is very clear and well documented. As are numerous examples available for using a Camel Processor. The lesser known brother of the Processor is the AsyncProcessor (http://camel.apache.org/asynchronous-processing.html) which is less documented and a less frequently used. Mainly because the AsyncProcessor is mainly targeted for Camel Component developers. However, recently I decided to play around with the Camel AsyncProcessor in a regular Camel setup. In this blog I would like to explain one possible way how to use the AsyncProcessor in a Camel route setup.

Creating a AsyncProcessor

Similar to creating a Processor, creating a AsyncProcessor starts by implementing the AsyncProcessor interface.


public class MyAsyncProcessor implements AsyncProcessor {

But instead of one process method, now two must be implemented:


@Override public boolean process(final Exchange exchange, AsyncCallback asyncCallback) {

@Override public void process(Exchange exchange) {

Next to the regular process method  process method which takes an AsyncCallback must be implemented. The AsyncCallback is invoked whenever the Async execution (which must be started in a seperate thread) is finished. The return boolean indicates whether or not the Camel routing engine must wait or continue routing to other components/processors defined in the Camel route.

Starting the Async job

In order to start a async job the execution must take place in another thread. Java nowadays has multiple ways for concurrent, multi threaded execution. For this example we simply create a Runnable class en start the job via een executor service.


private class AsyncBackgroundProcess implements Runnable {
  private Exchange exchange;
  private AsyncCallback asyncCallback;
  public AsyncBackgroundProcess(Exchange exchange, AsyncCallback asyncCallback){
    this.exchange = exchange;
    this.asyncCallback = asyncCallback;
  }
  @Override public void run() {
    log.info("Async backend process started");
    Boolean getBoolean = slowExecutionInterface.getBoolean("bla");
    exchange.setProperty("Response", getBoolean);
    log.info("Async backend process completed");
    asyncCallback.done(false);
  }
}

There are two things to note here:

  1. The AsyncCallback object from the process method is passed to the Runnable class
  2. When the execution is finished the asyncCallback.done method is called
    1. The false parameter indicates if the execution is handled synchronously (true) or asynchronously (false)

Implementing the AsyncProcessor process method

In the Async Processor process method we kickoff the Runnable class and define the callback method:


@Override public boolean process(final Exchange exchange, AsyncCallback asyncCallback) {
  log.info("Async process started");
  CountDownLatch countDownLatch = new CountDownLatch(1);
  exchange.setProperty("countDownLatch", countDownLatch);
  executorService.submit(new AsyncBackgroundProcess(exchange, new AsyncCallback() {
    @Override public void done(boolean b) {
      log.info("Async backend process fininshed");
      exchange.getContext().getAsyncProcessorAwaitManager().countDown(exchange, exchange.getProperty("countDownLatch", CountDownLatch.class));
    }
  }));
  return true;
}

Using the AsyncProcessor in a Camel route

Using a AsyncProcessor in a Camel route is exactly the same as using a regular Processor in the route:


from(jettyEndpoint)
.log("received")
.process(myAsyncProcessor)

Getting a response

By default the AsyncProcessor triggers a new thread for execution and does not sync back to the main execution thread. So getting a response in a “Fork-Join” manner requires some additional work. In the implementation of the process method above some actions for getting a response are already present:

A CountDownLatch is used for defining the number of threads the main thread can wait for (in our case 1):


CountDownLatch countDownLatch = new CountDownLatch(1);

in order to use the CountDownLatch downstream in our Camel route we save the it to an exchange property:


exchange.setProperty("countDownLatch", countDownLatch);

in the trigger for the Runnable class in a new thread we define the AsyncCallback and its actions when the done method is invoked, to count down the CountDownLatch indicating the background thread is finished:


executorService.submit(new AsyncBackgroundProcess(exchange, new AsyncCallback() {
    @Override public void done(boolean b) {
      log.info("Async backend process fininshed");
      exchange.getContext().getAsyncProcessorAwaitManager().countDown(exchange, exchange.getProperty("countDownLatch", CountDownLatch.class));
    }
  }));

But this does not synchronize our threads just that. In order to get a response in our Camel route or Processor the execution must wait at some point in time for the background thread to complete. For this a helper method was created:


public static void getResponseInBody(Exchange exchange) {
  CountDownLatch countDownLatch = exchange.getProperty("countDownLatch", CountDownLatch.class);
  exchange.getContext().getAsyncProcessorAwaitManager().await(exchange, countDownLatch);
  log.debug("Retrieved async response " + exchange.getProperty("Response", String.class));
  exchange.getIn().setBody(exchange.getProperty("Response", String.class));
}

In this helper method the CountDownLatch is used from the exchange and the Camel AwaitManager is used for the thread synchronization:

CountDownLatch countDownLatch = exchange.getProperty("countDownLatch", CountDownLatch.class);
exchange.getContext().getAsyncProcessorAwaitManager().await(exchange, countDownLatch);

Since this helper method is static, it can be invoked from anywhere in the route or processor, thereby giving the flexibility where in the route the threads must be synchronized.


@Override
public void configure() throws Exception {
from(jettyEndpoint)
.log("received")
.process(myAsyncProcessor)
.log("exited processor")
.bean(MyAsyncProcessor.class, "getResponse(${exchange})")
.log("${body} and Response Property ${property.Response}");
}

The entire AsyncProcessor looks like this:


package nl.rubix.eos.poc.asyncprocessor;
import org.apache.camel.AsyncCallback;
import org.apache.camel.AsyncProcessor;
import org.apache.camel.Exchange;
import org.slf4j.Logger;
import org.slf4j.LoggerFactory;
import javax.inject.Inject;
import javax.inject.Named;
import java.util.HashMap;
import java.util.concurrent.CountDownLatch;
import java.util.concurrent.ExecutorService;
import java.util.concurrent.Executors;
@Named("myAsyncProcessor")
public class MyAsyncProcessor implements AsyncProcessor {
  private final ExecutorService executorService = Executors.newFixedThreadPool(2);
  private static Logger log = LoggerFactory.getLogger(MyAsyncProcessor.class);
  @Inject
  @Named("slowExecutionImpl")
  private SlowExecutionInterface slowExecutionInterface;
  @Override public boolean process(final Exchange exchange, AsyncCallback asyncCallback) {
    log.info("Async process started");
    CountDownLatch countDownLatch = new CountDownLatch(1);
    exchange.setProperty("countDownLatch", countDownLatch);
    executorService.submit(new AsyncBackgroundProcess(exchange, new AsyncCallback() {
      @Override public void done(boolean b) {
        log.info("Async backend process fininshed");
        exchange.getContext().getAsyncProcessorAwaitManager().countDown(exchange, exchange.getProperty("countDownLatch", CountDownLatch.class));
      }
    }));
    return true;
  }
  @Override public void process(Exchange exchange) throws Exception {
    throw new IllegalStateException("Should never be called");
  }
  private class AsyncBackgroundProcess implements Runnable {
    private Exchange exchange;
    private AsyncCallback asyncCallback;
    public AsyncBackgroundProcess(Exchange exchange, AsyncCallback asyncCallback){
      this.exchange = exchange;
      this.asyncCallback = asyncCallback;
    }
    @Override public void run() {
      log.info("Async backend process started");
      Boolean getBoolean = slowExecutionInterface.getBoolean("bla");
      exchange.setProperty("Response", getBoolean);
      log.info("Async backend process completed");
      asyncCallback.done(false);
    }
  }
  public static void getResponseInBody(Exchange exchange) {
    CountDownLatch countDownLatch = exchange.getProperty("countDownLatch", CountDownLatch.class);
    exchange.getContext().getAsyncProcessorAwaitManager().await(exchange, countDownLatch);
    log.debug("Retrieved async response " + exchange.getProperty("Response", String.class));
    exchange.getIn().setBody(exchange.getProperty("Response", String.class));
  }
  public static void getResponseInProperty(Exchange exchange) {
    CountDownLatch countDownLatch = exchange.getProperty("countDownLatch", CountDownLatch.class);
    exchange.getContext().getAsyncProcessorAwaitManager().await(exchange, countDownLatch);
    log.debug("Retrieved async response " + exchange.getProperty("Response", String.class));
  }
  public static Boolean getResponse(Exchange exchange) {
    CountDownLatch countDownLatch = exchange.getProperty("countDownLatch", CountDownLatch.class);
    exchange.getContext().getAsyncProcessorAwaitManager().await(exchange, countDownLatch);
    log.debug("Retrieved async response " + exchange.getProperty("Response", String.class));
    return exchange.getProperty("Response", Boolean.class);
  }
}

The entire Camel route looks like this:


package nl.rubix.api.poc;
import nl.rubix.eos.poc.asyncprocessor.MyAsyncProcessor;
import org.apache.camel.Endpoint;
import org.apache.camel.builder.RouteBuilder;
import org.apache.camel.cdi.ContextName;
import org.apache.camel.cdi.Uri;
import javax.inject.Inject;
import javax.inject.Named;
/**
 * Configures all our Camel routes, components, endpoints and beans
 */
@ContextName("myJettyCamel")
public class MyJettyRoute extends RouteBuilder {
    @Inject @Uri("jetty:http://0.0.0.0:8080/async/test")
    private Endpoint jettyEndpoint;
    @Inject
    @Named("myAsyncProcessor")
    MyAsyncProcessor myAsyncProcessor;
    @Override
    public void configure() throws Exception {
        from(jettyEndpoint)
            .log("received")
            .process(myAsyncProcessor)
            .log("exited processor")
            .bean(MyAsyncProcessor.class, "getResponse(${exchange})")
            .log("${body} and Response Property ${property.Response}");
    }
}

To simulate slow execution a simple interface and corresponding implementation where used:


package nl.rubix.eos.poc.asyncprocessor;
public interface SlowExecutionInterface {
  Boolean getBoolean(String input);
}

package nl.rubix.eos.poc.asyncprocessor;
import javax.inject.Named;
@Named("slowExecutionImpl")
public class SlowExecutionInterfaceMock implements SlowExecutionInterface {
  @Override public Boolean getBoolean(String input) {
    try {
      Thread.sleep(5000);
    } catch (InterruptedException e) {
      e.printStackTrace();
    }
    return true;
  }
}

 
Leave a comment

Posted by on 2017-05-26 in JBoss Fuse


Tags: , , , , ,

Apache Camel – Dynamic redelivery based on MEP

The exception handling and retry mechanisms in Apache Camel are quite extensive. In this blogpost we are going to take a look at customizing the retry based on a predicate implementation of our own thereby enabling really fine grained retry logic.
In our example we are going to look at the MEP of the exchange, whenever it is inOnly we are going to retry since no synchronous subscriber is waiting for the response. Conversely, when the MEP of the exchange is inOut we are not going to retry and immediately send back an error. Think fail fast en stuff.
Like mentioned above we can enable this by implementing the Predicate interface from Apache Camel.
The entire class looks like this:
package nl.schiphol.api.integration.redelivery;

import org.apache.camel.Exchange;
import org.apache.camel.ExchangePattern;
import org.apache.camel.Predicate;
import org.apache.camel.component.properties.PropertiesComponent;

import javax.inject.Inject;
import javax.inject.Named;

@Named
public class InvokeEndpointsRedeliveryPolicy implements Predicate{

 @Inject
 PropertiesComponent properties;

 private Integer MAX_REDELIVERIES;

 /**
 * Returns a Boolean whether or not a redelivery must be executed.
 * Whether or not retries should be executed are dependend on two criteria: the MEP of the exchange and the max retries
 * If the MEP is inOnly a response is not required immediately and retries can commense up until the max retries
 * @implements org.apache.camel.Predicate
 * @param exchange The Camel Exchange is used as a parameter, this is dictated by the Predicate interface
 * @return Boolean if a redelivery should be executed.
 */
 @Override
 public boolean matches(Exchange exchange) {
   setMaxRedeliveries();
   //no redelivery is the default
   Boolean shouldRedeliver = false;

   ExchangePattern exchangePattern = exchange.getPattern();
   Boolean isInOut = exchangePattern.isOutCapable();
   Integer redeliveryCounter = getRedeliveryCounter(exchange.getIn().getHeader(Exchange.REDELIVERY_COUNTER, Integer.class));

   if(!isInOut && redeliveryCounter < MAX_REDELIVERIES){
    shouldRedeliver = true;
   }

   return shouldRedeliver;
 }

 private void setMaxRedeliveries() {
   try {
   String retryAmountProperty = properties.parseUri("{{health-api.invokeEndpoints.retryAmount}}");
   MAX_REDELIVERIES = new Integer(retryAmountProperty);
   } catch (Exception e) {
     MAX_REDELIVERIES = 3;
   }
 }

 private Integer getRedeliveryCounter(Integer redeliveryCounterHeader){
   Integer redeliveryCounter = redeliveryCounterHeader;

   if(redeliveryCounter == null){
    redeliveryCounter = 0;
   }

   return redeliveryCounter;
 }

 private Boolean getRetryProperty(Boolean retryProperty) {
   Boolean retry = retryProperty;

   if(retry == null){
     retry = false;
   }

   return retry;
 }
}
In order to use our predicate in our Camel Route for determining the retry use the ‘retryWhile’ statement:
@Override
private void configure() {
 from("direct:start").routeId("my-dynamic-retry-route")
 .onException(Exception.class).redeliveryDelay(1500).retryWhile(redeliveryPolicy).continued(true).end()
 ...
 
Leave a comment

Posted by on 2017-04-06 in JBoss Fuse


Tags: , , , , , , ,

Creating an insecure http4 component in Apache Camel

Recently I was struggling with invoking HTTP endpoints using self-signed certificates using the Apache Camel http4 component. The crux of the problem was the fact these certificates change rapidly and are maintained by other teams. Since this was an internal call only, routed through a VPN I decided  to approach the problem by disabling the certificate check instead of adding the self-signed certificates to a keystore which I normally do in these situations.  So keep in mind, doing this will undermine the security of the TLS connection. And obviously only works with one-way TLS connections.
It was with disabling the certificate checks in the http4 component that I was struggling so I decided to share what I did with you when I eventually found out the solution.
A small note, the example provided in this blogpost is using Apache Camel in combination of CDI. But the solution will work equally well with frameworks like Spring or OSGi Blueprint.
First I created my own instance of the HttpComponent seperating it from the standard http4 component.
public class CustomHttp4Component {

    @Produces
    @Named("insecurehttps4")
    public HttpComponent createCustomHttp4Component() {
       HttpComponent httpComponent = new HttpComponent();

In this custom http4 component we have to do two things. First is to change the Certificate HostnameVerifier so the hostname on the self-signed certificate is not causing an exception.

This is accomplished by setting an instance of the org.apache.http.conn.ssl.AllowAllHostnameVerifier to the http4 component using the setter method setX509HostNameVerifier. Note, the version of Apache Camel I am using (2.17) still requires the now deprecated: org.apache.http.conn.ssl.AllowAllHostnameVerifier newer versions of Apache Camel are using the org.apache.http.conn.ssl.NoopHostnameVerifier.

This unfortunately was not enough to invoke the endpoint, an empty X509TrustManager was also required. It needs to be empty for our purpose to basically omit the certificate validation checks. For this we needed to extend the X509ExtendedTrustManager and override the methods implementing them as “empty”. To set our empty thrustmanager on the http4 component we need to wrap it in a TrustManagersParameters class and wrap this into an SSLParameters class before we can add it to the http4 component.


TrustManagersParameters trustManagersParameters = new TrustManagersParameters();
X509ExtendedTrustManager extendedTrustManager = new InsecureX509TrustManager();
trustManagersParameters.setTrustManager(extendedTrustManager);

SSLContextParameters sslContextParameters = new SSLContextParameters();
sslContextParameters.setTrustManagers(trustManagersParameters);
httpComponent.setSslContextParameters(sslContextParameters);

After this we can use our new insecure http4 component in our Camel routes just as the normal http4 component.
The entire custom http4 component:

package nl.schiphol.api.integration.components;

import org.apache.camel.component.http4.HttpComponent;
import org.apache.camel.util.jsse.SSLContextParameters;
import org.apache.camel.util.jsse.TrustManagersParameters;
import org.apache.http.conn.ssl.AllowAllHostnameVerifier;

import javax.enterprise.inject.Produces;
import javax.inject.Named;
import javax.net.ssl.SSLEngine;
import javax.net.ssl.X509ExtendedTrustManager;
import java.net.Socket;
import java.security.cert.CertificateException;
import java.security.cert.X509Certificate;

public class CustomHttp4Component {

    @Produces
    @Named("insecurehttps4")
    public HttpComponent createCustomHttp4Component() {
        HttpComponent httpComponent = new HttpComponent();

        httpComponent.setX509HostnameVerifier(AllowAllHostnameVerifier.INSTANCE);


        TrustManagersParameters trustManagersParameters = new TrustManagersParameters();
        X509ExtendedTrustManager extendedTrustManager = new InsecureX509TrustManager();
        trustManagersParameters.setTrustManager(extendedTrustManager);

        SSLContextParameters sslContextParameters = new SSLContextParameters();
        sslContextParameters.setTrustManagers(trustManagersParameters);
        httpComponent.setSslContextParameters(sslContextParameters);

        return httpComponent;
    }

    private static class InsecureX509TrustManager extends X509ExtendedTrustManager {
        @Override
        public void checkClientTrusted(X509Certificate[] x509Certificates, String s, Socket socket) throws CertificateException {

        }

        @Override
        public void checkServerTrusted(X509Certificate[] x509Certificates, String s, Socket socket) throws CertificateException {

        }

        @Override
        public void checkClientTrusted(X509Certificate[] x509Certificates, String s, SSLEngine sslEngine) throws CertificateException {

        }

        @Override
        public void checkServerTrusted(X509Certificate[] x509Certificates, String s, SSLEngine sslEngine) throws CertificateException {

        }

        @Override
        public void checkClientTrusted(X509Certificate[] x509Certificates, String s) throws CertificateException {

        }

        @Override
        public void checkServerTrusted(X509Certificate[] x509Certificates, String s) throws CertificateException {

        }

        @Override
        public X509Certificate[] getAcceptedIssuers() {
            return new X509Certificate[0];
        }
    }
}

 
2 Comments

Posted by on 2017-02-17 in Geen categorie


Tags: , , ,

Camel CDI app in Fabric8 via Maven

Recently I spent some time experimenting with the Fabric8 microservices framework. And while it is way too comprehensive to cover in a single blog post I wanted to focus on deploying an App/Microservice to a Fabric8 cluster.

For this post I am using a local fabric8 install using minikube, for more information see: http://fabric8.io/guide/getStarted/gofabric8.html

For details on to setup your fabric8 environment using minikube you can read the excellent blog post of my collegue Dirk Janssen here.

Also since I am doing quite a lot of work recently with Apache Camel using the CDI framework I the decision to deploy a Camel CDI based microservice was quickly made 🙂

So in this blog I will outline how to create a basic Camel/CDI based microservice using maven and deploy in on a kubernetes cluster using a fabric8 CD pipeline.

Generating the microservice

I used a maven archetype to quickly bootstrap the microservice. Now I used the Eclipse IDE to generate the project, but you can off course use the Maven CLI as well.

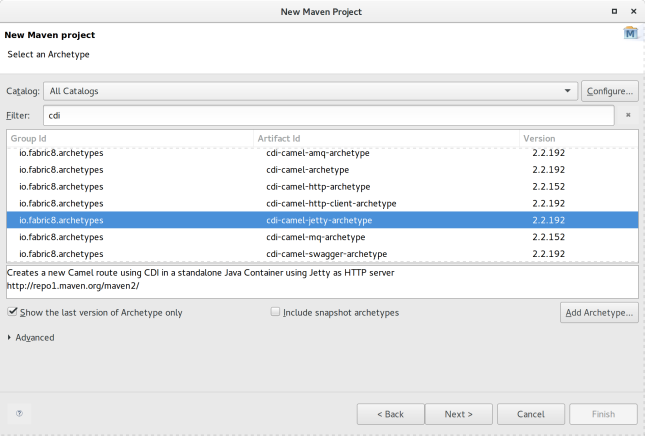
archetype-selector

Fabric8 provides lots of different archetypes and quickstarts out of the box for various types of programming languages and especially for Java various frameworks. Here I am going with the cdi-camel-jetty-archetype. This archetype generates a Camel route exposed with a Jetty endpoint wired together using CDI.


Building and running locally

As with any Maven based application one of the first things to do after the project is created is executing:

$ mvn clean install

However initially the result was:


~/workspace/cdi-jetty-demo$ mvn install
[INFO] Scanning for projects...
[INFO]
[INFO] ------------------------------------------------------------------------
[INFO] Building Fabric8 :: Quickstarts :: CDI :: Camel with Jetty as HTTP server 0.0.1-SNAPSHOT
[INFO] ------------------------------------------------------------------------
[INFO]
[INFO] --- maven-resources-plugin:2.6:resources (default-resources) @ cdi-jetty-demo ---
[INFO] Using 'UTF-8' encoding to copy filtered resources.
[INFO] Copying 2 resources
[INFO]
[INFO] --- fabric8-maven-plugin:3.2.8:resource (default) @ cdi-jetty-demo ---
[INFO] F8: Running in Kubernetes mode
[INFO] F8: Using resource templates from /home/pim/workspace/cdi-jetty-demo/src/main/fabric8
2016-12-28 11:54:14 INFO  Version:30 - HV000001: Hibernate Validator 5.2.4.Final
[WARNING] F8: fmp-git: No .git/config file could be found so cannot annotate kubernetes resources with git commit SHA and branch
[WARNING] F8: fmp-git: No .git/config file could be found so cannot annotate kubernetes resources with git commit SHA and branch
[WARNING] F8: fmp-git: No .git/config file could be found so cannot annotate kubernetes resources with git commit SHA and branch
[WARNING] F8: fmp-git: No .git/config file could be found so cannot annotate kubernetes resources with git commit SHA and branch
[WARNING] F8: fmp-git: No .git/config file could be found so cannot annotate kubernetes resources with git commit SHA and branch
[WARNING] F8: fmp-git: No .git/config file could be found so cannot annotate kubernetes resources with git commit SHA and branch
[INFO] ------------------------------------------------------------------------
[INFO] BUILD FAILURE
[INFO] ------------------------------------------------------------------------
[INFO] Total time: 3.612 s
[INFO] Finished at: 2016-12-28T11:54:14+01:00
[INFO] Final Memory: 37M/533M
[INFO] ------------------------------------------------------------------------
[ERROR] Failed to execute goal io.fabric8:fabric8-maven-plugin:3.2.8:resource (default) on project cdi-jetty-demo: Execution default of goal io.fabric8:fabric8-maven-plugin:3.2.8:resource failed: Container cdi-jetty-demo has no Docker image configured. Please check your Docker image configuration (including the generators which are supposed to run) -> [Help 1]
[ERROR]
[ERROR] To see the full stack trace of the errors, re-run Maven with the -e switch.
[ERROR] Re-run Maven using the -X switch to enable full debug logging.
[ERROR]
[ERROR] For more information about the errors and possible solutions, please read the following articles:
[ERROR] [Help 1] http://cwiki.apache.org/confluence/display/MAVEN/PluginExecutionException

Since the archetype did not have a template in cdi-jetty-demo/src/main/fabric8 and was still looking for it there it was throwing an error. After some looking around I managed to solve the issue by using a different version of the fabric8-maven-plugin.

Specifically:

<fabric8.maven.plugin.version>3.1.49</fabric8.maven.plugin.version>

Now running the clean install was executing successfully.


~/workspace/cdi-jetty-demo$ mvn clean install
[INFO] Scanning for projects...
[INFO]
[INFO] ------------------------------------------------------------------------
[INFO] Building Fabric8 :: Quickstarts :: CDI :: Camel with Jetty as HTTP server 0.0.1-SNAPSHOT
[INFO] ------------------------------------------------------------------------
[INFO]
[INFO] --- maven-clean-plugin:2.5:clean (default-clean) @ cdi-jetty-demo ---
[INFO] Deleting /home/pim/workspace/cdi-jetty-demo/target
[INFO]
[INFO] --- maven-resources-plugin:2.6:resources (default-resources) @ cdi-jetty-demo ---
[INFO] Using 'UTF-8' encoding to copy filtered resources.
[INFO] Copying 2 resources
[INFO]
[INFO] --- fabric8-maven-plugin:3.1.49:resource (default) @ cdi-jetty-demo ---
[INFO] F8> Running in Kubernetes mode
[INFO] F8> Running generator java-exec
[INFO] F8> Using resource templates from /home/pim/workspace/cdi-jetty-demo/src/main/fabric8
[WARNING] F8> No .git/config file could be found so cannot annotate kubernetes resources with git commit SHA and branch
[WARNING] F8> No .git/config file could be found so cannot annotate kubernetes resources with git commit SHA and branch
[INFO]
[INFO] --- maven-compiler-plugin:3.3:compile (default-compile) @ cdi-jetty-demo ---
[INFO] Changes detected - recompiling the module!
[INFO] Compiling 1 source file to /home/pim/workspace/cdi-jetty-demo/target/classes
[INFO]
[INFO] --- maven-resources-plugin:2.6:testResources (default-testResources) @ cdi-jetty-demo ---
[INFO] Using 'UTF-8' encoding to copy filtered resources.
[INFO] Copying 1 resource
[INFO]
[INFO] --- maven-compiler-plugin:3.3:testCompile (default-testCompile) @ cdi-jetty-demo ---
[INFO] Changes detected - recompiling the module!
[INFO] Compiling 1 source file to /home/pim/workspace/cdi-jetty-demo/target/test-classes
[INFO]
[INFO] --- maven-surefire-plugin:2.18.1:test (default-test) @ cdi-jetty-demo ---
[INFO]
[INFO] --- maven-jar-plugin:2.4:jar (default-jar) @ cdi-jetty-demo ---
[INFO] Building jar: /home/pim/workspace/cdi-jetty-demo/target/cdi-jetty-demo.jar
[INFO]
[INFO] >>> fabric8-maven-plugin:3.1.49:build (default) > initialize @ cdi-jetty-demo >>>
[INFO]
[INFO] <<< fabric8-maven-plugin:3.1.49:build (default) < initialize @ cdi-jetty-demo <<<
[INFO]
[INFO] --- fabric8-maven-plugin:3.1.49:build (default) @ cdi-jetty-demo ---
[INFO] F8> Running in Kubernetes mode
[INFO] F8> Running generator java-exec
[INFO] F8> Environment variable from gofabric8 : DOCKER_HOST=tcp://192.168.42.40:2376
[INFO] F8> Environment variable from gofabric8 : DOCKER_CERT_PATH=/home/pim/.minikube/certs
[INFO] F8> Pulling from fabric8/java-alpine-openjdk8-jdk
117f30b7ae3d: Already exists
f1011be98339: Pull complete
dae2abad9134: Pull complete
d1ea5cd75444: Pull complete
cec1e2f1c0f2: Pull complete
a9ec98a3bcba: Pull complete
38bbb9125eaa: Pull complete
66f50c07037b: Pull complete
868f8ddb8412: Pull complete
[INFO] F8> Digest: sha256:572ec2fdc9ac33bb1a8a5ee96c17eae9b7797666ed038c08b5c3583f98c1277f
[INFO] F8> Status: Downloaded newer image for fabric8/java-alpine-openjdk8-jdk:1.1.11
[INFO] F8> Pulled fabric8/java-alpine-openjdk8-jdk:1.1.11 in 47 seconds
Downloading: https://repo.fusesource.com/nexus/content/groups/public/org/apache/httpcomponents/httpclient/4.3.3/httpclient-4.3.3.pom
Downloading: https://maven.repository.redhat.com/ga/org/apache/httpcomponents/httpclient/4.3.3/httpclient-4.3.3.pom
Downloading: https://repo.maven.apache.org/maven2/org/apache/httpcomponents/httpclient/4.3.3/httpclient-4.3.3.pom
Downloaded: https://repo.maven.apache.org/maven2/org/apache/httpcomponents/httpclient/4.3.3/httpclient-4.3.3.pom (6 KB at 30.9 KB/sec)
Downloading: https://repo.fusesource.com/nexus/content/groups/public/org/apache/httpcomponents/httpmime/4.3.3/httpmime-4.3.3.pom
Downloading: https://maven.repository.redhat.com/ga/org/apache/httpcomponents/httpmime/4.3.3/httpmime-4.3.3.pom
Downloading: https://repo.maven.apache.org/maven2/org/apache/httpcomponents/httpmime/4.3.3/httpmime-4.3.3.pom
Downloaded: https://repo.maven.apache.org/maven2/org/apache/httpcomponents/httpmime/4.3.3/httpmime-4.3.3.pom (5 KB at 81.7 KB/sec)
Downloading: https://repo.fusesource.com/nexus/content/groups/public/org/apache/httpcomponents/httpclient-cache/4.3.3/httpclient-cache-4.3.3.pom
Downloading: https://maven.repository.redhat.com/ga/org/apache/httpcomponents/httpclient-cache/4.3.3/httpclient-cache-4.3.3.pom
Downloading: https://repo.maven.apache.org/maven2/org/apache/httpcomponents/httpclient-cache/4.3.3/httpclient-cache-4.3.3.pom
Downloaded: https://repo.maven.apache.org/maven2/org/apache/httpcomponents/httpclient-cache/4.3.3/httpclient-cache-4.3.3.pom (7 KB at 102.3 KB/sec)
Downloading: https://repo.fusesource.com/nexus/content/groups/public/org/apache/httpcomponents/fluent-hc/4.3.3/fluent-hc-4.3.3.pom
Downloading: https://maven.repository.redhat.com/ga/org/apache/httpcomponents/fluent-hc/4.3.3/fluent-hc-4.3.3.pom
Downloading: https://repo.maven.apache.org/maven2/org/apache/httpcomponents/fluent-hc/4.3.3/fluent-hc-4.3.3.pom
Downloaded: https://repo.maven.apache.org/maven2/org/apache/httpcomponents/fluent-hc/4.3.3/fluent-hc-4.3.3.pom (5 KB at 80.4 KB/sec)
[INFO] Copying files to /home/pim/workspace/cdi-jetty-demo/target/docker/eos/cdi-jetty-demo/snapshot-161228-115614-0167/build/maven
[INFO] Building tar: /home/pim/workspace/cdi-jetty-demo/target/docker/eos/cdi-jetty-demo/snapshot-161228-115614-0167/tmp/docker-build.tar
[INFO] F8> docker-build.tar: Created [eos/cdi-jetty-demo:snapshot-161228-115614-0167] "java-exec" in 8 seconds
[INFO] F8> [eos/cdi-jetty-demo:snapshot-161228-115614-0167] "java-exec": Built image sha256:94fad
[INFO] F8> [eos/cdi-jetty-demo:snapshot-161228-115614-0167] "java-exec": Tag with latest
[INFO]
[INFO] --- maven-install-plugin:2.4:install (default-install) @ cdi-jetty-demo ---
[INFO] Installing /home/pim/workspace/cdi-jetty-demo/target/cdi-jetty-demo.jar to /home/pim/.m2/repository/nl/rubix/eos/cdi-jetty-demo/0.0.1-SNAPSHOT/cdi-jetty-demo-0.0.1-SNAPSHOT.jar
[INFO] Installing /home/pim/workspace/cdi-jetty-demo/pom.xml to /home/pim/.m2/repository/nl/rubix/eos/cdi-jetty-demo/0.0.1-SNAPSHOT/cdi-jetty-demo-0.0.1-SNAPSHOT.pom
[INFO] Installing /home/pim/workspace/cdi-jetty-demo/target/classes/META-INF/fabric8/openshift.yml to /home/pim/.m2/repository/nl/rubix/eos/cdi-jetty-demo/0.0.1-SNAPSHOT/cdi-jetty-demo-0.0.1-SNAPSHOT-openshift.yml
[INFO] Installing /home/pim/workspace/cdi-jetty-demo/target/classes/META-INF/fabric8/openshift.json to /home/pim/.m2/repository/nl/rubix/eos/cdi-jetty-demo/0.0.1-SNAPSHOT/cdi-jetty-demo-0.0.1-SNAPSHOT-openshift.json
[INFO] Installing /home/pim/workspace/cdi-jetty-demo/target/classes/META-INF/fabric8/kubernetes.yml to /home/pim/.m2/repository/nl/rubix/eos/cdi-jetty-demo/0.0.1-SNAPSHOT/cdi-jetty-demo-0.0.1-SNAPSHOT-kubernetes.yml
[INFO] Installing /home/pim/workspace/cdi-jetty-demo/target/classes/META-INF/fabric8/kubernetes.json to /home/pim/.m2/repository/nl/rubix/eos/cdi-jetty-demo/0.0.1-SNAPSHOT/cdi-jetty-demo-0.0.1-SNAPSHOT-kubernetes.json
[INFO] ------------------------------------------------------------------------
[INFO] BUILD SUCCESS
[INFO] ------------------------------------------------------------------------
[INFO] Total time: 01:03 min
[INFO] Finished at: 2016-12-28T11:57:15+01:00
[INFO] Final Memory: 61M/873M
[INFO] ------------------------------------------------------------------------

After the project built successfully I wanted to run it in my Kubernetes cluster.

Thankfully the guys at fabric8 also took this into consideration, so by executing the maven goal fabric8:run you app will be booted into a Docker container and louched as a Pod in the Kubernetes cluster just for some local testing.


~/workspace/cdi-jetty-demo$ mvn fabric8:run
[INFO] Scanning for projects...
[INFO]
[INFO] ------------------------------------------------------------------------
[INFO] Building Fabric8 :: Quickstarts :: CDI :: Camel with Jetty as HTTP server 0.0.1-SNAPSHOT
[INFO] ------------------------------------------------------------------------
[INFO]
[INFO] >>> fabric8-maven-plugin:3.1.49:run (default-cli) > install @ cdi-jetty-demo >>>
[INFO]
[INFO] --- maven-resources-plugin:2.6:resources (default-resources) @ cdi-jetty-demo ---
[INFO] Using 'UTF-8' encoding to copy filtered resources.
[INFO] Copying 2 resources
[INFO]
[INFO] --- fabric8-maven-plugin:3.1.49:resource (default) @ cdi-jetty-demo ---
[INFO] F8> Running in Kubernetes mode
[INFO] F8> Running generator java-exec
[INFO] F8> Using resource templates from /home/pim/workspace/cdi-jetty-demo/src/main/fabric8
[WARNING] F8> No .git/config file could be found so cannot annotate kubernetes resources with git commit SHA and branch
[WARNING] F8> No .git/config file could be found so cannot annotate kubernetes resources with git commit SHA and branch
[INFO]
[INFO] --- maven-compiler-plugin:3.3:compile (default-compile) @ cdi-jetty-demo ---
[INFO] Nothing to compile - all classes are up to date
[INFO]
[INFO] --- maven-resources-plugin:2.6:testResources (default-testResources) @ cdi-jetty-demo ---
[INFO] Using 'UTF-8' encoding to copy filtered resources.
[INFO] Copying 1 resource
[INFO]
[INFO] --- maven-compiler-plugin:3.3:testCompile (default-testCompile) @ cdi-jetty-demo ---
[INFO] Nothing to compile - all classes are up to date
[INFO]
[INFO] --- maven-surefire-plugin:2.18.1:test (default-test) @ cdi-jetty-demo ---
[INFO]
[INFO] --- maven-jar-plugin:2.4:jar (default-jar) @ cdi-jetty-demo ---
[INFO] Building jar: /home/pim/workspace/cdi-jetty-demo/target/cdi-jetty-demo.jar
[INFO]
[INFO] >>> fabric8-maven-plugin:3.1.49:build (default) > initialize @ cdi-jetty-demo >>>
[INFO]
[INFO] <<< fabric8-maven-plugin:3.1.49:build (default) < initialize @ cdi-jetty-demo <<<
[INFO]
[INFO] --- fabric8-maven-plugin:3.1.49:build (default) @ cdi-jetty-demo ---
[INFO] F8> Running in Kubernetes mode
[INFO] F8> Running generator java-exec
[INFO] F8> Environment variable from gofabric8 : DOCKER_HOST=tcp://192.168.42.40:2376
[INFO] F8> Environment variable from gofabric8 : DOCKER_CERT_PATH=/home/pim/.minikube/certs
[INFO] Copying files to /home/pim/workspace/cdi-jetty-demo/target/docker/eos/cdi-jetty-demo/snapshot-161228-122841-0217/build/maven
[INFO] Building tar: /home/pim/workspace/cdi-jetty-demo/target/docker/eos/cdi-jetty-demo/snapshot-161228-122841-0217/tmp/docker-build.tar
[INFO] F8> docker-build.tar: Created [eos/cdi-jetty-demo:snapshot-161228-122841-0217] "java-exec" in 5 seconds
[INFO] F8> [eos/cdi-jetty-demo:snapshot-161228-122841-0217] "java-exec": Built image sha256:bccd3
[INFO] F8> [eos/cdi-jetty-demo:snapshot-161228-122841-0217] "java-exec": Tag with latest
[INFO]
[INFO] --- maven-install-plugin:2.4:install (default-install) @ cdi-jetty-demo ---
[INFO] Installing /home/pim/workspace/cdi-jetty-demo/target/cdi-jetty-demo.jar to /home/pim/.m2/repository/nl/rubix/eos/cdi-jetty-demo/0.0.1-SNAPSHOT/cdi-jetty-demo-0.0.1-SNAPSHOT.jar
[INFO] Installing /home/pim/workspace/cdi-jetty-demo/pom.xml to /home/pim/.m2/repository/nl/rubix/eos/cdi-jetty-demo/0.0.1-SNAPSHOT/cdi-jetty-demo-0.0.1-SNAPSHOT.pom
[INFO] Installing /home/pim/workspace/cdi-jetty-demo/target/classes/META-INF/fabric8/openshift.yml to /home/pim/.m2/repository/nl/rubix/eos/cdi-jetty-demo/0.0.1-SNAPSHOT/cdi-jetty-demo-0.0.1-SNAPSHOT-openshift.yml
[INFO] Installing /home/pim/workspace/cdi-jetty-demo/target/classes/META-INF/fabric8/openshift.json to /home/pim/.m2/repository/nl/rubix/eos/cdi-jetty-demo/0.0.1-SNAPSHOT/cdi-jetty-demo-0.0.1-SNAPSHOT-openshift.json
[INFO] Installing /home/pim/workspace/cdi-jetty-demo/target/classes/META-INF/fabric8/kubernetes.yml to /home/pim/.m2/repository/nl/rubix/eos/cdi-jetty-demo/0.0.1-SNAPSHOT/cdi-jetty-demo-0.0.1-SNAPSHOT-kubernetes.yml
[INFO] Installing /home/pim/workspace/cdi-jetty-demo/target/classes/META-INF/fabric8/kubernetes.json to /home/pim/.m2/repository/nl/rubix/eos/cdi-jetty-demo/0.0.1-SNAPSHOT/cdi-jetty-demo-0.0.1-SNAPSHOT-kubernetes.json
[INFO]
[INFO] <<< fabric8-maven-plugin:3.1.49:run (default-cli) < install @ cdi-jetty-demo <<<
[INFO]
[INFO] --- fabric8-maven-plugin:3.1.49:run (default-cli) @ cdi-jetty-demo ---
[INFO] F8> Using Kubernetes at https://192.168.42.40:8443/ in namespace default with manifest /home/pim/workspace/cdi-jetty-demo/target/classes/META-INF/fabric8/kubernetes.yml
[INFO] Using namespace: default
[INFO] Creating a Service from kubernetes.yml namespace default name cdi-jetty-demo
[INFO] Created Service: target/fabric8/applyJson/default/service-cdi-jetty-demo.json
[INFO] Creating a Deployment from kubernetes.yml namespace default name cdi-jetty-demo
[INFO] Created Deployment: target/fabric8/applyJson/default/deployment-cdi-jetty-demo.json
[INFO] hint> Use the command `kubectl get pods -w` to watch your pods start up
[INFO] F8> Watching pods with selector LabelSelector(matchExpressions=[], matchLabels={project=cdi-jetty-demo, provider=fabric8, group=nl.rubix.eos}, additionalProperties={}) waiting for a running pod...
[INFO] New Pod> cdi-jetty-demo-1244207563-s9xn2 status: Pending
[INFO] New Pod> cdi-jetty-demo-1244207563-s9xn2 status: Running
[INFO] New Pod> Tailing log of pod: cdi-jetty-demo-1244207563-s9xn2
[INFO] New Pod> Press Ctrl-C to scale down the app and stop tailing the log
[INFO] New Pod>
[INFO] Pod> exec java -javaagent:/opt/agent-bond/agent-bond.jar=jolokia{{host=0.0.0.0}},jmx_exporter{{9779:/opt/agent-bond/jmx_exporter_config.yml}} -cp .:/app/* org.apache.camel.cdi.Main
[INFO] Pod> I> No access restrictor found, access to any MBean is allowed
[INFO] Pod> Jolokia: Agent started with URL http://172.17.0.6:8778/jolokia/
[INFO] Pod> 2016-12-28 11:28:52.953:INFO:ifasjipjsoejs.Server:jetty-8.y.z-SNAPSHOT
[INFO] Pod> 2016-12-28 11:28:53.001:INFO:ifasjipjsoejs.AbstractConnector:Started SelectChannelConnector@0.0.0.0:9779
[INFO] Pod> 2016-12-28 11:28:53,142 [main           ] INFO  Version                        - WELD-000900: 2.3.3 (Final)
[INFO] Pod> 2016-12-28 11:28:53,412 [main           ] INFO  Bootstrap                      - WELD-000101: Transactional services not available. Injection of @Inject UserTransaction not available. Transactional observers will be invoked synchronously.
[INFO] Pod> 2016-12-28 11:28:53,605 [main           ] INFO  Event                          - WELD-000411: Observer method [BackedAnnotatedMethod] private org.apache.camel.cdi.CdiCamelExtension.processAnnotatedType(@Observes ProcessAnnotatedType<?>) receives events for all annotated types. Consider restricting events using @WithAnnotations or a generic type with bounds.
[INFO] Pod> 2016-12-28 11:28:54,809 [main           ] INFO  DefaultTypeConverter           - Loaded 196 type converters
[INFO] Pod> 2016-12-28 11:28:54,861 [main           ] INFO  CdiCamelExtension              - Camel CDI is starting Camel context [myJettyCamel]
[INFO] Pod> 2016-12-28 11:28:54,863 [main           ] INFO  DefaultCamelContext            - Apache Camel 2.18.1 (CamelContext: myJettyCamel) is starting
[INFO] Pod> 2016-12-28 11:28:54,864 [main           ] INFO  ManagedManagementStrategy      - JMX is enabled
[INFO] Pod> 2016-12-28 11:28:55,030 [main           ] INFO  DefaultRuntimeEndpointRegistry - Runtime endpoint registry is in extended mode gathering usage statistics of all incoming and outgoing endpoints (cache limit: 1000)
[INFO] Pod> 2016-12-28 11:28:55,081 [main           ] INFO  DefaultCamelContext            - StreamCaching is not in use. If using streams then its recommended to enable stream caching. See more details at http://camel.apache.org/stream-caching.html
[INFO] Pod> 2016-12-28 11:28:55,120 [main           ] INFO  log                            - Logging initialized @2850ms
[INFO] Pod> 2016-12-28 11:28:55,170 [main           ] INFO  Server                         - jetty-9.2.19.v20160908
[INFO] Pod> 2016-12-28 11:28:55,199 [main           ] INFO  ContextHandler                 - Started o.e.j.s.ServletContextHandler@28cb9120{/,null,AVAILABLE}
[INFO] Pod> 2016-12-28 11:28:55,206 [main           ] INFO  ServerConnector                - Started ServerConnector@2da1c45f{HTTP/1.1}{0.0.0.0:8080}
[INFO] Pod> 2016-12-28 11:28:55,206 [main           ] INFO  Server                         - Started @2936ms
[INFO] Pod> 2016-12-28 11:28:55,225 [main           ] INFO  DefaultCamelContext            - Route: route1 started and consuming from: jetty:http://0.0.0.0:8080/camel/hello
[INFO] Pod> 2016-12-28 11:28:55,226 [main           ] INFO  DefaultCamelContext            - Total 1 routes, of which 1 are started.
[INFO] Pod> 2016-12-28 11:28:55,228 [main           ] INFO  DefaultCamelContext            - Apache Camel 2.18.1 (CamelContext: myJettyCamel) started in 0.363 seconds
[INFO] Pod> 2016-12-28 11:28:55,238 [main           ] INFO  Bootstrap                      - WELD-ENV-002003: Weld SE container STATIC_INSTANCE initialized
^C[INFO] F8> Stopping the app:
[INFO] F8> Scaling Deployment default/cdi-jetty-demo to replicas: 0
[INFO] Pod> 2016-12-28 11:29:52,307 [Thread-12      ] INFO  MainSupport$HangupInterceptor  - Received hang up - stopping the main instance.
[INFO] Pod> 2016-12-28 11:29:52,313 [Thread-12      ] INFO  CamelContextProducer           - Camel CDI is stopping Camel context [myJettyCamel]
[INFO] Pod> 2016-12-28 11:29:52,313 [Thread-12      ] INFO  DefaultCamelContext            - Apache Camel 2.18.1 (CamelContext: myJettyCamel) is shutting down
[INFO] Pod> 2016-12-28 11:29:52,314 [Thread-12      ] INFO  DefaultShutdownStrategy        - Starting to graceful shutdown 1 routes (timeout 300 seconds)
[INFO] Pod> 2016-12-28 11:29:52,347 [ - ShutdownTask] INFO  ServerConnector                - Stopped ServerConnector@2da1c45f{HTTP/1.1}{0.0.0.0:8080}
[INFO] Pod> 2016-12-28 11:29:52,350 [ - ShutdownTask] INFO  ContextHandler                 - Stopped o.e.j.s.ServletContextHandler@28cb9120{/,null,UNAVAILABLE}
[INFO] Pod> 2016-12-28 11:29:52,353 [ - ShutdownTask] INFO  DefaultShutdownStrategy        - Route: route1 shutdown complete, was consuming from: jetty:http://0.0.0.0:8080/camel/hello

There are two things to note:

thirst the App is not by default exposed outside of the Kubernetes cluster. I will explain how to do this later on in this blog after we have completely deployed the app in our cluster.

Second, the fabric8:run goal starts the container and tails the log in the foreground, whenever you close the app by hitting ctrl+c your app is undeployed in the cluster automatically. To tweak this behavior check: https://maven.fabric8.io

Deploying our microservice in the fabric8 cluster

After running and testing our microservice locally we are ready to fully deploy our microservice in our cluster. For this we also start with a Maven command, mvn fabric8:import will import the application (templates) in the Kubernetes cluster and push the sources of the microservice to the fabric8 git repository based on Gogs.


~/workspace/cdi-jetty-demo$ mvn fabric8:import
[INFO] Scanning for projects...
[INFO]
[INFO] ------------------------------------------------------------------------
[INFO] Building Fabric8 :: Quickstarts :: CDI :: Camel with Jetty as HTTP server 0.0.1-SNAPSHOT
[INFO] ------------------------------------------------------------------------
[INFO]
[INFO] --- fabric8-maven-plugin:3.1.49:import (default-cli) @ cdi-jetty-demo ---
[INFO] F8> Running 1 endpoints of gogs in namespace default
[INFO] F8> Creating Namespace user-secrets-source-minikube with labels: {provider=fabric8, kind=secrets}
Please enter your username for git repo gogs: gogsadmin
Please enter your password/access token for git repo gogs: RedHat$1
[INFO] F8> Creating Secret user-secrets-source-minikube/default-gogs-git
[INFO] F8> Creating ConfigMap fabric8-git-app-secrets in namespace user-secrets-source-minikube
[INFO] F8> git username: gogsadmin password: ******** email: pim@rubix.nl
[INFO] Trusting all SSL certificates
[INFO] Initialised an empty git configuration repo at /home/pim/workspace/cdi-jetty-demo
[INFO] creating git repository client at: http://192.168.42.40:30616
[INFO] Using remoteUrl: http://192.168.42.40:30616/gogsadmin/cdi-jetty-demo.git and remote name origin
[INFO] About to git commit and push to: http://192.168.42.40:30616/gogsadmin/cdi-jetty-demo.git and remote name origin
[INFO] Using UsernamePasswordCredentialsProvider{user: gogsadmin, password length: 8}
[INFO] Creating a BuildConfig for namespace: default project: cdi-jetty-demo
[INFO] F8> You can view the project dashboard at: http://192.168.42.40:30482/workspaces/default/projects/cdi-jetty-demo
[INFO] F8> To configure a CD Pipeline go to: http://192.168.42.40:30482/workspaces/default/projects/cdi-jetty-demo/forge/command/devops-edit
[INFO] ------------------------------------------------------------------------
[INFO] BUILD SUCCESS
[INFO] ------------------------------------------------------------------------
[INFO] Total time: 19.643 s
[INFO] Finished at: 2016-12-28T12:30:27+01:00
[INFO] Final Memory: 26M/494M
[INFO] ------------------------------------------------------------------------

After the successful execution of the import goal we need to finish the setup further in the fabric8 console.

First we need to setup a Kubernetes secret to authenticate to the Gogs Git repository.

select-secret

Next we can select a CD pipeline.

select-pipeline

After we have selected a CD pipeline suited for the lifecycle of our Microservice the Jenkinsfile will be committed in Git repository of our microservice. And after that Jenkins will be configured and the Jenkins CD pipeline will start its initial job.

build-success

If everything goes fine the entire Jenkins pipeline will finish successfully.

finished-pipeline

Now our microservice is running in the test and staging environments, which are created if they did not already exist. However like mentioned above the microservice is not yet exposed outside of the Kubernetes cluster. This is because the Kubernetes template used has the following setting in the service configuration:

type: ClusterIP

change this to and your app will be exposed outside of the Kubernetes cluster ready to be consumed by external parties:

type: NodePort

This means the microservice can be called via a browser:

app

If everything went fine the fabric8 dashboard for the app will look something like this:

app-dashboard

Like I mentioned above, the selection of the CD pipeline will add the Jenkinsfile to the Git repository, you can see it (and edit it off course if you whish) in the Gogs Git repo:

gogs-jenkins-file

Some final thoughts

Being able to quickly deploy functionality across different environments and not have to worry about runtime config, app servers, and manually hacking CD pipelines is definitely a major advantage for every app developer. For this reason the fabric8 framework in combination with Kubernetes really has some good potential. Using fabric8 locally with minikube did cause some stability issues, which I have not fully identified yet, but I’m sure this will improve with every new version coming up.

 
1 Comment

Posted by on 2016-12-28 in API Management, Geen categorie


Tags: , , , , , ,

Serverless architecture, what is it?

One of the more recent trends in IT is Serverless architecture. Like any hype in the earlier stages a lot of ambiguity exists on what it is and what problems it solves. Serverless architecture is no different. So recently a collegue of mine Jan van Zoggel (you can read his awesome blog here) and I took a look at what Serverless architecture is.

Some definitions, some ambiguity and some other terms

The Serverless trend emerged, like so many others these days, in the realm of web and app development. Where all logic and state traditionally handled by the backend was placed is a “*aas” (as a service) which got the term BaaS or mBaaS (mobile)Backend as a service.

Meanwhile Serverless also got to mean something slightly different, which of course got another “*aas” acronym, FaaS. Or Function as a Service. In FaaS certain application logic (Functions) run in ephemeral runtimes, in the cloud where the cloud provider in question handles all runtime specific configuration and setup. This includes stuff like networking, loadbalancing, scaling and so on. More on these emphemeral runtimes below.

Even though it is still quite early on in the world of Serverless architectures it seems the FaaS definition of Serverless architecture is gaining more traction than the mBaaS definition. This doesn’t mean mBaaS does not have a valid right of existence, just that it’s association with Serverless architecture is faining away.

To return to the definition of Serverless architecture and FaaS, it seems that the abstraction of (all) runtime configuration, setup and complexity is what Serverless is all about. Off course it is not truly serverless. Your stuff has to run somewhere 😉

With this abstraction in mind I find the definition by Justin Isaf the most to the point when he said:

“Abstracting the server away from the developer. Not removing the server itself”

You can find his presentation about Serverless on YouTube: https://www.youtube.com/watch?v=5-V8DKPsUoU

The evolution of runtimes

When looking not just at Serverless architecture, but also other fairly recent trends in IT, we’re looking at you Cloud, Microservices and Containerization. We can detect a “evolution of runtimes”.

From one to many runtimes.

Traditionally you had one gigantic server, virtualized or bare metal where an application server of some sort was installed to. And on this application server all applications, modules and or components of a system would be deployed to and run. Even though these application servers where usually setup in multiples to at least have some high availability further scaling and moving around these often called monolithic runtimes was hard at best and downright impossible at worst (looking at you mainframe!).

Recently a trend emerged to not only split complex monolithic systems is autonomous modules, called microservices, but also to separate these microservices further by running them in a separate runtime. Usually a container of some sort. Thow in some container orchestration tool like Kubernetes, or Docker Swarm and all of a sudden scaling out and moving around runtimes becomes much much simpler. Every application is neatly separated by others and specific requests or messages for a particular app are handled by its runtime (container).

The next step in this evolution is what Serverless architecture and FaaS is all about. When a container runtime handles all requests of the app it is serving a FaaS function or app runtime handles only one request and turns itself off after the function completes. This turning off after every invocation has a couple of characteristics which defines a Serverless architecture.

  • No “Always on” server – when no invocation requests are being handled and a traditional runtime would be sitting idle a Serverless architecture simply has nothing running.
  • “Infinite” scalability – since every request is handled by it’s seperate runtime and the provisioning and running of these FaaS functions is handled by the (Cloud) provider it provides a theoretically infinitely scalable application.
  • Zero runtime configuration – the configuration of your application server, docker container or server is completely left to the (cloud) provider. Providing a “No-Ops” environment where the team only has to worry about the application logic itself.

evolution-of-runtimes

The evolution of runtimes

You can compare it with modern cars which turn off the engine while waiting for a traffic light. When the light turns green and the engine has to perform it starts. When the car is idling it simply turns off the engine completely.

scalibility

Since every request is handled by its own runtime scalability is handled out of the box.

Commercial offerings

As of the writing of this blog the three largest commercial offerings for implementing a Serverless architecture are available from, not surprisingly, the “big three” of cloud providers.

  1. Amazon AWS Lambda aws-lambda
  2. Google Cloud Functions screen-shot-2016-12-02-at-15-30-58
  3. Microsoft Azure Functions screen-shot-2016-12-10-at-13-06-26

Not suprisingly the specific Serverless offering is completely integrated with all other cloud offerings of the particular provider. Meaning you can invoke your FaaS function from various triggers provided by other cloud solutions.

Some final thoughts

Even though it’s pretty early in the hype cycle Serverless architecture and FaaS definitely have some attractive characteristics. The potential of Serverless functions is very great, basically all short running stateless transactions can be handled by a FaaS functions. And when combined with other cloud offerings like storage and API Gateways even more complex applications can be created with Serverless architecture. With the cloud native and scalability of FaaS your application is completely ready for the 21st century, and off course buzzword complient 😉


Tags: , , , ,

Configuring a Network of Brokers in Fuse Fabric

In ActiveMQ it is possible to define logical groups of message brokers in order to obtain more resiliency or throughput.
The setup configuration described here can be outlined as follows:
Network_of_brokers_layout
Creating broker groups and a network of brokers can be done in various manners in JBoss Fuse Fabric. Here we are going to use the Fabric CLI.
The following steps are necessary to create the configuration above:

  1. Creating a Fabric (if we don’t already have one)

  2. Create child containers

  3. Create the MQ broker profiles and assign them to the child containers

  4. Connect a couple of clients for testing

1. Creating a Fabric (optional)

Assuming we start with a clean Fuse installation the first step is creating a Fabric. This step can be skipped if a fabric is already available.

In the Fuse CLI execute the following command:

JBossFuse:karaf@root> fabric:create -p fabric --wait-for-provisioning

2. Create child containers

Next we are going to create two sets of child containers which are going to host our brokers. Note, the child containers we are going to create in this step are empty child containers and do not yet contain AMQ brokers. We are going to provision these containers with AMQ brokers in step 3.

First create the child containers for siteA:

JBossFuse:karaf@root> fabric:container-create-child root site-a 2

Next create the child containers for siteB:

JBossFuse:karaf@root> fabric:container-create-child root site-b 2

3. Create the MQ broker profiles and assign them to the child containers

In this step we are going to create the broker profiles in fabric and assign them to the containers we created in the previous step.


JBossFuse:karaf@root> fabric:mq-create --group site-a --networks site-b --networks-username admin --networks-password admin --assign-container site-a1,site-a2 site-a-profile

JBossFuse:karaf@root> fabric:mq-create --group site-b --networks site-a --networks-username admin --networks-password admin --assign-container site-b1,site-b2 site-b-profile

The fabric:mq-create command creates a broker profile in Fuse Fabric. The –group flag assigns a group to the brokers in the profile. The networks flag creates the required network connection needed for a network of brokers. In the assign-container flag we assign this newly created broker profile to one or more containers.

4.Connect a couple of clients for testing

A sample project containing two clients, one producer and one consumer is available on github.

Clone the repository:

$ git clone https://github.com/pimg/mq-fabric-client.git

build the project:

$ mvn clean install

Start the message consumer (in the java-consumer directory):

$ mvn exec:java

Start the message producer (in the java-producer directory):

$ mvn exec:java

Observe the console logging of the producer:

14:48:58 INFO  Using local ZKClient
14:48:58 INFO  Starting
14:48:58 INFO  Client environment:zookeeper.version=3.4.6-1569965, built on 02/20/2014 09:09 GMT
14:48:58 INFO  Client environment:host.name=pim-XPS-15-9530
14:48:58 INFO  Client environment:java.version=1.8.0_77
14:48:58 INFO  Client environment:java.vendor=Oracle Corporation
14:48:58 INFO  Client environment:java.home=/home/pim/apps/jdk1.8.0_77/jre
14:48:58 INFO  Client environment:java.class.path=/home/pim/apps/apache-maven-3.3.9/boot/plexus-classworlds-2.5.2.jar
14:48:58 INFO  Client environment:java.library.path=/usr/java/packages/lib/amd64:/usr/lib64:/lib64:/lib:/usr/lib
14:48:58 INFO  Client environment:java.io.tmpdir=/tmp
14:48:58 INFO  Client environment:java.compiler=<NA>
14:48:58 INFO  Client environment:os.name=Linux
14:48:58 INFO  Client environment:os.arch=amd64
14:48:58 INFO  Client environment:os.version=4.2.0-34-generic
14:48:58 INFO  Client environment:user.name=pim
14:48:58 INFO  Client environment:user.home=/home/pim
14:48:58 INFO  Client environment:user.dir=/home/pim/workspace/mq-fabric/java-producer
14:48:58 INFO  Initiating client connection, connectString=localhost:2181 sessionTimeout=60000 watcher=org.apache.curator.ConnectionState@47e011e3
14:48:58 INFO  Opening socket connection to server localhost/127.0.0.1:2181
14:48:58 INFO  Socket connection established to localhost/127.0.0.1:2181, initiating session
14:48:58 INFO  Session establishment complete on server localhost/127.0.0.1:2181, sessionid = 0x154620540e80009, negotiated timeout = 40000
14:48:58 INFO  State change: CONNECTED
14:48:59 INFO  Adding new broker connection URL: tcp://10.0.3.1:38417
14:49:00 INFO  Successfully connected to tcp://10.0.3.1:38417
14:49:00 INFO  Sending to destination: queue://fabric.simple this text: 1. message sent
14:49:00 INFO  Sending to destination: queue://fabric.simple this text: 2. message sent
14:49:01 INFO  Sending to destination: queue://fabric.simple this text: 3. message sent
14:49:01 INFO  Sending to destination: queue://fabric.simple this text: 4. message sent
14:49:02 INFO  Sending to destination: queue://fabric.simple this text: 5. message sent
14:49:02 INFO  Sending to destination: queue://fabric.simple this text: 6. message sent
14:49:03 INFO  Sending to destination: queue://fabric.simple this text: 7. message sent
14:49:03 INFO  Sending to destination: queue://fabric.simple this text: 8. message sent
14:49:04 INFO  Sending to destination: queue://fabric.simple this text: 9. message sent

Observe the console logging of the consumer:

14:48:20 INFO  Using local ZKClient
14:48:20 INFO  Starting
14:48:20 INFO  Client environment:zookeeper.version=3.4.6-1569965, built on 02/20/2014 09:09 GMT
14:48:20 INFO  Client environment:host.name=pim-XPS-15-9530
14:48:20 INFO  Client environment:java.version=1.8.0_77
14:48:20 INFO  Client environment:java.vendor=Oracle Corporation
14:48:20 INFO  Client environment:java.home=/home/pim/apps/jdk1.8.0_77/jre
14:48:20 INFO  Client environment:java.class.path=/home/pim/apps/apache-maven-3.3.9/boot/plexus-classworlds-2.5.2.jar
14:48:20 INFO  Client environment:java.library.path=/usr/java/packages/lib/amd64:/usr/lib64:/lib64:/lib:/usr/lib
14:48:20 INFO  Client environment:java.io.tmpdir=/tmp
14:48:20 INFO  Client environment:java.compiler=<NA>
14:48:20 INFO  Client environment:os.name=Linux
14:48:20 INFO  Client environment:os.arch=amd64
14:48:20 INFO  Client environment:os.version=4.2.0-34-generic
14:48:20 INFO  Client environment:user.name=pim
14:48:20 INFO  Client environment:user.home=/home/pim
14:48:20 INFO  Client environment:user.dir=/home/pim/workspace/mq-fabric/java-consumer
14:48:20 INFO  Initiating client connection, connectString=localhost:2181 sessionTimeout=60000 watcher=org.apache.curator.ConnectionState@3d732a14
14:48:20 INFO  Opening socket connection to server localhost/127.0.0.1:2181
14:48:20 INFO  Socket connection established to localhost/127.0.0.1:2181, initiating session
14:48:20 INFO  Session establishment complete on server localhost/127.0.0.1:2181, sessionid = 0x154620540e80008, negotiated timeout = 40000
14:48:20 INFO  State change: CONNECTED
14:48:21 INFO  Adding new broker connection URL: tcp://10.0.3.1:38417
14:48:21 INFO  Successfully connected to tcp://10.0.3.1:38417
14:48:21 INFO  Start consuming messages from queue://fabric.simple with 120000ms timeout
14:49:00 INFO  Got 1. message: 1. message sent
14:49:00 INFO  Got 2. message: 2. message sent
14:49:01 INFO  Got 3. message: 3. message sent
14:49:01 INFO  Got 4. message: 4. message sent
14:49:02 INFO  Got 5. message: 5. message sent
14:49:02 INFO  Got 6. message: 6. message sent
14:49:03 INFO  Got 7. message: 7. message sent
14:49:03 INFO  Got 8. message: 8. message sent
14:49:04 INFO  Got 9. message: 9. message sent
 
Leave a comment

Posted by on 2016-12-02 in JBoss Fuse


Tags: , , , , ,

JBoss Fuse Jolokia requests

Even though Hawtio is a pretty awesome console for JBoss Fuse, sometimes you want or even need to have the underlying data Hawtio uses. Maybe you want to incorporate it in your existing dashboard, maybe you want to store it in a database so you have a historical record, or maybe you’re just curious and want to experiment with it.

The nice thing of JBoss Fuse and really the underlying community products, mainly Apache Camel and Apache ActiveMQ, is that they expose a lot of metrics and statistics via JMX. Now you could start your favorite IDE or text editor and write a slab of Java code to query the JMX metrics from Apache Camel and Apache ActiveMQ, like some sort of maniac. Or you could leverage the out of the box Jolokia features, like the people from Hawtio did, and really any sane person would do.

For those of you who never heard of Jolokia, in a nutshell its basically JMX over http/json. Which makes doing JMX almost fun again.

Now to start things off here are a couple Jolokia requests (and responses) to start you off. These are just plain http requests, do note they use basic authentication to authenticate against the JBoss Fuse server.

To start things of some statistics on the JVM:

The request for querying the heapsize of the JVM JBoss Fuse is running on:

http://localhost:8181/hawtio/jolokia/read/java.lang:type=Memory/HeapMemoryUsage

Which returns, on my local test machine, the following response:

{
   "request":{
      "mbean":"java.lang:type=Memory",
      "attribute":"HeapMemoryUsage",
      "type":"read"
   },
   "value":{
      "init":536870912,
      "committed":749207552,
      "max":954728448,
      "used":118298056
   },
   "timestamp":1469035168,
   "status":200
}

Now we know how to query the Heap memory, fetching the NonHeap is pretty trivial:

http://localhost:8181/hawtio/jolokia/read/java.lang:type=Memory/NonHeapMemoryUsage

{
   "request":{
      "mbean":"java.lang:type=Memory",
      "attribute":"NonHeapMemoryUsage",
      "type":"read"
   },
   "value":{
      "init":2555904,
      "committed":120848384,
      "max":-1,
      "used":110152704
   },
   "timestamp":1469035298,
   "status":200
}

Some additional threading statistics for the JVM:

http://localhost:8181/hawtio/jolokia/read/java.lang:type=Threading

which returns:

{
   "request":{
      "mbean":"java.lang:type=Threading",
      "type":"read"
   },
   "value":{
      "ThreadAllocatedMemorySupported":true,
      "ThreadContentionMonitoringEnabled":false,
      "TotalStartedThreadCount":125,
      "CurrentThreadCpuTimeSupported":true,
      "CurrentThreadUserTime":610000000,
      "PeakThreadCount":108,
      "AllThreadIds":[
         150,
         45,
         123,
         122,
         121,
         120,
         119,
         118,
         117,
         116,
         115,
         113,
         111,
         110,
         109,
         107,
         106,
         105,
         104,
         103,
         102,
         101,
         100,
         99,
         98,
         97,
         96,
         95,
         94,
         93,
         92,
         90,
         87,
         86,
         84,
         83,
         82,
         81,
         80,
         79,
         78,
         77,
         76,
         74,
         73,
         72,
         71,
         70,
         69,
         68,
         67,
         65,
         62,
         61,
         60,
         58,
         57,
         55,
         54,
         53,
         51,
         47,
         46,
         44,
         42,
         40,
         39,
         38,
         37,
         36,
         35,
         34,
         33,
         32,
         31,
         30,
         28,
         27,
         26,
         24,
         25,
         21,
         20,
         23,
         22,
         19,
         18,
         15,
         14,
         13,
         12,
         11,
         4,
         3,
         2,
         1
      ],
      "ThreadAllocatedMemoryEnabled":true,
      "CurrentThreadCpuTime":624340113,
      "ObjectName":{
         "objectName":"java.lang:type=Threading"
      },
      "ThreadContentionMonitoringSupported":true,
      "ThreadCpuTimeSupported":true,
      "ThreadCount":96,
      "ThreadCpuTimeEnabled":true,
      "ObjectMonitorUsageSupported":true,
      "SynchronizerUsageSupported":true,
      "DaemonThreadCount":70
   },
   "timestamp":1469035389,
   "status":200
}

Now for some JBoss Fuse specific queries:

First some overall statistics for our ActiveMQ broker:

http://localhost:8181/hawtio/jolokia/read/org.apache.activemq:type=Broker,brokerName=amq

Which returns:

{
   "request":{
      "mbean":"org.apache.activemq:brokerName=amq,type=Broker",
      "type":"read"
   },
   "value":{
      "StatisticsEnabled":true,
      "TotalConnectionsCount":0,
      "StompSslURL":"",
      "TransportConnectors":{
         "openwire":"tcp:\/\/localhost:61616",
         "stomp":"stomp+nio:\/\/pim-XPS-15-9530:61613"
      },
      "StompURL":"",
      "TotalProducerCount":0,
      "CurrentConnectionsCount":0,
      "TopicProducers":[

      ],
      "JMSJobScheduler":null,
      "UptimeMillis":461929,
      "TemporaryQueueProducers":[

      ],
      "TotalDequeueCount":0,
      "JobSchedulerStorePercentUsage":0,
      "DurableTopicSubscribers":[

      ],
      "QueueSubscribers":[

      ],
      "AverageMessageSize":1024,
      "BrokerVersion":"5.11.0.redhat-621084",
      "TemporaryQueues":[

      ],
      "BrokerName":"amq",
      "MinMessageSize":1024,
      "DynamicDestinationProducers":[

      ],
      "OpenWireURL":"tcp:\/\/localhost:61616",
      "TemporaryTopics":[

      ],
      "JobSchedulerStoreLimit":0,
      "TotalConsumerCount":0,
      "MaxMessageSize":1024,
      "TotalMessageCount":0,
      "TempPercentUsage":0,
      "TemporaryQueueSubscribers":[

      ],
      "MemoryPercentUsage":0,
      "SslURL":"",
      "InactiveDurableTopicSubscribers":[

      ],
      "StoreLimit":10737418240,
      "QueueProducers":[

      ],
      "VMURL":"vm:\/\/amq",
      "TemporaryTopicProducers":[

      ],
      "Topics":[
         {
            "objectName":"org.apache.activemq:brokerName=amq,destinationName=ActiveMQ.Advisory.MasterBroker,destinationType=Topic,type=Broker"
         }
      ],
      "Uptime":"7 minutes",
      "BrokerId":"ID:pim-XPS-15-9530-35535-1469035012806-0:1",
      "DataDirectory":"\/home\/pim\/apps\/jboss-fuse-6.2.1.redhat-084\/data\/amq",
      "Persistent":true,
      "TopicSubscribers":[

      ],
      "MemoryLimit":668309914,
      "Slave":false,
      "TotalEnqueueCount":1,
      "TempLimit":5368709120,
      "TemporaryTopicSubscribers":[

      ],
      "StorePercentUsage":0,
      "Queues":[

      ]
   },
   "timestamp":1469035474,
   "status":200
}

We can also zoom into a specific JMS destination on our broker, in this case the Queue named testQueue:

http://localhost:8181/hawtio/jolokia/read/org.apache.activemq:type=Broker,brokerName=amq,destinationType=Queue,destinationName=testQueue

{
   "request":{
      "mbean":"org.apache.activemq:brokerName=amq,destinationName=testQueue,destinationType=Queue,type=Broker",
      "type":"read"
   },
   "value":{
      "ProducerFlowControl":true,
      "AlwaysRetroactive":false,
      "Options":"",
      "MemoryUsageByteCount":0,
      "AverageBlockedTime":0.0,
      "MemoryPercentUsage":0,
      "CursorMemoryUsage":0,
      "InFlightCount":0,
      "Subscriptions":[

      ],
      "CacheEnabled":true,
      "ForwardCount":0,
      "DLQ":false,
      "AverageEnqueueTime":0.0,
      "Name":"testQueue",
      "MaxAuditDepth":10000,
      "BlockedSends":0,
      "TotalBlockedTime":0,
      "MaxPageSize":200,
      "QueueSize":0,
      "PrioritizedMessages":false,
      "MemoryUsagePortion":0.0,
      "Paused":false,
      "EnqueueCount":0,
      "MessageGroups":{

      },
      "ConsumerCount":0,
      "AverageMessageSize":0,
      "CursorFull":false,
      "MaxProducersToAudit":64,
      "ExpiredCount":0,
      "CursorPercentUsage":0,
      "MinEnqueueTime":0,
      "MinMessageSize":0,
      "MemoryLimit":1048576,
      "DispatchCount":0,
      "MaxEnqueueTime":0,
      "BlockedProducerWarningInterval":30000,
      "DequeueCount":0,
      "ProducerCount":0,
      "MessageGroupType":"cached",
      "MaxMessageSize":0,
      "UseCache":true,
      "SlowConsumerStrategy":null
   },
   "timestamp":1469035582,
   "status":200
}

And next to ActiveMQ we can also retrieve some Camel statistics:

http://localhost:8181/hawtio/jolokia/read/org.apache.camel:context=*,type=routes,name=*/Load01,InflightExchanges,LastProcessingTime,ExchangesFailed

Which returns the metrics: “Load01”, “InflightExchanges”, “LastProcessingTime” and “ExchangesFailed” from all Camel routes in all Camel Contexts:

{
   "request":{
      "mbean":"org.apache.camel:context=*,name=*,type=routes",
      "attribute":[
         "Load01",
         "InflightExchanges",
         "LastProcessingTime",
         "ExchangesFailed"
      ],
      "type":"read"
   },
   "value":{
      "org.apache.camel:context=camel-blueprint,name=\"route1\",type=routes":{
         "LastProcessingTime":0,
         "ExchangesFailed":0,
         "InflightExchanges":0,
         "Load01":""
      },
      "org.apache.camel:context=camel-blueprint,name=\"route3\",type=routes":{
         "LastProcessingTime":0,
         "ExchangesFailed":0,
         "InflightExchanges":0,
         "Load01":""
      },
      "org.apache.camel:context=camel-blueprint,name=\"route2\",type=routes":{
         "LastProcessingTime":0,
         "ExchangesFailed":0,
         "InflightExchanges":0,
         "Load01":""
      }
   },
   "timestamp":1469035650,
   "status":200
}

We can off course also remove some filters to get all available statisitics on the Camel routes:

http://localhost:8181/hawtio/jolokia/read/org.apache.camel:context=*,type=routes,name=*

which returns a lot more statistics:

{
   "request":{
      "mbean":"org.apache.camel:context=*,name=*,type=routes",
      "type":"read"
   },
   "value":{
      "org.apache.camel:context=camel-blueprint,name=\"route1\",type=routes":{
         "StatisticsEnabled":true,
         "EndpointUri":"rest:\/\/get:\/user:\/%7Bid%7D?description=Find+user+by+id&outType=nl.schiphol.my.camel.swagger.example.User&routeId=route1",
         "CamelManagementName":"camel-blueprint",
         "ExchangesCompleted":0,
         "LastProcessingTime":0,
         "ExchangesFailed":0,
         "Description":null,
         "FirstExchangeCompletedExchangeId":null,
         "FirstExchangeCompletedTimestamp":null,
         "LastExchangeFailureTimestamp":null,
         "MaxProcessingTime":0,
         "LastExchangeCompletedTimestamp":null,
         "Load15":"",
         "DeltaProcessingTime":0,
         "OldestInflightDuration":null,
         "ExternalRedeliveries":0,
         "ExchangesTotal":0,
         "ResetTimestamp":"2016-07-20T19:16:53+02:00",
         "ExchangesInflight":0,
         "MeanProcessingTime":0,
         "LastExchangeFailureExchangeId":null,
         "FirstExchangeFailureExchangeId":null,
         "CamelId":"myCamel",
         "TotalProcessingTime":0,
         "FirstExchangeFailureTimestamp":null,
         "RouteId":"route1",
         "RoutePolicyList":"",
         "FailuresHandled":0,
         "MessageHistory":true,
         "Load05":"",
         "OldestInflightExchangeId":null,
         "State":"Started",
         "InflightExchanges":0,
         "Redeliveries":0,
         "MinProcessingTime":0,
         "LastExchangeCompletedExchangeId":null,
         "Tracing":false,
         "Load01":""
      },
      "org.apache.camel:context=camel-blueprint,name=\"route3\",type=routes":{
         "StatisticsEnabled":true,
         "EndpointUri":"rest:\/\/get:\/user:\/findAll?description=Find+all+users&outType=nl.schiphol.my.camel.swagger.example.User%5B%5D&routeId=route3",
         "CamelManagementName":"camel-blueprint",
         "ExchangesCompleted":0,
         "LastProcessingTime":0,
         "ExchangesFailed":0,
         "Description":null,
         "FirstExchangeCompletedExchangeId":null,
         "FirstExchangeCompletedTimestamp":null,
         "LastExchangeFailureTimestamp":null,
         "MaxProcessingTime":0,
         "LastExchangeCompletedTimestamp":null,
         "Load15":"",
         "DeltaProcessingTime":0,
         "OldestInflightDuration":null,
         "ExternalRedeliveries":0,
         "ExchangesTotal":0,
         "ResetTimestamp":"2016-07-20T19:16:53+02:00",
         "ExchangesInflight":0,
         "MeanProcessingTime":0,
         "LastExchangeFailureExchangeId":null,
         "FirstExchangeFailureExchangeId":null,
         "CamelId":"myCamel",
         "TotalProcessingTime":0,
         "FirstExchangeFailureTimestamp":null,
         "RouteId":"route3",
         "RoutePolicyList":"",
         "FailuresHandled":0,
         "MessageHistory":true,
         "Load05":"",
         "OldestInflightExchangeId":null,
         "State":"Started",
         "InflightExchanges":0,
         "Redeliveries":0,
         "MinProcessingTime":0,
         "LastExchangeCompletedExchangeId":null,
         "Tracing":false,
         "Load01":""
      },
      "org.apache.camel:context=camel-blueprint,name=\"route2\",type=routes":{
         "StatisticsEnabled":true,
         "EndpointUri":"rest:\/\/put:\/user?description=Updates+or+create+a+user&inType=nl.schiphol.my.camel.swagger.example.User&routeId=route2",
         "CamelManagementName":"camel-blueprint",
         "ExchangesCompleted":0,
         "LastProcessingTime":0,
         "ExchangesFailed":0,
         "Description":null,
         "FirstExchangeCompletedExchangeId":null,
         "FirstExchangeCompletedTimestamp":null,
         "LastExchangeFailureTimestamp":null,
         "MaxProcessingTime":0,
         "LastExchangeCompletedTimestamp":null,
         "Load15":"",
         "DeltaProcessingTime":0,
         "OldestInflightDuration":null,
         "ExternalRedeliveries":0,
         "ExchangesTotal":0,
         "ResetTimestamp":"2016-07-20T19:16:53+02:00",
         "ExchangesInflight":0,
         "MeanProcessingTime":0,
         "LastExchangeFailureExchangeId":null,
         "FirstExchangeFailureExchangeId":null,
         "CamelId":"myCamel",
         "TotalProcessingTime":0,
         "FirstExchangeFailureTimestamp":null,
         "RouteId":"route2",
         "RoutePolicyList":"",
         "FailuresHandled":0,
         "MessageHistory":true,
         "Load05":"",
         "OldestInflightExchangeId":null,
         "State":"Started",
         "InflightExchanges":0,
         "Redeliveries":0,
         "MinProcessingTime":0,
         "LastExchangeCompletedExchangeId":null,
         "Tracing":false,
         "Load01":""
      }
   },
   "timestamp":1469035760,
   "status":200
}

Now there are probably tens or hundreds more queries to think of, but hopefully this will start you off in the right direction.

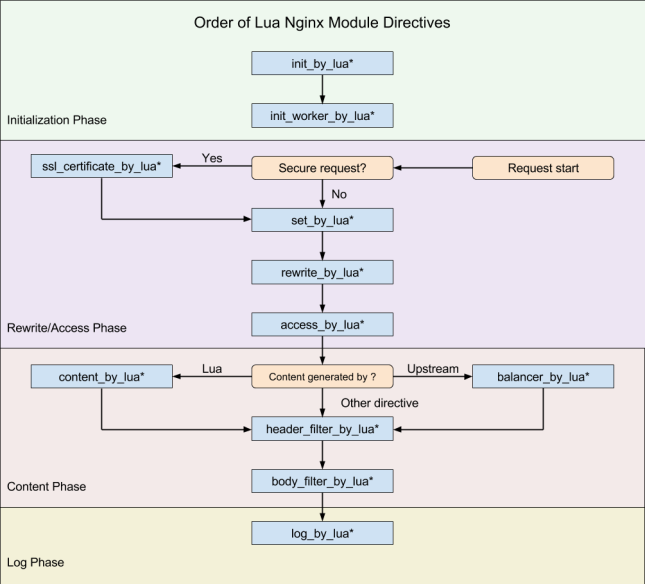
 
Leave a comment

Posted by on 2016-07-20 in JBoss Fuse


Tags: , , , , , ,

Instantiating a java.util.Properties via OSGi Blueprint

I was recently struggling a bit to instantiate a java.util.Properties object via OSGi Blueprint. Normally when dealing with properties in OSGi Blueprint I use the OSGi Admin config or Compendium service. However one of the other objects I needed required a java.util.Properties object as a constructor argument. So I needed to instantiate it via Blueprint. After some try & error I found the solution.


<bean id="myPropertiesObject" class="java.util.Properties">
    <argument>
      <props>
        <prop key="property1">value1</prop>
        <prop key="property2">value1</prop>
        <prop key="property3">value1</prop>
      </props>
    </argument>
  </bean>
 
2 Comments

Posted by on 2016-03-28 in Geen categorie, JBoss Fuse


Tags: , ,

What is HATEOAS?

With probably the most unpronounceable acronym in the world of IT, and there are a lot, HATEOAS is also one of the most obscure and misunderstood constraints of the REST specification. In this article I will make an attempt to shed some light on the world of hypermedia and HATEOAS.

Let’s start with listing the complete list of the constraints of REST to give us some context on where the HATEOAS constraint sits in the REST constraints.

  1. Client-server
  2. Stateless server
  3. Cache
  4. Uniform interface
    1. Identification of resources
    2. Manipulation of resources through representations
    3. Self-descriptive messages
    4. Hypermedia as the engine of application state (HATEOAS)
  5. Layered System
  6. Code-on-Demand


As we just saw in the list of constraints HATEOAS stands for “Hypermedia As The Engine Of Application State”. So, what does this mean?

To grab the concept it’s helpful to think of a regular webpage. When browsing to a page there are, most of the time, various hyperlinks available which you can use to navigate further to other pages. These pages are essentially the “state” of the web(application).

To quote Roy Fielding from his thesis about RESTful architecture and design:

“The name ‘Representational State Transfer’ is intended to evoke an image of how a well-designed Web application behaves: a network of web pages (a virtual state-machine), where the user progresses through the application by selecting links (state transitions), resulting in the next page (representing the next state of the application) being transferred to the user and rendered for their use.”-Roy Fielding
Architectural Styles and the Design of Network-based Software Architectures
Chapter 6

So in essence the states are the various webpages and the transitions to the different states are the hyperlinks. The hyperlinks are the “engine” to which the state transfer can occur.

Hateoas_web

Above we see a diagram of various webpages, when starting to browse the internet we start at an initial starting page. Clicking links on this starting page we can browse to other pages. Except from changing the URL manually in the browser address bar, the pages we can open via hyperlinks are dictated by the first page itself. The state transitions are controlled by the web application. This is an important concept in HATEOAS as well. Also the endpoints are hidden from an end user perspective.

As stated above the webpages are states of the (web)application and the hyperlinks are the mechanism (engine) to changing the state. We can abstract our webpages diagram also to this:

Hateoas_api

So… how does this applies to REST and HATEOAS?

The way to implement HATEOAS is pretty straightforward: in each response message add the link(s) for possible next request messages. Therefore give the opportunity to the consumer of the REST service to transition the state via the links in the response message.

A very simplified example of a HATEOAS response:

{
  "stocklist": {
    "name": "ACME",
    "price": "10.00",
    "link": [
      {
        "rel": "self",
        "href": "/stock/ACME",
        "method": "get"
      },
      {
        "rel": "buy",
        "href": "/account/ACME/buy",
        "method": "post"
      },
      {
        "rel": "sell",
        "href": "/account/ACME/sell",
        "method": "post"
      }
    ]
  }
}

In our simple example response we request the stock information for ACME. We get the price back, but in addition the links to either buy or sell the stock.

So when we add links to our responses does that mean we are now truly RESTfull?

Again, Roy Fielding seems pretty clear about this:

“If the engine of application state (and hence the API) is not being driven by hypertext, then it cannot be RESTful and cannot be a REST API. Period. Is there some broker manual somewhere that needs to be fixed?”-Roy Fielding
REST APIs must be hypertext-driven
Untangled: Musings of Roy T. Fielding

But, are we truly RESTful if we include hyperlinks in our responses?

The thing is, people do not use REST API’s. People use apps and sites and those apps and site use those REST API’s. So what does this mean? It means that if the app or site developer chooses not to use the HATEOAS links in the response the end user cannot state transition using hypermedia and ergo we are not truly HATEOAS compliant and thus RESTful.

So, adding the links in the responses is an important step in HATEOAS and RESTful compliant, it is only the first step.

HATEOAS is one of the more misunderstood and forgotten REST constraints. I hope this blogpost will help you in better grasp this REST constraint.

 
Leave a comment

Posted by on 2016-03-18 in API Management


Tags: , , , , , ,

MVN camel:run exception in Fuse 6.2.1

When playing around with a new Fuse 6.2.1 environment I notices the maven archetypes provided with Fuse did not run out of the box with the mvn camel:run command.

Whenever I executed the command I received the following error:


[ERROR] Failed to execute goal org.apache.camel:camel-maven-plugin:2.15.1.redhat-621084:run (default-cli) on project postback-core: Execution default-cli of goal org.apache.camel:camel-maven-plugin:2.15.1.redhat-621084:run failed: Plugin org.apache.camel:camel-maven-plugin:2.15.1.redhat-621084 or one of its dependencies could not be resolved: Failed to collect dependencies at org.apache.camel:camel-maven-plugin:jar:2.15.1.redhat-621084 -> org.apache.maven.reporting:maven-reporting-impl:jar:2.0.5 -> org.apache.maven.doxia:doxia-site-renderer:jar:1.0 -> org.apache.velocity:velocity:jar:1.5 -> commons-collections:commons-collections:jar:3.2.1.redhat-7: Failed to read artifact descriptor for commons-collections:commons-collections:jar:3.2.1.redhat-7: Failure to find org.apache.commons:commons-parent:pom:22-redhat-2 in https://repo1.maven.org/maven2 was cached in the local repository, resolution will not be reattempted until the update interval of central has elapsed or updates are forced -> [Help 1]

Executing the command with the –e flag gave the following stacktrace:


org.apache.maven.lifecycle.LifecycleExecutionException: Failed to execute goal org.apache.camel:camel-maven-plugin:2.15.1.redhat-621084:run (default-cli) on project postback-core: Execution default-cli of goal org.apache.camel:camel-maven-plugin:2.15.1.redhat-621084:run failed: Plugin org.apache.camel:camel-maven-plugin:2.15.1.redhat-621084 or one of its dependencies could not be resolved: Failed to collect dependencies at org.apache.camel:camel-maven-plugin:jar:2.15.1.redhat-621084 -> org.apache.maven.reporting:maven-reporting-impl:jar:2.0.5 -> org.apache.maven.doxia:doxia-site-renderer:jar:1.0 -> org.apache.velocity:velocity:jar:1.5 -> commons-collections:commons-collections:jar:3.2.1.redhat-7

at org.apache.maven.lifecycle.internal.MojoExecutor.execute(MojoExecutor.java:212)

at org.apache.maven.lifecycle.internal.MojoExecutor.execute(MojoExecutor.java:153)

at org.apache.maven.lifecycle.internal.MojoExecutor.execute(MojoExecutor.java:145)

at org.apache.maven.lifecycle.internal.LifecycleModuleBuilder.buildProject(LifecycleModuleBuilder.java:116)

at org.apache.maven.lifecycle.internal.LifecycleModuleBuilder.buildProject(LifecycleModuleBuilder.java:80)

at org.apache.maven.lifecycle.internal.builder.singlethreaded.SingleThreadedBuilder.build(SingleThreadedBuilder.java:51)

at org.apache.maven.lifecycle.internal.LifecycleStarter.execute(LifecycleStarter.java:128)

at org.apache.maven.DefaultMaven.doExecute(DefaultMaven.java:307)

at org.apache.maven.DefaultMaven.doExecute(DefaultMaven.java:193)

at org.apache.maven.DefaultMaven.execute(DefaultMaven.java:106)

at org.apache.maven.cli.MavenCli.execute(MavenCli.java:863)

at org.apache.maven.cli.MavenCli.doMain(MavenCli.java:288)

at org.apache.maven.cli.MavenCli.main(MavenCli.java:199)

at sun.reflect.NativeMethodAccessorImpl.invoke0(Native Method)

at sun.reflect.NativeMethodAccessorImpl.invoke(NativeMethodAccessorImpl.java:62)

at sun.reflect.DelegatingMethodAccessorImpl.invoke(DelegatingMethodAccessorImpl.java:43)

at java.lang.reflect.Method.invoke(Method.java:497)

at org.codehaus.plexus.classworlds.launcher.Launcher.launchEnhanced(Launcher.java:289)

at org.codehaus.plexus.classworlds.launcher.Launcher.launch(Launcher.java:229)

at org.codehaus.plexus.classworlds.launcher.Launcher.mainWithExitCode(Launcher.java:415)

at org.codehaus.plexus.classworlds.launcher.Launcher.main(Launcher.java:356)

Caused by: org.apache.maven.plugin.PluginExecutionException: Execution default-cli of goal org.apache.camel:camel-maven-plugin:2.15.1.redhat-621084:run failed: Plugin org.apache.camel:camel-maven-plugin:2.15.1.redhat-621084 or one of its dependencies could not be resolved: Failed to collect dependencies at org.apache.camel:camel-maven-plugin:jar:2.15.1.redhat-621084 -> org.apache.maven.reporting:maven-reporting-impl:jar:2.0.5 -> org.apache.maven.doxia:doxia-site-renderer:jar:1.0 -> org.apache.velocity:velocity:jar:1.5 -> commons-collections:commons-collections:jar:3.2.1.redhat-7

at org.apache.maven.plugin.DefaultBuildPluginManager.executeMojo(DefaultBuildPluginManager.java:106)

at org.apache.maven.lifecycle.internal.MojoExecutor.execute(MojoExecutor.java:207)

... 20 more

Caused by: org.apache.maven.plugin.PluginResolutionException: Plugin org.apache.camel:camel-maven-plugin:2.15.1.redhat-621084 or one of its dependencies could not be resolved: Failed to collect dependencies at org.apache.camel:camel-maven-plugin:jar:2.15.1.redhat-621084 -> org.apache.maven.reporting:maven-reporting-impl:jar:2.0.5 -> org.apache.maven.doxia:doxia-site-renderer:jar:1.0 -> org.apache.velocity:velocity:jar:1.5 -> commons-collections:commons-collections:jar:3.2.1.redhat-7

at org.apache.maven.plugin.internal.DefaultPluginDependenciesResolver.resolveInternal(DefaultPluginDependenciesResolver.java:214)

at org.apache.maven.plugin.internal.DefaultPluginDependenciesResolver.resolve(DefaultPluginDependenciesResolver.java:149)

at org.apache.maven.plugin.internal.DefaultMavenPluginManager.createPluginRealm(DefaultMavenPluginManager.java:400)

at org.apache.maven.plugin.internal.DefaultMavenPluginManager.setupPluginRealm(DefaultMavenPluginManager.java:372)

at org.apache.maven.plugin.DefaultBuildPluginManager.getPluginRealm(DefaultBuildPluginManager.java:231)

at org.apache.maven.plugin.DefaultBuildPluginManager.executeMojo(DefaultBuildPluginManager.java:102)

... 21 more

Caused by: org.eclipse.aether.collection.DependencyCollectionException: Failed to collect dependencies at org.apache.camel:camel-maven-plugin:jar:2.15.1.redhat-621084 -> org.apache.maven.reporting:maven-reporting-impl:jar:2.0.5 -> org.apache.maven.doxia:doxia-site-renderer:jar:1.0 -> org.apache.velocity:velocity:jar:1.5 -> commons-collections:commons-collections:jar:3.2.1.redhat-7

at org.eclipse.aether.internal.impl.DefaultDependencyCollector.collectDependencies(DefaultDependencyCollector.java:291)

at org.eclipse.aether.internal.impl.DefaultRepositorySystem.collectDependencies(DefaultRepositorySystem.java:316)

at org.apache.maven.plugin.internal.DefaultPluginDependenciesResolver.resolveInternal(DefaultPluginDependenciesResolver.java:202)

... 26 more

Caused by: org.eclipse.aether.resolution.ArtifactDescriptorException: Failed to read artifact descriptor for commons-collections:commons-collections:jar:3.2.1.redhat-7

at org.apache.maven.repository.internal.DefaultArtifactDescriptorReader.loadPom(DefaultArtifactDescriptorReader.java:329)

at org.apache.maven.repository.internal.DefaultArtifactDescriptorReader.readArtifactDescriptor(DefaultArtifactDescriptorReader.java:198)

at org.eclipse.aether.internal.impl.DefaultDependencyCollector.resolveCachedArtifactDescriptor(DefaultDependencyCollector.java:535)

at org.eclipse.aether.internal.impl.DefaultDependencyCollector.getArtifactDescriptorResult(DefaultDependencyCollector.java:519)

at org.eclipse.aether.internal.impl.DefaultDependencyCollector.processDependency(DefaultDependencyCollector.java:409)

at org.eclipse.aether.internal.impl.DefaultDependencyCollector.processDependency(DefaultDependencyCollector.java:363)

at org.eclipse.aether.internal.impl.DefaultDependencyCollector.process(DefaultDependencyCollector.java:351)

at org.eclipse.aether.internal.impl.DefaultDependencyCollector.doRecurse(DefaultDependencyCollector.java:504)

at org.eclipse.aether.internal.impl.DefaultDependencyCollector.processDependency(DefaultDependencyCollector.java:458)

at org.eclipse.aether.internal.impl.DefaultDependencyCollector.processDependency(DefaultDependencyCollector.java:363)

at org.eclipse.aether.internal.impl.DefaultDependencyCollector.process(DefaultDependencyCollector.java:351)

at org.eclipse.aether.internal.impl.DefaultDependencyCollector.collectDependencies(DefaultDependencyCollector.java:254)

... 28 more

Caused by: org.apache.maven.model.resolution.UnresolvableModelException: Failure to find org.apache.commons:commons-parent:pom:22-redhat-2 in https://repo1.maven.org/maven2 was cached in the local repository, resolution will not be reattempted until the update interval of central has elapsed or updates are forced

at org.apache.maven.repository.internal.DefaultModelResolver.resolveModel(DefaultModelResolver.java:177)

at org.apache.maven.repository.internal.DefaultModelResolver.resolveModel(DefaultModelResolver.java:226)

at org.apache.maven.model.building.DefaultModelBuilder.readParentExternally(DefaultModelBuilder.java:1000)

at org.apache.maven.model.building.DefaultModelBuilder.readParent(DefaultModelBuilder.java:800)

at org.apache.maven.model.building.DefaultModelBuilder.build(DefaultModelBuilder.java:329)

at org.apache.maven.repository.internal.DefaultArtifactDescriptorReader.loadPom(DefaultArtifactDescriptorReader.java:320)

... 47 more

Caused by: org.eclipse.aether.resolution.ArtifactResolutionException: Failure to find org.apache.commons:commons-parent:pom:22-redhat-2 in https://repo1.maven.org/maven2 was cached in the local repository, resolution will not be reattempted until the update interval of central has elapsed or updates are forced

at org.eclipse.aether.internal.impl.DefaultArtifactResolver.resolve(DefaultArtifactResolver.java:444)

at org.eclipse.aether.internal.impl.DefaultArtifactResolver.resolveArtifacts(DefaultArtifactResolver.java:246)

at org.eclipse.aether.internal.impl.DefaultArtifactResolver.resolveArtifact(DefaultArtifactResolver.java:223)

at org.apache.maven.repository.internal.DefaultModelResolver.resolveModel(DefaultModelResolver.java:173)

... 52 more

Caused by: org.eclipse.aether.transfer.ArtifactNotFoundException: Failure to find org.apache.commons:commons-parent:pom:22-redhat-2 in https://repo1.maven.org/maven2 was cached in the local repository, resolution will not be reattempted until the update interval of central has elapsed or updates are forced

at org.eclipse.aether.internal.impl.DefaultUpdateCheckManager.newException(DefaultUpdateCheckManager.java:231)

at org.eclipse.aether.internal.impl.DefaultUpdateCheckManager.checkArtifact(DefaultUpdateCheckManager.java:206)

at org.eclipse.aether.internal.impl.DefaultArtifactResolver.gatherDownloads(DefaultArtifactResolver.java:585)

at org.eclipse.aether.internal.impl.DefaultArtifactResolver.performDownloads(DefaultArtifactResolver.java:503)

at org.eclipse.aether.internal.impl.DefaultArtifactResolver.resolve(DefaultArtifactResolver.java:421)

... 55 more

It took me some time to get this resolved in the end the solution was configuring another maven plugin repository:


<pluginRepository>
  <id>redhat</id>
  <url>https://maven.repository.redhat.com/ga/</url>
  <releases>
    <enabled>true</enabled>
  </releases>
</pluginRepository>

 
1 Comment

Posted by on 2016-01-31 in JBoss Fuse


Tags: , ,

Using a custom BundleActivator class in your Camel OSGi bundle

For those not familiar with the BundleActivator class in OSGi it is used to control the startup and shutdown of an OSGi bundle. From the OSGI wiki:

“Bundle-Activator is a Manifest Header which specifies a class, implementing the org.osgi.framework.BundleActivator interface, which will be called at bundle activation time and deactivation time.”

When implementing a Camel context and deploying it as an OSGi bundle (for example when using JBoss Fuse or Apache Servicemix) no custom bundleactivator is used. In this post I will explain how to create a custom BundleActivator and add to the manifest of the OSGi bundle.

Creating the custom BundleActivator class

As the quote from above states we need to implement the BundleActivator interface. We create a new Java class implementing this interface.

When we implement the interface we need to implement two methods. The auto-generated method stubs created by Eclipse look like this:


package nl.rubix.custombundleactovator;

import org.osgi.framework.BundleActivator;
import org.osgi.framework.BundleContext;

public class MyBundleActivator implements BundleActivator{

    @Override
    public void start(BundleContext arg0) throws Exception {
        // TODO Auto-generated method stub
        
    }

    @Override
    public void stop(BundleContext arg0) throws Exception {
        // TODO Auto-generated method stub
        
    }

}

The methods are quite self-explanatory, the start method is called when the OSGi bundle is started, the stop method when the bundle is stopped 🙂

To demonstrate the BundleActivator some simple logging is added so we have something to look at.


package nl.rubix.custombundleactovator;

import org.apache.log4j.Logger;
import org.osgi.framework.BundleActivator;
import org.osgi.framework.BundleContext;

public class MyBundleActivator implements BundleActivator{

    private Logger logger = Logger.getLogger(this.getClass());
    
    @Override
    public void start(BundleContext arg0) throws Exception {
        logger.info("look ma im here.....");
    }

    @Override
    public void stop(BundleContext arg0) throws Exception {
        logger.info("screw you guys im going home...");
    }

}

Adding the custom BundleActivator to the OSGi bundle

To add the custom BundleActivator to the OSGi bundle we can use the maven felix plugin. When using the JBoss Fuse packaged product from Red Hat it is actually a best practice to use the maven plugin for creating the OSGi manifest. https://access.redhat.com/documentation/en-US/Red_Hat_JBoss_Fuse/6.2/html/Deploying_into_the_Container/BestPractices.html#BestPractices-Tooling-UTMBPTGTM

To add the custom BundleActivator class add the Bundle-Activator option to the configuration instructions and point to the class.


<!-- to generate the MANIFEST-FILE of the bundle -->
<plugin>
<groupId>org.apache.felix</groupId>
<artifactId>maven-bundle-plugin</artifactId>
<version>2.3.7</version>
<extensions>true</extensions>
<executions>
  <execution>
   <id>bundle-manifest</id>
   <phase>process-classes</phase>
   <goals>
       <goal>manifest</goal>
   </goals>
  </execution>
</executions>
<configuration>
  <instructions>
    <Bundle-SymbolicName>custombundleactivator</Bundle-SymbolicName>
    <Private-Package>nl.rubix.custombundleactovator.*</Private-Package>
    <Bundle-Activator>nl.rubix.custombundleactovator.MyBundleActivator</Bundle-Activator>
    <Import-Package>*</Import-Package>
  </instructions>
</configuration>
</plugin>

Deploying and testing

The OSGi bundle with a custom BundleActivator requires no special treatment regarding deployment. (kinda depends on what you put in the BundleActivator class of cource but generally speaking no special action is required). Just deploy the bundle like you would deploy any other.

In this example the OSGi bundle also contains the a Camel context with one timer base route which logs a message to the fuse.log every five seconds.

When we deploy the bundle and let it run for a couple of seconds before stopping the log looks like this:

custom-bundleactivator-1


Leave a comment

Posted by on 2015-08-31 in JBoss Fuse


Tags: , , , , ,

ActiveMQ DLQ use OriginalDestination in Camel

Ah the DLQ, the place where messages go to die. When messages end up in the DLQ (Dead letter queue) of ActiveMQ they receive an additional message header with the queue name where the message resided originally. This message header called Original Destination, can be viewed from Hawtio.

DLQSubscriber-1

When using Apache Camel as a subscriber I noticed something strange. Normally all JMS Headers and properties are mapped to the Camel Exchange headers and properties. However, the OriginalDestination header was not.

For example when creating this dummy route for testing purposes I got the following output:


package nl.rubix.dlqsubscriber.dlqsubscriber;

import org.apache.camel.builder.RouteBuilder;

public class DLQSubscriberRouteBuilder extends RouteBuilder{

    @Override
    public void configure() throws Exception {
        from("amq:queue:ActiveMQ.DLQ").log("${headers}");
    }

}


[#0 - JmsConsumer[ActiveMQ.DLQ]] route1                         INFO {breadcrumbId=ID:localhost.localdomain-39943-1438348606321-13:1:1:1:1, CamelJmsDeliveryMode=2, dlqDeliveryFailureCause=java.lang.Throwable: Message Expired. Expiration:1438348926673, JMSCorrelationID=null, JMSDeliveryMode=2, JMSDestination=queue://ActiveMQ.DLQ, JMSExpiration=0, JMSMessageID=ID:localhost.localdomain-39943-1438348606321-15:1:1:1:1, JMSPriority=4, JMSRedelivered=false, JMSReplyTo=null, JMSTimestamp=1438348926663, JMSType=null, JMSXGroupID=null, JMSXUserID=null, originalExpiration=1438348926673}

I spent quite some time trying to figure out what happened when I realized the JMS message on the DLQ is not the exact same message from the original queue with some extra headers and properties. The original message seems to be wrapped inside the message placed on the DLQ. To access this message we need to work with the “raw” JMSMessage from ActiveMQ rather the processed message from Camel. This can be done by creating a processor which uses a typeconverter in Camel to get the JMS message from the Camel exchange.

In the code below I created a processor which fetches the inner message and from that message retrieves the originalDestination property (which is an instance variable on the ActiveMQMessage class (ActiveMQTextMessage is a subclass of ActiveMQMessage) and places this property as an header on the Camel exchange.


package nl.rubix.dlqsubscriber.dlqsubscriber;

import org.apache.activemq.command.ActiveMQTextMessage;
import org.apache.camel.Exchange;
import org.apache.camel.Processor;
import org.apache.camel.component.jms.JmsMessage;

public class DQLMessageProcessor implements Processor{

    @Override
    public void process(Exchange exchange) throws Exception {
        JmsMessage jmsMsg = exchange.getIn().getBody(JmsMessage.class);
        ActiveMQTextMessage innerMsg = (ActiveMQTextMessage) jmsMsg.getJmsMessage();
        exchange.getIn().setHeader("OriginalDestination", innerMsg.getOriginalDestination());
    }

}


Now when observing the output log of .log(“${headers}”) we see the OriginalDestination header in the log output:


[#0 - JmsConsumer[ActiveMQ.DLQ]] route1                         INFO {breadcrumbId=ID:localhost.localdomain-39943-1438348606321-21:1:1:1:1, CamelJmsDeliveryMode=2, dlqDeliveryFailureCause=java.lang.Throwable: Message Expired. Expiration:1438350527570, JMSCorrelationID=null, JMSDeliveryMode=2, JMSDestination=queue://ActiveMQ.DLQ, JMSExpiration=0, JMSMessageID=ID:localhost.localdomain-39943-1438348606321-15:4:1:1:1, JMSPriority=4, JMSRedelivered=false, JMSReplyTo=null, JMSTimestamp=1438350527560, JMSType=null, JMSXGroupID=null, JMSXUserID=null, OriginalDestination=queue://test2, originalExpiration=1438350527570}

In the end it costs me quite some time to grab the concept of fetching the ActiveMQTextMessage from the JmsMessage, since I was under the impression the Camel ActiveMQ component does this out of the box.

Anyway I hope it helps someone.


1 Comment

Posted by on 2015-07-31 in JBoss Fuse


Tags: , , , , ,

JBoss Fuse 6.2 a first look at the http gateway

Tech preview in 6.1 the http gateway for Fuse fabric is in full support in JBoss Fuse 6.2. The http gateway (and mq gateway for ActiveMQ) offers a gateway for clients not residing inside the fabric to services within the fabric. When not using this kind of functionality services have to be running on particular IP addresses and ports for clients to connect to them. Even when using a loadbalancer, the loadbalancer has to know on what IP and port combination the services are running. The whole concept of fabric and containers in general is that they become IP agnostic, it does not really matter where and how many services/containers are running as long as they can handle the load. This IP agnosticism introduces complexity for clients who need to connect to these services. The http gateway offers a solution for this complexity by using autodiscovery based on the Zookeeper registry of Fuse fabric and exposes itself for external clients on one static port. So now only the http gateway needs to be deployed on a static IP and port, while the services can be deployed on any container inside the fabric.

Prior to the 6.2 release this autodiscovery mechanism needed to be built automatically and a dumbed down version of the gateway could be build using Camel. I have blogged about creating both a service and a client (acting as a dumbed down gateway, I called it proxy in my post) here:

https://pgaemers.wordpress.com/2015/02/26/fabric-load-balancer-for-cxf-part-1/
https://pgaemers.wordpress.com/2015/03/16/fabric-load-balancer-for-cxf-part-2/


Now that the http gateway is in full support let’s take a look at it.

Deploying a service

To hit the ground running I’ve used the Rest Quickstart example provided in JBoss Fuse. I just simply create a new fabric container with the quickstarts/cxf/rest profile:

http-gateway-1

After the container is started it provides a Rest service with four verbs, for the purpose demoing the http gateway we will be using only the get operation since it is the simplest to invoke.http-gateway-7a

In Hawtio when navigating to Services -> APIs we can see the API provided by the REST quickstart is registered inside Fuse. We can browse the endpoint or retrieve the WADL.

http-gateway-2When invoking the get operation from a browser we can fetch a response.

http-gateway-3

When we connect to the container and inspect the log file we can see the following entries:

We can see the invoked endpoint is: http://10.0.2.15:8182/cxf/crm/customerservice/customers/123

Deploying the http gateway

Deploying the standard out of the box http gateway couldn’t be simpler. Just spin up a new container and add the Gateway/http profile to it.

http-gateway-5

By default the http gateway is exposed on port 9000 and since we do not have any custom mapping rules implemented the context path of the service is used by the gateway as is. This means we can use the same URI as the previous request except for the port which is now 9000. So when invoking this endpoint we get the same response we previously got: http://10.0.2.15:9000/cxf/crm/customerservice/customers/123/

http-gateway-6

When looking at the log file of the container hosting our service we can now see the following entries:

http-gateway-4

We can see the request came from port 9000

Replicating the service

But what happens when we create another instance of our rest quickstart service by creating another container with the same profile. Or replicating our container.

Since the rest quickstarts has a relative path configured JBoss Fuse Fabric allocates a port for when provisioning a container with the rest quickstart. In our first container this was 8182. To see the endpoint of our new container we can again go to the Services -> APIs tab in Hawtio and take look:

http-gateway-8

Here we see the latest instance of the service is bound to port 8184, and indeed when we invoke this endpoint we retrieve the expected response:

http-gateway-9When using the gateway endpoint (port 9000) to invoke the service we can observe the logs of both containers to see gateway requests are fed to both endpoints:

http-gateway-10

http-gateway-11

This means clients wanting to invoke this service can use the gateway endpoint, in this example invoke the 9000 port and requests get automatically redirected to the service containers. Dynamically reallocating the services to new IP addresses and/or ports does not effect this as long as the service is inside the fabric and the endpoint is registered inside Zookeeper!


Configuring the http gateway

Until now we have been running the http gateway in the standard configuration. This means the rules for redirecting are taking the contextpath of the service. That’s why we only had to change the port number to direct our browser to the gateway rather than one of the service directly. It is however possible to change the configuration of the gateway profile and have different mapping rules.

To change the configuration of the http gateway we have to modify the properties stored in the gateway/http profile. Make sure you modify the properties in the profile and not in the child container running the profile since this can cause synchronization problems inside the fabric. When changing properties always do it in the profile/configuration registry.

This can be done by utilizing the GIT api of the Fabric configuration registry directly or by using Hawtio. For this demo we are going to use Hawtio.

http-gateway-12

When using Hawtio to browse to the http gateway profile we can see the four property files containing the mapping rules:

  • fabric8.gateway.http.mapping-apis.properties
  • fabric8.gateway.http.mapping-git.properties
  • fabric8.gateway.http.mapping-servlets.properties
  • fabric8.gateway.http.mapping-webapps.properties

The mapping rules, and property files, are devided in four different categories. In the documentation it is explained what those categories are: https://access.redhat.com/documentation/en-US/Red_Hat_JBoss_Fuse/6.2/html/Fabric_Guide/Gateway-Config.html

Our rest quickstart falls under the mapping-apis category so we will have to modify the “io.fabric8.gateway.http.mapping-apis.properties” file. This can be done straight from Hawtio.

Simply click that particular property file and the read-only mode opens.

http-gateway-13

Here we see the path in the Zookeeper registry where the endpoints of all APIs are located. To edit the file simply click edit.

As mentioned before the default mapping rule maps the zookeeperPath to the contextpath. But we can insert our own paths.

To modify the mapping add the following property to the property file:

uriTemplate: /mycoolpath{contextPath}/

The complete file looks like this:

#
#  Copyright 2005-2014 Red Hat, Inc.
#
#  Red Hat licenses this file to you under the Apache License, version
#  2.0 (the "License"); you may not use this file except in compliance
#  with the License.  You may obtain a copy of the License at
#
#     http://www.apache.org/licenses/LICENSE-2.0
#
#  Unless required by applicable law or agreed to in writing, software
#  distributed under the License is distributed on an "AS IS" BASIS,
#  WITHOUT WARRANTIES OR CONDITIONS OF ANY KIND, either express or
#  implied.  See the License for the specific language governing
#  permissions and limitations under the License.
#

zooKeeperPath = /fabric/registry/clusters/apis
uriTemplate: /mycoolpath{contextPath}/

Now when we go to this url: http://localhost:9000/mycoolpath/cxf/crm/customerservice/customers/123/ we get the response from the service.

http-gateway-14

In the example above we just changed the uriTemplate property. For more finegrained URL rules we can add extra rules also modifying the zooKeeperPath property. For example to split REST and SOAP APIs.

The http gateway is a very handy tool to solve the problem of having to know what service is running on what container binding to what port. Since it uses the Zookeeper registry of the fabric it can enable making the services container agnostic. It should also help tremendously when securing the fabric. The gateway can drastically reduce the amount of ports that need to be opened for the outside world and can make configuring external proxies and load balancers a lot easier.

 
Leave a comment

Posted by on 2015-07-18 in JBoss Fuse


Tags: , , , , ,

JBoss Fuse 6.2 – a first look at the data transformation mapper

JBoss Fuse 6.2 is just release and one of the new exiting features is the new, graphical, data transformation component. And although still in tech preview phase I got curious and started to play with it. Now there are already some good tutorials available. For example this one: https://vimeo.com/131250890

After tinkering around a bit with the new feature I found some peculiarities which I will share here.

Project setup

I decided to go with a similar setup as in the tutorial described above. Transforming a xml document into a JSON document.

The xsd for the xml document I used looks like this:

<?xml version="1.0" encoding="UTF-8"?>
<xs:schema attributeFormDefault="unqualified" elementFormDefault="qualified" xmlns:xs="http://www.w3.org/2001/XMLSchema">
  <xs:element name="Person">
    <xs:complexType>
      <xs:sequence>
        <xs:element name="PersonDetails">
          <xs:complexType>
            <xs:sequence>
              <xs:element type="xs:string" name="firstName"/>
              <xs:element type="xs:string" name="lastName"/>
              <xs:element type="xs:integer" name="age"/>
            </xs:sequence>
          </xs:complexType>
        </xs:element>
        <xs:element name="Addresses">
          <xs:complexType>
            <xs:sequence>
            <xs:element name="Address" minOccurs="0" maxOccurs="unbounded">
                <xs:complexType>
                    <xs:sequence>
                        <xs:element type="xs:string" name="street"/>
                        <xs:element type="xs:string" name="city"/>
                        <xs:element type="xs:string" name="country"/>
                    </xs:sequence>
                </xs:complexType>
            </xs:element>
            </xs:sequence>
          </xs:complexType>
        </xs:element>
      </xs:sequence>
    </xs:complexType>
  </xs:element>
</xs:schema>

The JSON sample doc looks like this:

{"name":"dummyName",
"sirName":"dummySirName",
"age":"32",
"addresses":[
{"streetname":"dummyStreet","cityname":"dummyCity","countryname":"dummyCountry"},
{"streetname":"dummyStreet2","cityname":"dummyCity2","countryname":"dummyCountry2"}
]}

Since we are concentrating on the data transformation the rest of the project setup is not really all that important. I initially created a pass-through route with a direct and a mock endpoint:

datatransformation-1When creating a new data transformation drag and drop the “Data Transformation” component from the palette to the canvas.

datatransformation-2This will bring up the wizard for setting up the data transformation.

datatransformation-3The “Transformation ID” field is a unique identifier for the transformation, similar to the id field in a bean defined in the OSGi Blueprint configuration. The “Source Type” and “Target Type” drop downs allow you to select the source and target specifications.

datatransformation-4The choices in the drop down are Java, XML, JSON and other. Other basically means you have to generate/create your own java type representation of the message format. For example using Bindy or BeanIO for CSV messages. Using the XML and JSON options will generate the java object for you on the fly, which is very handy.

When selecting XML as the source and JSON as the Target type and click next the next screen is the xml type window.

datatransformation-5Here we can select our XML schema as source file and select Person as root element. A preview is displayed in the “XML Structure Preview” window.

datatransformation-6Clicking “next” we move on to the JSON type window.

datatransformation-7

When clicking “Finish” the graphical Data Transformation screen is displayed and we can begin mapping the fields.

datatransformation-8

To map the fields simply drag the source field to the required target field.

Note, since we have repeating groups in both the xml and JSON messages we also need to drag and drop address to addresses. The complete mapping looks like this:

datatransformation-9

Now we have to wire the components in the route together to finish things up.

datatransformation-10

Peaking under the covers:

When switching to the source mode of the Blueprint configuration we can see what the wizard has setup:


<?xml version="1.0" encoding="UTF-8"?>
<blueprint xmlns="http://www.osgi.org/xmlns/blueprint/v1.0.0"
       xmlns:xsi="http://www.w3.org/2001/XMLSchema-instance"
       xsi:schemaLocation="
       http://www.osgi.org/xmlns/blueprint/v1.0.0 http://www.osgi.org/xmlns/blueprint/v1.0.0/blueprint.xsd
       http://camel.apache.org/schema/blueprint http://camel.apache.org/schema/blueprint/camel-blueprint.xsd">

  <camelContext xmlns="http://camel.apache.org/schema/blueprint">
  <endpoint uri="dozer:myfirstdatatransform?sourceModel=persons.Person&amp;targetModel=personsjson.Personsjson&amp;marshalId=transform-json&amp;unmarshalId=persons&amp;mappingFile=transformation.xml" id="myfirstdatatransform"/>
  <dataFormats>
    <jaxb contextPath="persons" id="persons"/>
    <json library="Jackson" id="transform-json"/>
  </dataFormats>
  <route>
    <from uri="direct:start"/>
    <to ref="myfirstdatatransform"/>
    <to uri="mock:output"/>
  </route>
</camelContext>

</blueprint>

As we can see an endpoint has been created and configured with the Dozer component. Also two data formats have been created representing the xml schema and JSON documents respectively.

When looking at the project explorer we can also see the generated Java classes:

datatransformation-11


Testing the transformation

Now that our transformation is finished we need to test it. Luckilly Fuse provides the generation of a unit test for data transformations:

datatransformation-12In the wizard simply point to the Blueprint containing the data transformation and the data transformation file and hit finish:

datatransformation-13This generates a Camel Junit test, containing a stub Camel route, a producertemplate and a helper method for reading files (for feeding the producertemplate). The generated test class looks like this:


package nl.rubix.datatransformation.datatransformationtest;

import java.io.FileInputStream;

import org.apache.camel.EndpointInject;
import org.apache.camel.Produce;
import org.apache.camel.ProducerTemplate;
import org.apache.camel.builder.RouteBuilder;
import org.apache.camel.component.mock.MockEndpoint;
import org.apache.camel.test.blueprint.CamelBlueprintTestSupport;
import org.junit.Test;

public class TransformationTest extends CamelBlueprintTestSupport {
    
    @EndpointInject(uri = "mock:myfirstdatatransform-test-output")
    private MockEndpoint resultEndpoint;
    
    @Produce(uri = "direct:myfirstdatatransform-test-input")
    private ProducerTemplate startEndpoint;
    
    @Test
    public void transform() throws Exception {
        
    }
    
    @Override
    protected RouteBuilder createRouteBuilder() throws Exception {
        return new RouteBuilder() {
            public void configure() throws Exception {
                from("direct:myfirstdatatransform-test-input")
                    .log("Before transformation:\n ${body}")
                    .to("ref:myfirstdatatransform")
                    .log("After transformation:\n ${body}")
                    .to("mock:myfirstdatatransform-test-output");
            }
        };
    }
    
    @Override
    protected String getBlueprintDescriptor() {
        return "OSGI-INF/blueprint/blueprint.xml";
    }
    
    private String readFile(String filePath) throws Exception {
        String content;
        FileInputStream fis = new FileInputStream(filePath);
        try {
             content = createCamelContext().getTypeConverter().convertTo(String.class, fis);
        } finally {
            fis.close();
        }
        return content;
    }
}

To complete our test just fill in our test method and we’re good to go. For this example we are just going to feed the producertemplate with a sample document and check the log. Normally you would create a more detailed unit test containing assertions and what not.

Our filled in test method looks like this:


@Test
public void transform() throws Exception {
 startEndpoint.sendBody("direct:myfirstdatatransform-test-input", readFile("src/test/resources/dummyInput.xml"));
}

Now run it as a Junit test and inspect the log.

When inspecting the log we can see our transformation working and producing the following JSON document:

{"name":"testFirstName","sirName":"testLastName","age":"32","addresses":[{"streetname":"teststreet","cityname":"testcity","countryname":"testcountry"},{"streetname":"teststreet2","cityname":"testcity2","countryname":"testcountry2"}]}

A simple use case and a gotcha

Now above we created one of the simplest transformations imaginable. A common use case and still pretty straightforward is performing some filter action inside a loop. In this example we want to filter out some addresses in our transformation. As an example we only want to transform the address with “testcountry2” and ignore all others. A real life scenario would for example filter all billing addresses from postal addresses.

The data transformation offers next to the basic field mapping we’ve looked at previously also a couple of other options.

When selecting the mapping we want add the filter (address -> addresses) we can click to get the extra options:

datatransformation-14

The “Set field” option is just what we already performed to select a target and source field for the transformation. The “Set variable” allows us to use a variable we can define on the variable tab on the source pane. The “Set expression” allows us to leverage on of the Camel supported expression languages to perform some data manipulation. And finally the “Add custom function” allows us to create a Java helper method so some custom transformation logic can be implemented.

Since using XML as source for the data transformation, I initially tried to create an xpath expression performing the filtering. After all filtering in xpath is quite easy to do. However here I experienced some behaviour I did not expect.

In the menu above select “Set expression”, a new window pops up:

I selected xpath and entered the following expression:

/Person/Addresses/Address[country = “testcountry2”]

However, when observing the output log I encountered the following output:

{"name":"testFirstName","sirName":"testLastName","age":"32","addresses":["<?xml version=\"1.0\" encoding=\"UTF-16\"?>\n<Address>\n           <street>teststreet2</street>\n           <city>testcity2</city>\n           <country>testcountry2</country>\n       </Address>"]}

Basically, two things have happened, first the filtering is performed correctly, but the output of the filter is “paste” into the target field. This is also mentioned in the tutorial I linked to above, but this does mean this simple use case is not supported using expressions. This also seems a bit unintuitive. To implement the filter use case I ended up creating a custom function.

After removing the xpath, by drag and drop the address field again. In the menu presented in the last screenshot select “Add custom function”. The following wizard pops up:

datatransformation-15

Click the “C” button to create a new class. In the screen that follows, select a Java package, enter a Class name and select the Return type and Parameter type.

datatransformation-16

The following class is generated:


package nl.rubix.datatransformation.datatransformationtest;

public class FilterTest {

    public java.util.List< ? > map(java.util.List< ? > input) {
        return null;
    }

}

Luckily we can use the new Java 8 collection types and lambda expressions which eases the implementation of our filtering. The finished FilterTest class looks like this:


package nl.rubix.datatransformation.datatransformationtest;

import java.util.ArrayList;
import java.util.List;
import java.util.stream.Collectors;

import persons.Person.Addresses.Address;

public class FilterTest {

    public ArrayList<personsjson.Address> map(ArrayList<Address> input) {
        List<personsjson.Address> filteredAddress = input.stream().filter(c -> c.getCountry().equals("testcountry2")).map(Address -> createAddress(Address)).collect(Collectors.toList());
        
        return (ArrayList<personsjson.Address>) filteredAddress;
    }
    
    private personsjson.Address createAddress(Address personAddress){
        personsjson.Address address = new personsjson.Address();
        address.setCityname(personAddress.getCity());
        address.setCountryname(personAddress.getCountry());
        address.setCountryname(personAddress.getCountry());
        
        return address;
    }

}

Now when we run the unit test and observe the logging we can see the correctly formatted JSON.

{"name":"testFirstName","sirName":"testLastName","age":"32","addresses":[{"cityname":"testcity2","countryname":"testcountry2"}]}

Although the data transformation functionality is very nice, I am a bit disappointed that for such a simple and common use case as filtering a custom Java class has to be created. This will probably mean for most data transformation we still cannot eliminate custom code. Something a graphical data transformation tool should aim at. But in all fairness the data transformation is still in tech-preview phase so who knows how it will look like and perform when it is officially supported.

 
Leave a comment

Posted by on 2015-07-05 in JBoss Fuse


Tags: , , ,

JBoss Fuse, CXF, java.io.IOException: Could not load keystore resource

I was recently tasked with enabling TLS on a CXF webservice hosted on JBoss Fuse. Since it was the first time I actually needed to enable the TLS within JBoss Fuse (with CXF) I was looking at some pointers. Luckily Red Had provides an excellent tutorial in their Security guide documentation. Which can be found here: https://access.redhat.com/documentation/en-US/Red_Hat_JBoss_Fuse/6.2/html/Security_Guide/CamelCXF-SecureProxy.html
This is an excellent step by step tutorial for setting up a TLS secured webservice. However the example is using Spring, and I was required to using OSGi Blueprint. Not a problem, usually it is a matter of finding the right namespaces and some minor changes in the xml config which are quite simple using this site: http://cxf.apache.org/docs/schemas-and-namespaces.html

However I was getting some strange behavior when I tried loading the Java Keystore resource from the file system, which was another requirement, rather than the classpath. I kept getting the java.io.IOException: Could not load keystore resource

My Blueprint configuration was as follows:


<cxfcore:bus/>
  
<httpj:engine-factory bus="cxf">
  <httpj:engine port="${port}">
    <httpj:tlsServerParameters secureSocketProtocol="${ secureSocketProtocol}">
      <sec:keyManagers keyPassword="${key.password}">
        <sec:keyStore resource="${keystoreLocation}" password="${keystore.password}" type="JKS"/>
      </sec:keyManagers>
      <sec:trustManagers>
        <sec:keyStore resource="${truststoreLocation}" password="${truststore.password}" type="JKS"/>
      </sec:trustManagers>
      <sec:cipherSuitesFilter>
        <sec:include>.*_WITH_3DES_.*</sec:include>
        <sec:include>.*_WITH_DES_.*</sec:include>
        <sec:exclude>.*_WITH_NULL_.*</sec:exclude>
        <sec:exclude>.*_DH_anon_.*</sec:exclude>
      </sec:cipherSuitesFilter>
      <sec:clientAuthentication want="true" required="${clientAuthentication}"/>
    </httpj:tlsServerParameters>
  </httpj:engine>
</httpj:engine-factory>

I spent quite a few hours trying to figure out why it wasn’t loading the Keystore. Was the path and the filename correct? Where the file system access rights setup accordingly? Was there some bundle cache that needed to be flushed?

After a while I found the solution when browsing through the CXF security.xsd, which can be found here (and if setup correctly the url should be in the blueprint.xml file): http://cxf.apache.org/schemas/configuration/security.xsd

Especially the KeyStoreType:


<xs:complexType name="KeyStoreType">
  <xs:annotation>
    <xs:documentation>
    A KeyStoreType represents the information needed to load a collection
    of key and certificate material from a desired location.
    The "url", "file", and "resource" attributes are intended to be
    mutually exclusive, though this assumption is not encoded in schema.
    The precedence order observed by the runtime is
    1) "file", 2) "resource", and 3) "url".
    </xs:documentation>
  </xs:annotation>
    <xs:attribute name="type"     type="xs:string">
      <xs:annotation>
        <xs:documentation>
        This attribute specifies the type of the keystore.
        It is highly correlated to the provider. Most common examples
        are "jks" "pkcs12".
        </xs:documentation>
      </xs:annotation>
    </xs:attribute>
    <xs:attribute name="password" type="xs:string">
      <xs:annotation>
        <xs:documentation>
        This attribute specifes the integrity password for the keystore.
        This is not the password that unlock keys within the keystore.
        </xs:documentation>
      </xs:annotation>
    </xs:attribute>
    <xs:attribute name="provider" type="xs:string">
      <xs:annotation>
        <xs:documentation>
        This attribute specifies the keystore implementation provider.
        Most common examples are "SUN".
        </xs:documentation>
      </xs:annotation>
    </xs:attribute>
    <xs:attribute name="url"      type="xs:string">
      <xs:annotation>
        <xs:documentation>
        This attribute specifies the URL location of the keystore.
        This element should be a properly accessible URL, such as
        "http://..." "file:///...", etc. Only one attribute of
        "url", "file", or "resource" is allowed.
        </xs:documentation>
      </xs:annotation>
    </xs:attribute>
    <xs:attribute name="file"     type="xs:string">
      <xs:annotation>
        <xs:documentation>
        This attribute specifies the File location of the keystore.
        This element should be a properly accessible file from the
        working directory. Only one attribute of
        "url", "file", or "resource" is allowed.
        </xs:documentation>
      </xs:annotation>
    </xs:attribute>
    <xs:attribute name="resource" type="xs:string">
      <xs:annotation>
        <xs:documentation>
        This attribute specifies the Resource location of the keystore.
        This element should be a properly accessible on the classpath.
        Only one attribute of
        "url", "file", or "resource" is allowed.
        </xs:documentation>
      </xs:annotation>
    </xs:attribute>
</xs:complexType>

When modifying the recource to file the keystore was loaded perfectly.

The final config was looking like this:


<cxfcore:bus/>
  
<httpj:engine-factory bus="cxf">
  <httpj:engine port="${port}">
    <httpj:tlsServerParameters secureSocketProtocol="${ secureSocketProtocol}">
      <sec:keyManagers keyPassword="${key.password}">
        <sec:keyStore file="${keystoreLocation}" password="${keystore.password}" type="JKS"/>
      </sec:keyManagers>
      <sec:trustManagers>
        <sec:keyStore file="${truststoreLocation}" password="${truststore.password}" type="JKS"/>
      </sec:trustManagers>
      <sec:cipherSuitesFilter>
        <sec:include>.*_WITH_3DES_.*</sec:include>
        <sec:include>.*_WITH_DES_.*</sec:include>
        <sec:exclude>.*_WITH_NULL_.*</sec:exclude>
        <sec:exclude>.*_DH_anon_.*</sec:exclude>
      </sec:cipherSuitesFilter>
      <sec:clientAuthentication want="true" required="${clientAuthentication}"/>
    </httpj:tlsServerParameters>
  </httpj:engine>
</httpj:engine-factory>


Anyway, I hope it saves someone the hasle.

 
1 Comment

Posted by on 2015-06-23 in JBoss Fuse


Tags: , , , ,

JBoss Fuse Fabric port ranges… oh my…

Recently I had an opportunity for a customer to sort out some of the interconnectivity required between servers for a JBoss Fuse Fabric HA ensemble. Obviously when connecting multiple servers in a Fuse Fabric ensemble interconnectivity between those servers is required. Unfortunately the port (ranges) required by JBoss Fuse Fabric are not all documented, and the ones who are documented are spread out between different documents and sections. So it’s not a bulletproof list down to the digit but, with some trial and error (and some netstat J ) we discovered quite some port ranges.

ActiveMQ

Starting with one of the more well known ports, the ActiveMQ message broker defaults to 61616 (although this can be overridden in the broker xml configuration file). When creating brokers based on fabric profiles and assigning these to child containers ports get increased. We decided to open a range of 61600-61700 for the ActiveMQ brokers. When you add more than one hundred brokers you should probably make some additional changes to the broker xml configuration file anyways, here you could control the port ranges to accommodate to your specific needs).

SSH

The containers in JBoss Fuse Fabric have an Apache Karaf runtime. Apache Karaf acts as its own SSH server. Which are useful for managing these containers. However the Apache Karaf containers in Fuse do not host their SSH servers on port 22 (which is usually reserved for the SSH access to the server), but host their ssh a port range starting with 8100 and increasing with each child container created in the Fabric. So a range of 8100 – 8180 (increasing further will cause conflicts with Jolokia, which we will discuss below) gives the option of creating 80 child containers per server!!

RMI

Now it gets a little bit more dicey, for RMI two separate ranges have to be opened RMI registry and RMI server. We noticed the RMI server starts with a port range of 44444, but when creating some child containers the ports got a bit stranger. They were increasing, as expected, and in the url they neatly increase by one. So a child container gets 44445 (as the root container starts with 44444) and so on. But a netstat –plnt command reveals a lot more open ports a lot higher up the range.
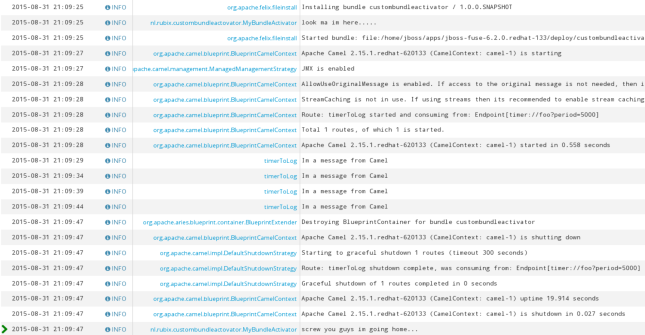
In the documentation for the fabric:create command in the console reference[1] the default max port is documented as 65535. This seems to be corresponding with the RMI server port since a netstat revealed assigned ports in the 50000s for the child containers we created.

For the RMI registry port, the documentation unfortunately does not provide much clearity. The default JMX RMI port is 1099, and this does get used by Fuse Fabric, usually by the root container of that node. However, each child containers has its own RMI registry port. These registry ports increase by one. So we decided to open the range up to 1400 giving ample room for creating and deleting child containers.

The strange thing also is the fact this port range conflicts with the ActiveMQ range. Since an internal port conflict is not something I experienced yet I assume Fuse Fabric has the logic to accommodate for the ranges overlapping.

Controlling the RMI ports for both could be done with the commands admin:change-rmi-registry-port and admin:change-rmi-server-port however, I did not test this in a Fabric ensemble setup!

https://access.redhat.com/documentation/en-US/Red_Hat_JBoss_Fuse/6.1/html/Console_Reference/ConsoleadminChangeRegistryPort.html

https://access.redhat.com/documentation/en-US/Red_Hat_JBoss_Fuse/6.1/html/Console_Reference/ConsoleadminChangeServerPort.html

Fuse Management Console + Jolokia

The default port for the Fuse Management Console is 8181, this is also the port Jolokia uses. For each child container this port gets increased by one. Since we ended our range for the RMI registry at 1400 we will end this range at 8582 for consistency. Although when creating 400 child containers on one machine you’ll have one hell of a server running all these Fabric containers.

Zookeeper

JBoss Fuse Fabric uses Zookeeper as a registry for all sorts of things (for example auto discovery) The default port the Zookeeper registry listens on is 2181. But when creating an ensemble the Zookeeper url gets updated and the port will change, usually increasing by one. Although it is a bit unclear how this port change actually works under the hood. To be on the safe side we went with a port range of 2181 up to 2200.

Fabric Server

The last port ranges are of the Fabric server. I found this one when I did a fabric:config-list and found this entry

Properties:

service.pid = io.fabric8.zookeeper.server.2d360b3a-18bb-4a68-8c94-dccd25e9a2b1

clientPortAddress = 0.0.0.0

syncLimit = 5

server.id = 1

initLimit = 10

service.factoryPid = io.fabric8.zookeeper.server

clientPort = 2182

server.1 = 10.0.2.15:2888:3888

dataDir = data/zookeeper/0001

tickTime = 2000

fabric.zookeeper.pid = io.fabric8.zookeeper.server-0001

Here we see a port range of 2888 to 3888 of the Fabric server.


Some final thoughts

Getting into the interconnectivity between servers in a JBoss Fuse Fabric ensemble is definitely not trivial. Espessially the port ranges of Fuse Fabric are quite esoteric. Hopefully this will get documented soon or become a lot clearer when Fabric V2 arrives.

Anyway all the final port ranges we discovered are listed here:

Usage Port range
ActiveMQ 61600 – 61700
RMI registry 1000 – 1400
RMI server 44444 – 65535
SSH 8100 – 8180
Fuse Management Console + Jolokia 8181 – 8582
Zookeeper 2181 – 2200
Fabric server 2888 – 3888


[1] https://access.redhat.com/documentation/en-US/Red_Hat_JBoss_Fuse/6.1/html/Console_Reference/ConsoleFabricCreate.html

 
Leave a comment

Posted by on 2015-04-26 in JBoss Fuse


Tags: , , , , ,

Fabric load balancer for CXF – Part 2

In part 1 we explored the possibility to use Fabric as a load balancer for multiple CXF http endpoints and had a more detailed look at how to implement the Fabric load balancing feature on a CXFRS service. In this part we will look into the client side of the load balancer feature.

In order to leverage the Fabric load balancer from a client side clients have to be “inside the Fabric” meaning they will need access to the Zookeeper registry.

When we again take a look at a diagram explaining the load balancer feature we can see clients will need to perform a lookup in the Zookeeper registry to obtain the actual endpoints of the http service.

Fabric load balancer CXF Part 1 - 1

As mentioned in part 1 there are two possibilities to accomplish this lookup in the Fabric Zookeeper registry:

As of this moment in JBoss Fuse 6.1 the fabric-http-gateway profile is not fully supported yet. So in this post we will explore the Camel proxy route.

Camel route

A Camel proxy is essentially a Camel route

A Camel proxy is essentially a Camel route which provides a protocol bridge between “regular” http and Fabric load balancing by looking up endpoints in the Fabric (Zookeeper) registry. The Camel route itself can be very straight forward, an example Camel route implementing this proxy can look like:

<camelContext id="cxfProxyContext" trace="false" xmlns="http://camel.apache.org/schema/blueprint">
    <route id="cxfProxyRoute">
        <from uri="cxfrs:bean:proxyEndpoint"/>
        <log message="got proxy request"/>
        <to uri="cxfrs:bean:clientEndpoint"/>
    </route>
</camelContext>

The Fabric load balancer will be implemented on the cxfrs:bean in the Camel route.

Note the Camel route also exposes a CXFRS endpoint in the <from endpoint therefore a regular CXFRS service class and endpoint will have to be created.

The service class is the same we used in part 1 for the service itself:


package nl.rubix.cxf.fabric.ha.test;

import javax.ws.rs.GET;
import javax.ws.rs.Path;
import javax.ws.rs.PathParam;
import javax.ws.rs.Produces;
import javax.ws.rs.core.MediaType;

@Path("/")
public class Endpoint {
    
    @GET
    @Path("/test/{id}")
    @Produces(MediaType.APPLICATION_JSON)
    public String getAssets(@PathParam("id") String id){
        return null;
    }
    
}

The endpoint we will expose our proxy on is configured like this:

<cxf:rsServer id=<strong>"proxyEndpoint"</strong> address=<strong>"http://localhost:1234/proxy"</strong> serviceClass=<strong>"nl.rubix.cxf.fabric.proxy.test.Endpoint"</strong>/>

Implementing the Fabric load balancer

To implement the load balancer on the client side the pom has to be updated just as the server side. Next to the regular cxfrs dependencies add the fabric-cxf dependency to the pom:

<dependency>
    <groupId>io.fabric8</groupId>
    <artifactId>fabric-cxf</artifactId>
    <version>1.0.0.redhat-379</version>
    <type>bundle</type>
</dependency>

And also add the fabric cxf class to the import package in the maven-bundle-plugin to add it to the OSGi manifest file:

<plugin>
    <groupId>org.apache.felix</groupId>
    <artifactId>maven-bundle-plugin</artifactId>
    <version>2.3.7</version>
    <extensions>true</extensions>
    <configuration>
        <instructions>
            <Bundle-SymbolicName>cxf-fabric-proxy-test</Bundle-SymbolicName>
            <Private-Package>nl.rubix.cxf.fabric.proxy.test.*</Private-Package>
            <Import-Package>*,io.fabric8.cxf</Import-Package>
        </instructions>
    </configuration>
</plugin>

The next step is to add the load balancer features to the Blueprint.xml (or Spring if you prefer Spring). These steps are similar to the configuration of the Fabric Load balancer on the Server side discussed in part 1.

So first add the cxf-core namespace to the Blueprint.xml.

xmlns:cxf-core=”http://cxf.apache.org/blueprint/core

Add an OSGi reference to the CuratorFramework OSGi service[1]:


<reference id=<strong>"curator"</strong> interface=<strong>"org.apache.curator.framework.CuratorFramework"</strong> />

Next instantiate the load balancer bean:

Instantiate the FabricLoadBalancerFeature bean:

<bean id="fabricLoadBalancerFeature" class="io.fabric8.cxf.FabricLoadBalancerFeature">
    <property name="curator" ref="curator" />
    <property name="fabricPath" value="cxf/endpoints" />
</bean>

It is important to note the value in the “fabricPath” property must contain the exact same value of the fabricPath of the service the client will invoke. This fabricPath points to the location in the Fabric Zookeeper registry where the endpoints are stored. It is the coupling between the client and service.

To register the Fabric load balancer with the cxfrs:bean used in the to endpoint (we are implementing a client so we must register the Fabric load balancer with the cxfrs bean on the client side). Extend the declaration of the cxfrsclient:

<cxf:rsClient id="clientEndpoint" address="http://dummy/url" serviceClass="nl.rubix.cxf.fabric.proxy.test.Endpoint">
    <cxf:features>
        <ref component-id="fabricLoadBalancerFeature"/>
      </cxf:features>
</cxf:rsClient> 

Add the Fabric load balancer feature to a cxf bus in the rsClient:

<cxf:rsClient id="clientEndpoint" address="http://dummy/url" serviceClass="nl.rubix.cxf.fabric.proxy.test.Endpoint">
    <cxf:features>
        <ref component-id="fabricLoadBalancerFeature"/>
    </cxf:features>
</cxf:rsClient> 

The entire Blueprint.xml for this proxy looks like this:


<?xml version="1.0" encoding="UTF-8"?>
<blueprint xmlns="http://www.osgi.org/xmlns/blueprint/v1.0.0"
       xmlns:xsi="http://www.w3.org/2001/XMLSchema-instance"
       xmlns:camel="http://camel.apache.org/schema/blueprint"
       xmlns:cxf="http://camel.apache.org/schema/blueprint/cxf"
       xmlns:cxf-core="http://cxf.apache.org/blueprint/core"
       xsi:schemaLocation="
       http://www.osgi.org/xmlns/blueprint/v1.0.0 http://www.osgi.org/xmlns/blueprint/v1.0.0/blueprint.xsd
       http://camel.apache.org/schema/blueprint http://camel.apache.org/schema/blueprint/camel-blueprint.xsd">

  <cxf:rsServer id="proxyEndpoint" address="http://localhost:1234/proxy" serviceClass="nl.rubix.cxf.fabric.proxy.test.Endpoint"/>
  <cxf:rsClient id="clientEndpoint" address="http://dummy/url" serviceClass="nl.rubix.cxf.fabric.proxy.test.Endpoint">
    <cxf:features>
        <ref component-id="fabricLoadBalancerFeature"/>
      </cxf:features>
  </cxf:rsClient> 
  <reference id="curator" interface="org.apache.curator.framework.CuratorFramework" />

    <bean id="fabricLoadBalancerFeature" class="io.fabric8.cxf.FabricLoadBalancerFeature">
        <property name="curator" ref="curator" />
        <property name="fabricPath" value="cxf/endpoints" />
    </bean>
  
  <camelContext id="cxfProxyContext" trace="false" xmlns="http://camel.apache.org/schema/blueprint">
    <route id="cxfProxyRoute">
      <from uri="cxfrs:bean:proxyEndpoint"/>
      <log message="got proxy request"/>
      <to uri="cxfrs:bean:clientEndpoint"/>
    </route>
  </camelContext>

</blueprint>

This Camel proxy will proxy request from: “http://localhost:1234/proxy” to the two instances of the CXFRS service we created in part 1 running on port “http://localhost:2345/testendpoint

When we deploy this Camel proxy in a Fabric profile and run it in a Fabric container we can test the proxy:

Fabric load balancer CXF Part 2 - 2

The response comes from the service created in part 1, but now it is accessible by our proxy endpoint.

Abstracting endpoints like this makes sense in larger Fabric environments when leveraging multiple machines hosting the Fabric containers. Clients no longer need to know the IP and port of the services they call. So scaling and migrating the services to other machines becomes much easier. For instance adding another instance of a CXFRS service on a container running on another machine, or even in the cloud no longer requires the endpoints of the clients to be updated.


For more information about CXF load balancing using Fabric:

https://access.redhat.com/documentation/en-US/Red_Hat_JBoss_Fuse/6.1/html/Apache_CXF_Development_Guide/FabricHA.html

[1] The CuratorFramework service is for communicating with the Apache Zookeeper registry used by Fabric.

 
1 Comment

Posted by on 2015-03-16 in JBoss Fuse


Tags: , , , , ,

Fabric load balancer for CXF – Part 1

Sticking with the recent CXF themes of this blog in this 2 part series we will explore the combination of CXF http endpoints and Fuse Fabric for autodiscovery and load balancing.

One of the advantages of using Fuse Fabric is the autodiscovery of services within the Fabric. In this two part post we are going to take a look at the load balancing feature provided by Fabric for CXF endpoints. Note, it is also possible to use similar kind of features for plain http endpoints. In the first part we will focus on the server side and setup a CXF service in Fuse to use the load balancing feature provided by Fabric. In the second part we will focus on the client side of consuming the load balanced service and execute the lookup in the Fabric registry.

When using the Fuse Fabric load balancing feature, Fabric will provide the load balancing by discovering CXF endpoints and load balancing requests between these endpoints. However, for endpoints to be discovered by Fabric they have to register themselves in the Fabric registry implemented by Apache ZooKeeper. It is worth to note that when an endpoint is registered in the Fabric it is still possible to call that endpoint with the registered address without the Fabric load balancer. The advantage of enabling a Fabric load balancer is that CXF(RS) services can be looked up in the Fabric registry so scaling to new machines can be done without reconfiguring IP and ports on the client side. However for this to work a client also has to use fabric for the ability to lookup endpoints in the Fabric registry. Since the Fabric registry is only available for clients within the Fabric and not for external (non Fuse Fabric clients), this will be the focus of part 2.

Fabric load balancer CXF Part 1 - 1In the picture above from the Red Hat documentation (https://access.redhat.com/documentation/en-US/Red_Hat_JBoss_Fuse/6.1/html/Apache_CXF_Development_Guide/FabricHA.html ) the servers (1 and 2) register their endpoints in the Fabric registry under the fabric path (explained below) “demo/lb”. The client performs a lookup to the same “demo/lb” fabric path to obtain the actual endpoints of the service it wants to call. In the design time configuration a dummy address is configured (http://dummyaddress) this address is not used during runtime, since the endpoints are retrieved from the fabric registry.

CXFRS service

For this post a very simple CXFRS service is created exposing one GET method which responds with a fixed string. The interface class of the service looks like this:


package nl.rubix.cxf.fabric.ha.test;

import javax.ws.rs.GET;
import javax.ws.rs.Path;
import javax.ws.rs.PathParam;
import javax.ws.rs.Produces;
import javax.ws.rs.core.MediaType;

@Path("/")
public class Endpoint {
    
    @GET
    @Path("/test/{id}")
    @Produces(MediaType.APPLICATION_JSON)
    public String getAssets(@PathParam("id") String id){
        return null;
    }

    
}

The Blueprint context implementing the CXFRS service looks like this:


<?xml version="1.0" encoding="UTF-8"?>
<blueprint xmlns="http://www.osgi.org/xmlns/blueprint/v1.0.0" 
            xmlns:camel="http://camel.apache.org/schema/blueprint" 
            xmlns:xsi="http://www.w3.org/2001/XMLSchema-instance" 
            xmlns:cxf="http://camel.apache.org/schema/blueprint/cxf"
            xmlns:cm="http://aries.apache.org/blueprint/xmlns/blueprint-cm/v1.0.0"
            xsi:schemaLocation="http://www.osgi.org/xmlns/blueprint/v1.0.0 http://www.osgi.org/xmlns/blueprint/v1.0.0/blueprint.xsd
            http://camel.apache.org/schema/blueprint http://camel.apache.org/schema/blueprint/camel-blueprint.xsd">

  <camelContext id="blueprintContext" trace="false" xmlns="http://camel.apache.org/schema/blueprint">
    <route id="cxfrsServerTest">
      <from uri="cxfrs:bean:rsServer?bindingStyle=SimpleConsumer"/>
      <log message="The id contains ${header.id}!!"/>
      <setBody>
        <constant>this is a  response</constant>
      </setBody>
    </route>
  </camelContext>
  
  <cxf:rsServer id="rsServer" address="http://localhost:2345/testendpoint" serviceClass="nl.rubix.cxf.fabric.ha.test.Endpoint" loggingFeatureEnabled="true" />
  
</blueprint>


Note, this service is just plain CXFRS and Camel, no Fabric features have been added yet.

Implementing the load balancer features

To implement Fabric load balancing on the server side the pom has to be updated with extra dependencies and the Blueprint xml file needs to be configured with the load balancer.

The pom needs to be updated with the following items:

Add the fabric-cxf dependency to the pom:


<dependency>
    <groupId>io.fabric8</groupId>
    <artifactId>fabric-cxf</artifactId>
    <version>1.0.0.redhat-379</version>
    <type>bundle</type>
</dependency>


Add the io.fabric8.cxf to the import package of the OSGi bundle:


<plugin>
    <groupId>org.apache.felix</groupId>
    <artifactId>maven-bundle-plugin</artifactId>
    <version>2.3.7</version>
    <extensions>true</extensions>
    <configuration>
        <instructions>
            <Bundle-SymbolicName>cxf-fabric-ha-test</Bundle-SymbolicName>
            <Private-Package>test.cxf.fabric.ha.test.*</Private-Package>
            <Import-Package>*,io.fabric8.cxf</Import-Package>
        </instructions>
    </configuration>
</plugin>


To add the CXF Fabric load balancer to the Blueprint xml file:

Add the cxf-core namespace to the Blueprint xml:

xmlns:cxf-core=”http://cxf.apache.org/blueprint/core

Add an OSGi reference to the CuratorFramework OSGi service[1]:

[1] The CuratorFramework service is for communicating with the Apache Zookeeper registry used by Fabric.


<reference id="curator" interface="org.apache.curator.framework.CuratorFramework" />

Instantiate the FabricLoadBalancerFeature bean:


<bean id="fabricLoadBalancerFeature" class="io.fabric8.cxf.FabricLoadBalancerFeature">
    <property name="curator" ref="curator" />
    <property name="fabricPath" value="cxf/endpoints" />
</bean>

The curator property is a reference to the curator OSGi service reference declared earlier. The fabricPath is the location in the Fabric (Zookeeper) registry where the CXF endpoints are stored. This location in the registry is used by clients to lookup available endpoints. In the picture above this was set to demo/lb

To register the Fabric load balancer with the CXF service add a CXF bus with a reference to the fabricLoadBalancerFeature bean declared above:


<cxf-core:bus>
    <cxf-core:features>
        <cxf-core:logging />
        <ref component-id="fabricLoadBalancerFeature" />
    </cxf-core:features>
</cxf-core:bus>

The entire Blueprint xml for the load balancer looks like this:


<?xml version="1.0" encoding="UTF-8"?>
<blueprint xmlns="http://www.osgi.org/xmlns/blueprint/v1.0.0" 
            xmlns:camel="http://camel.apache.org/schema/blueprint" 
            xmlns:xsi="http://www.w3.org/2001/XMLSchema-instance" 
            xmlns:cxf="http://camel.apache.org/schema/blueprint/cxf"
            xmlns:cxf-core="http://cxf.apache.org/blueprint/core" 
            xmlns:cm="http://aries.apache.org/blueprint/xmlns/blueprint-cm/v1.0.0"
            xsi:schemaLocation="http://www.osgi.org/xmlns/blueprint/v1.0.0 http://www.osgi.org/xmlns/blueprint/v1.0.0/blueprint.xsd
       http://camel.apache.org/schema/blueprint http://camel.apache.org/schema/blueprint/camel-blueprint.xsd">

  <camelContext id="blueprintContext" trace="false" xmlns="http://camel.apache.org/schema/blueprint">
    <route id="cxfrsServerTest">
      <from uri="cxfrs:bean:rsServer?bindingStyle=SimpleConsumer"/>
      <log message="The id contains ${header.id}!!"/>
      <setBody>
        <constant>this is a  response</constant>
      </setBody>
    </route>
  </camelContext>
  
  <cxf:rsServer id="rsServer" address="http://localhost:2345/testendpoint" serviceClass="nl.rubix.cxf.fabric.ha.test.Endpoint" loggingFeatureEnabled="true" />
  
  <!-- configuration for the Fabric load balancer -->
  <reference id="curator" interface="org.apache.curator.framework.CuratorFramework" />

    <bean id="fabricLoadBalancerFeature" class="io.fabric8.cxf.FabricLoadBalancerFeature">
        <property name="curator" ref="curator" />
        <property name="fabricPath" value="cxf/endpoints" />
    </bean>

    <cxf-core:bus>
        <cxf-core:features>
            <cxf-core:logging />
            <ref component-id="fabricLoadBalancerFeature" />
        </cxf-core:features>
    </cxf-core:bus>

</blueprint>

When we deploy this service in a Fabric profile on a container we can access the service through the assigned endpoints the container gave us. Note this is not yet using the load balancer feature, since accessing the service through a browser does not perform the lookup in the Fabric registry.

Fabric load balancer CXF Part 1 - 2You can find the endpoint the container assigned to the services on the APIs tab:

Fabric load balancer CXF Part 1 - 3When we access the endpoint through a browser, again without using the Fabric load balancer we get the response:

Fabric load balancer CXF Part 1 - 4

As mentioned above to use the Fabric load balancing on the client side clients have to be able to access the Fabric registry. There are two possibilities to accomplish this:

In part 2 we will explore the client side for accessing the Fabric load balancer.

For more information about CXF load balancing using Fabric:

https://access.redhat.com/documentation/en-US/Red_Hat_JBoss_Fuse/6.1/html/Apache_CXF_Development_Guide/FabricHA.html

 
1 Comment

Posted by on 2015-02-26 in JBoss Fuse


Tags: , , , ,

Exploring the SimpleConsumer and Default Camel CXFRS binding styles

When exposing your Camel route as a Rest service using CXFRS there has to be a translation from the CXFRS message to the Camel exchange. This translation is covered in the bindingStyle used in Camel. The Camel CXFRS component has three different binding styles:

  • SimpleConsumer
  • Default
  • Custom

In this blogpost we will explore some of the characteristics and differences between the SimpleConsumer and the Default binding styles. This will be a brief overview, so not all aspects of the binding styles will be covered in this post.

Project setup

In order to show some of the characteristics and differences between the two binding styles we will create a dummy Fuse project. The project contains 1 Camel route and exposes this route as a REST service using CXFRS.

The CXFRS class looks like this:


package nl.rubix.cxfrs.service;

import javax.ws.rs.GET;
import javax.ws.rs.Path;
import javax.ws.rs.PathParam;
import javax.ws.rs.Produces;
import javax.ws.rs.core.MediaType;

@Path("/")
public class Endpoint {
    
    @GET
    @Path("/test/{id}/{id2}")
    @Produces(MediaType.APPLICATION_JSON)
    public String getAssets(@PathParam("id") String id, @PathParam("id2") String id2){
        return null;
    }

    
}

The Camel route looks like this:


<?xml version="1.0" encoding="UTF-8"?>
<blueprint xmlns="http://www.osgi.org/xmlns/blueprint/v1.0.0"
       xmlns:xsi="http://www.w3.org/2001/XMLSchema-instance"
       xmlns:camel="http://camel.apache.org/schema/blueprint"
       xmlns:cxf="http://camel.apache.org/schema/blueprint/cxf"
       xsi:schemaLocation="
       http://www.osgi.org/xmlns/blueprint/v1.0.0 http://www.osgi.org/xmlns/blueprint/v1.0.0/blueprint.xsd
       http://camel.apache.org/schema/blueprint http://camel.apache.org/schema/blueprint/camel-blueprint.xsd">

  <cxf:rsServer id="rsServer" address="http://localhost:2345/testendpoint" serviceClass="nl.rubix.cxfrs.service.Endpoint" loggingFeatureEnabled="false" />

  <camelContext trace="false" id="blueprintContext" xmlns="http://camel.apache.org/schema/blueprint">
    <route customId="true" id="cxfrs.service">
        <from uri="cxfrs:bean:rsServer?bindingStyle=Default"/>
        <log message="The message contains ${body[0]}"/>
        <marshal>
            <json library="Jackson"/>
        </marshal>
    </route>
</camelContext>

</blueprint>

The first thing to note is the fact we do not have any message transformations within the route. This means the request passed to the server is simply marshalled as a JSON document and returned as a response message.

With our GET operation the bindingStyle does not affect the response message. So when using SimpleConsumer or Default binding style, the response message is the same.

simple_vs_default_binding_1

This is because of two reasons: first both the default and SimpleConsumer binding styles the Camel message is populated with the raw CXFRS message, an object of type MessageContentsList. This is the behaviour of the Default binding style. However, the SimpleConsumer looks at the method signature of the method in the Endpoint class. When a single object can be identified as the body the Camel Message will be populated with this particular object. When a sigle object cannot be identified as the body the original MessageContentsList is used as the body in the Camel message. Since our GET operation uses two pathParam arguments the SimpleConsumer binding cannot decide which one of them is the body and defaults to the MessageContentsList object.

This behaviour is explained in more detail in the Camel documentation: http://camel.apache.org/cxfrs.html

Another thing to note is the fact the standard Camel Type converters can handle the MessageContentsList object type and marshal it to a JSON object without any trouble or configuration.
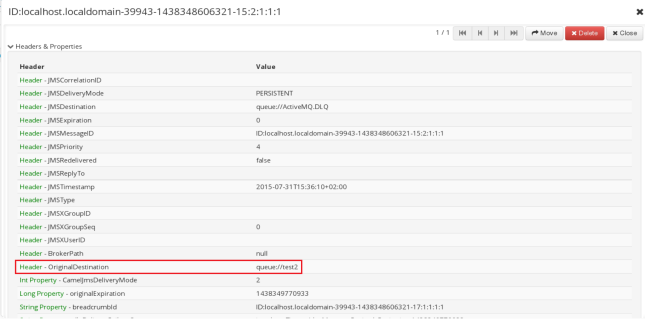
It is even possible to use the Simple index expression on the body of the Camel message. So for example this statements:
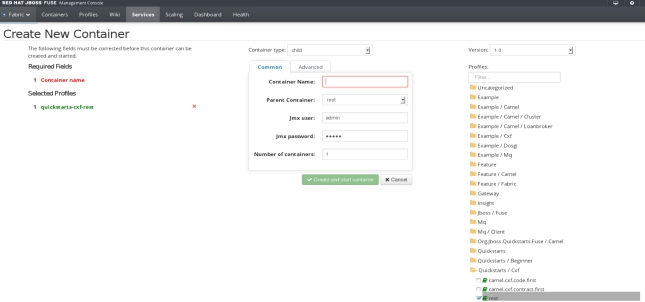

<log message=<strong>"The message contains ${body[0]}"</strong>/>

Outputs the following: The message contains 1

When the request URL was: http://localhost:2345/testendpoint/test/1/bla

SimpleConsumer binding

To use the SimpleConsumer binding in stead of the Default binding we simply add the following property to our component URI: “bindingStyle=SimpleConsumer”

The SimpleConsumer bindingStyle provides standard behaviour regarding the mapping of the CXFRS message to a Camel Exchange and Message. It does this according the following specs (again from the Camel documentation:

“In contrast, the SimpleConsumer binding style performs the following mappings, in order to make the request data more accessible to you within the Camel Message:

  • JAX-RS Parameters (@HeaderParam, @QueryParam, etc.) are injected as IN message headers. The header name matches the value of the annotation.
  • The request entity (POJO or other type) becomes the IN message body. If a single entity cannot be identified in the JAX-RS method signature, it falls back to the original MessageContentsList.
  • Binary @Multipart body parts become IN message attachments, supporting DataHandler, InputStream, DataSource and CXF’s Attachment class.
  • Non-binary @Multipart body parts are mapped as IN message headers. The header name matches the Body Part name.

Additionally, the following rules apply to the Response mapping:

  • If the message body type is different to javax.ws.rs.core.Response (user-built response), a new Response is created and the message body is set as the entity (so long it’s not null). The response status code is taken from the Exchange.HTTP_RESPONSE_CODE header, or defaults to 200 OK if not present.
  • If the message body type is equal to javax.ws.rs.core.Response, it means that the user has built a custom response, and therefore it is respected and it becomes the final response.

In all cases, Camel headers permitted by custom or default HeaderFilterStrategy are added to the HTTP response.”

This means the path parameters in our request are accessible as Camel headers on the exchange.

So we can access the id parameter using this expression:


<log message=<strong>"The message contains ${header.id}"</strong>/>

In our simple example using a GET with just two path parameters it might seem a bit trivial to use the SimpleConsumer binding over the Default. However when method signatures become more complex the SimpleConsumer binding provides very usefull functionality and can save time mapping the CXFRS MessageContentsList message manually.

Default Binding

The Default binding is, as the name suggests, the default J so no additional configuration on the component is required. However to be more verbose, one can add the bindingStyle=Default to the URI.

The Default binding style always populates the Camel message body with the CXFRS MessageContentsList object. As we have seen above we can use the Camel Simple list expressions to retrieve values from this MessageContentsList. And this can be a quick way to access values where the options are limited. However, when using more complex method signatures in your CXFRS methods this can become quite cumbersome. Especially when the values in the method signature are more exotic Java Objects.

The most common way for using the Default binding is to implement a custom Camel processor to perform the mapping manually.

For this post a sample processor is created which concatenates both values from the path parameters. The processor looks like this:


package nl.rubix.cxfrs.service;

import org.apache.camel.Exchange;
import org.apache.camel.Processor;
import org.apache.cxf.message.MessageContentsList;

public class MyCustomProcessor implements Processor{

    @Override
    public void process(Exchange exchange) throws Exception {
        // retrieve the MessageContentsList object from the Camel exchange
        MessageContentsList cxfMessage = exchange.getIn().getBody(MessageContentsList.class);
        
        // The new body message will be a simple String which holds the concatenated values of the MessageContentsList
        String camelBody = cxfMessage.get(0).toString() + "-" + cxfMessage.get(1).toString();
        
        exchange.getIn().setBody(camelBody);
        
    }

}

To use this processor in our Camel Route the route is modified and now looks like this:


<?xml version="1.0" encoding="UTF-8"?>
<blueprint xmlns="http://www.osgi.org/xmlns/blueprint/v1.0.0"
       xmlns:xsi="http://www.w3.org/2001/XMLSchema-instance"
       xmlns:camel="http://camel.apache.org/schema/blueprint"
       xmlns:cxf="http://camel.apache.org/schema/blueprint/cxf"
       xsi:schemaLocation="
       http://www.osgi.org/xmlns/blueprint/v1.0.0 http://www.osgi.org/xmlns/blueprint/v1.0.0/blueprint.xsd
       http://camel.apache.org/schema/blueprint http://camel.apache.org/schema/blueprint/camel-blueprint.xsd">

  <cxf:rsServer id="rsServer" address="http://localhost:2345/testendpoint" serviceClass="nl.rubix.cxfrs.service.Endpoint" loggingFeatureEnabled="false" />
  <bean id="myCustomProcessor" class="nl.rubix.cxfrs.service.MyCustomProcessor"/>

  <camelContext trace="false" id="blueprintContext" xmlns="http://camel.apache.org/schema/blueprint">
    <route customId="true" id="cxfrs.service">
        <from uri="cxfrs:bean:rsServer?bindingStyle=Default"/>
        <bean ref="myCustomProcessor"/>
        <log message="The message contains ${body}"/>
        <marshal>
            <json library="Jackson"/>
        </marshal>
    </route>
</camelContext>

</blueprint>


The log statements now outputs: The message contains 1-bla

A more extensive example using the SimpleConsumer

As mentioned above when using a very simplistic call containing only two path parameters handling the CXFRS message is quite simple using Camel, regardless of the binding type used. However when dealing with more complex scenarios the SimpleConsumer definitely can save time and effort.

When we add a POST method to our Endpoint class and add the request message to the signature the SimpleConsumer maps the request body in the POST to the Camel message body.

The Endpoint class looks like this:


package nl.rubix.cxfrs.service;

import javax.ws.rs.GET;
import javax.ws.rs.POST;
import javax.ws.rs.Path;
import javax.ws.rs.PathParam;
import javax.ws.rs.Produces;
import javax.ws.rs.core.MediaType;

@Path("/")
public class Endpoint {
    
    @GET
    @Path("/test/{id}/{id2}")
    @Produces(MediaType.APPLICATION_JSON)
    public String getAssets(@PathParam("id") String id, @PathParam("id2") String id2){
        return null;
    }

    @POST
    @Path("/test/{id}/{id2}")
    @Produces(MediaType.APPLICATION_JSON)
    public String doPost(String request, @PathParam("id") String id, @PathParam("id2") String id2){
        return null;
        
    }
}


Note the String request parameter in our doPost method.

Using SoapUI to send the POST request to the endpoint:

simple_vs_default_binding_2When we modify our Camel route to log both the body and headers we get the following result in our log:

INFO The message body contains [“test”,”request”]

INFO The message headers contains {id=1, CamelAcceptContentType=*/*, User-Agent=Apache-HttpClient/4.1.1 (java 1.5), connection=keep-alive, CamelHttpCharacterEncoding=ISO-8859-1, CamelCxfRsOperationResourceInfoStack=[org.apache.cxf.jaxrs.model.MethodInvocationInfo@2637df06], id2=bla, Host=localhost:2345, CamelCxfRsResponseClass=class java.lang.String, CamelHttpMethod=POST, CamelHttpUri=/testendpoint/test/1/bla, content-type=application/json, CamelCxfRsResponseGenericType=class java.lang.String, accept-encoding=gzip,deflate, operationName=doPost, breadcrumbId=ID-localhost-localdomain-37504-1423222735361-0-1, CamelHttpPath=/test/1/bla, Content-Length=18, CamelCxfMessage=org.apache.cxf.message.XMLMessage@319f9d1d}

As we can see the SimpleConsumer adds all http headers to the Camel headers, but also creates Camel exchange headers for the PathParam parameters we defined in our method signature (displayed in bold).

For reference our Camel route looks like this:


<?xml version="1.0" encoding="UTF-8"?>
<blueprint xmlns="http://www.osgi.org/xmlns/blueprint/v1.0.0"
       xmlns:xsi="http://www.w3.org/2001/XMLSchema-instance"
       xmlns:camel="http://camel.apache.org/schema/blueprint"
       xmlns:cxf="http://camel.apache.org/schema/blueprint/cxf"
       xsi:schemaLocation="
       http://www.osgi.org/xmlns/blueprint/v1.0.0 http://www.osgi.org/xmlns/blueprint/v1.0.0/blueprint.xsd
       http://camel.apache.org/schema/blueprint http://camel.apache.org/schema/blueprint/camel-blueprint.xsd">

  <cxf:rsServer id="rsServer" address="http://localhost:2345/testendpoint" serviceClass="nl.rubix.cxfrs.service.Endpoint" loggingFeatureEnabled="false" />

  <camelContext trace="false" id="blueprintContext" xmlns="http://camel.apache.org/schema/blueprint">
    <route customId="true" id="cxfrs.service">
        <from uri="cxfrs:bean:rsServer?bindingStyle=SimpleConsumer"/>
        <log message="The message body contains ${body}"/>
        <log message="The message headers contains ${headers}"/>
        <marshal>
            <json library="Jackson"/>
        </marshal>
    </route>
</camelContext>

</blueprint>


The SimpleConsumer binding style provides a lot of ease when consuming REST messages from Camel and can be a real time saver. Especially when dealing with (even slightly) more complex REST messages.

A note on the Custom binding

Although the Custom binding is not covered in detail in this post the third bindingStyle option is to create a Custom binding and use this in your Camel Route. Creating a Custom binding is often not required, as the simple of default binding style showed above usually provide the desired functionality. However, the option does exist to create a custom binding. To implement a Custom binding create a new class implementing the org.apache.camel.component.cxf.jaxrs.CxfRsBinding interface. This class can be added to the Spring or Blueprint context by instantiating it as a bean. As a final step the custom binding can be used in the URI of the Camel CXFRS component by adding the bindingStyle=Custom&binding=#myBinding


Leave a comment

Posted by on 2015-02-06 in JBoss Fuse


Tags: , , , , ,

Fuse Fabric MQ provision exception

When using the discovery endpoint to connect to a master slave ActiveMQ cluster I ran into an error.
It is worth to note that this exception is not caused by the discovery mechanism, I happened to find this issue when using the discovery url, however when hard wiring the connector (e.g. using tcp://localhost:61616) will also cause this issue. This issue has to do with the container setup and profiling which I will explain below.

“Provision Exception:

org.osgi.service.resolver.ResolutionException: Unable to resolve dummy/0.0.0: missing requirement [dummy/0.0.0] osgi.identity; osgi.identity=fabricdemo; type=osgi.bundle; version=”[1.0.0.SNAPSHOT,1.0.0.SNAPSHOT]” [caused by: Unable to resolve fabricdemo/1.0.0.SNAPSHOT: missing requirement [fabricdemo/1.0.0.SNAPSHOT] osgi.wiring.package; filter:=”(&(osgi.wiring.package=org.apache.activemq.camel.component)(version>=5.9.0)(!(version>=6.0.0)))”]”

Fabric-MQ-provision-error-1

This is caused by the Fuse container setup, where the brokers run on two seperate containers in a master slave construction. The container running the deployed Camel route is also running the JBoss Fuse minimal profile.
Fabric-MQ-provision-error-2

The connection to the broker cluster is setup in the Blueprint context in the following manner:

<bean id="jmsConnectionFactory" class="org.apache.activemq.ActiveMQConnectionFactory">
	<property name="brokerURL" value="discovery:(fabric:default)" />
	<property name="userName" value="admin" />
	<property name="password" value="admin" />
</bean>
<bean id="pooledConnectionFactory" class="org.apache.activemq.pool.PooledConnectionFactory">
	<property name="maxConnections" value="1" />
	<property name="maximumActiveSessionPerConnection" value="500" />
	<property name="connectionFactory" ref="jmsConnectionFactory" />
</bean>
<bean id="jmsConfig" class="org.apache.camel.component.jms.JmsConfiguration">
	<property name="connectionFactory" ref="pooledConnectionFactory" />
	<property name="concurrentConsumers" value="10" />
</bean>
<bean id="activemq" class="org.apache.activemq.camel.component.ActiveMQComponent">
	<property name="configuration" ref="jmsConfig"/>
</bean>

When starting the container a provision exception is thrown, this exception: missing requirement [fabricdemo/1.0.0.SNAPSHOT] osgi.wiring.package; filter:=”(&(osgi.wiring.package=org.apache.activemq.camel.component)(version>=5.9.0)(!(version>=6.0.0)))”]”

Again, it is not just caused by the discovery brokerURL: .

The exception is thrown because the JBoss Fuse minimal profile does not provides the ActiveMQ component. When adding the dependencies for this component to your project the exception still persists, the reason for this is that the component is not exported by default in the OSGi bundle. This means other bundles cannot use it. Exporting the class implementing the component will solve this issue.
To export the ActiveMQ component class we need to extend the Apache Felix maven-bundle-plugin. We need to tell the plugin to export the ActiveMQ component, this can be done by adding the following line to the configuration:

<Export-Package>org.apache.activemq.camel.component</Export-Package>

The entire plugin now looks like this:

<plugin>
	<groupId>org.apache.felix</groupId>
	<artifactId>maven-bundle-plugin</artifactId>
	<version>2.3.7</version>
	<extensions>true</extensions>
	<configuration>
		<instructions>
			<Bundle-SymbolicName>fabricdemo</Bundle-SymbolicName>
			<Private-Package>nl.rubix.camel-activemq.*</Private-Package>
			<Import-Package>*</Import-Package>
			<Export-Package>org.apache.activemq.camel.component</Export-Package>
		</instructions>
	</configuration>
</plugin>

As a side note: to use the discovey broker url the mq-fabric feature must be added to the profile. For this demo I used the Fabric maven plugin which I configured as follows:

<plugin>
	<groupId>io.fabric8</groupId>
	<artifactId>fabric8-maven-plugin</artifactId>
	<configuration>
		<profile>activemqtest</profile>
		<features>mq-fabric</features>
	</configuration>
</plugin>

After the modification the the pom.xml the container will start properly:

Fabric-MQ-provision-error-3

Anyway I hope this helps someone.

 
1 Comment

Posted by on 2014-12-24 in JBoss Fuse


Tags: , , , , , ,

Implementing a CXFRS client in JBoss Fuse

Apache CXF is a part of JBoss Fuse, so is Apache Camel. In this blog post we are going to implement a rest client in CXFRS and Camel. Note, you can also implement a rest client using JAX-RS directly, but in this blog post we are using the CXFRS framework.

For this example we are going to implement a client for the public rest api: http://freegeoip.net

From the freegeoip website:

“The HTTP API takes GET requests in the following schema:
freegeoip.net/{format}/{IP_or_hostname}
Supported formats are: csv, xml, json and jsonp. If no IP or hostname is provided, then your own IP is looked up. ”

To create the CXFRS client endpoint and the Camel route using it we will have to complete the following steps.

  1. Add Maven dependencies to the Pom file
  2. Implement the CXFRS client proxy
  3. setup a CxfRsClient Endpoint in Camel
  4. Create a custom processor for formatting the CXFRS request
  5. Create a Camel route to call the CXFRS endpoint

Add Maven dependencies

Assuming you start out with a Camel or Fuse project the following dependencies should be added to the POM file:

<dependency>
      <groupId>org.ow2.asm</groupId>
      <artifactId>asm-all</artifactId>
      <version>4.1</version>
    </dependency>
    <dependency>
      <groupId>org.apache.cxf</groupId>
      <artifactId>cxf-rt-transports-http-jetty</artifactId>
      <version>${camel-version}</version>
    </dependency>
<dependency>
      <groupId>org.apache.camel</groupId>
      <artifactId>camel-cxf</artifactId>
      <version>${camel-version}</version>
    </dependency>

Implement the CXFRS client proxy

The Camel CXFRS components can either use the CXFRS client proxy API or the HTTP API. When using the entire http request needs to be created in Camel. This option is basically the same as the http component in Camel. Therefore in this post we are going to implement the CXFRS client proxy API.

More information on the CXFRS client proxy API can be found on the CXF website: https://cwiki.apache.org/confluence/display/CXF20DOC/JAX-RS+Client+API#JAX-RSClientAPI-Proxy-basedAPI

To implement the client proxy create a new Java interface (a class will work as well) but since the client proxy is only using empty methods an interface will be fine.

The name of the class/interface can be whatever you want, but since we are making a client for freegeoip I called the interface freegeoip.

@Path(value="/")
public interface Freegeoip {
…

Next we need to annotate the interface with the Path annotation, the value of the path annotation will correspond to the path after the root url. The value “/” corresponds with the root, so with: http://freegeoip.net

Next we need to add a method for specific request we want to implement. Note, you can add as many methods as you want, and if the rest API you want to call actually supports them of cource 😉
In our example we need to implement the API call of freegeoip: freegeoip.net/{format}/{IP_or_hostname}
To do this add a method to our interface, again the name of the method can be whatever you like, here I chose “getGeoip”:

@GET
@Path(value="/{type}/{ip}")
@Produces({MediaType.APPLICATION_JSON, MediaType.APPLICATION_XML })
public String getGeoip(@PathParam("type") String type, @PathParam("ip") String ip);

The method is annotaded with the rest http operation it uses, in our example GET. Again with a Path corresponding to the specific path of that particular request. Note that we are using variables in the path value: type and ip. The last annotation we use is the response we expect back from the rest API. In this example both XML and JSON.

Next is the method signature, note the parameters of the method are also annotated with the PathParam annotation. The values of the PathParam annotations corresponds with the values of the variables in the Path annotation. This means the arguments of the methods will be bound to the variables of the path when making the request.
The entire java interface looks like this:

package nl.rubix.cxfrs.test.endpoint;

import javax.ws.rs.GET;
import javax.ws.rs.Path;
import javax.ws.rs.PathParam;
import javax.ws.rs.Produces;
import javax.ws.rs.core.MediaType;

@Path(value="/")
public interface Freegeoip {

	@GET
	@Path(value="/{type}/{ip}")
	@Produces({MediaType.APPLICATION_JSON, MediaType.APPLICATION_XML })
	public String getGeoip(@PathParam("type") String type, @PathParam("ip") String ip);

}

setup a CxfRsClient Endpoint in Camel

To setup the endpoint create a new Camel context xml file. You can use either Spring of Blueprint, although the configuration differs slightly. In this example I am using Blueprint.

The first thing we need to do is to add the CXF namespace to the Blueprint xml:

xmlns:cxf=”http://camel.apache.org/schema/blueprint/cxf

This enables the CXF options in the Blueprint xml. So now a CxfRsClient can be created. Add this client to the Blueprint XML (outside the CamelContext):

<cxf:rsClient id="rsClient" address="http://freegeoip.net" serviceClass="nl.rubix.cxfrs.test.endpoint.Freegeoip" loggingFeatureEnabled="true"/>

The request to the CXF Client API has some specific requirements. To implement these requirements we use a custom processor. To create a custom processor create a new Java class implementing the Processor interface. Inside the processor we do three things: set the exchange pattern to inOut; setting some CXF headers; create the request object expected by CXF.
The argument of the process method is the exchange object (this method is required when implementing the Processor interface). So manipulating the exchange pattern and headers is quite straightforward. To set the exchange pattern to inOut:

exchange.setPattern(ExchangePattern.InOut);

Next we need tot set the message header to state the operation name we want to call. This operation name corresponds with the method name of our Client Proxy API. We also want to use the Client proxy API in stead of the HTTP API (see above).
To set these headers add the following statements to the processor:

// set the operation name
inMessage.setHeader(CxfConstants.OPERATION_NAME, "getGeoip");
// using the proxy client API
inMessage.setHeader(CxfConstants.CAMEL_CXF_RS_USING_HTTP_API, Boolean.FALSE);

Now all the headers and exchange properties are set properly we move our attention to the message body. By default CXFRS expects the request to be of the type, org.apache.cxf.message.MessageContentsList and although this can be change by creating a custom binding in this post we are going to stick with the MessageContentsList type.

The MessageContentsList is a name value pair type and should contain (in order) the arguments of the method in our Client Proxy API. The method signature of our Client Proxy API looks like this:

public String getGeoip(@PathParam("type") String type, @PathParam("ip") String ip);

So we need to add two Strings to our MessageContentsList: type and ip.
To do this add the following code to the process method:

String ip = inMessage.getBody(String.class);
String type = inMessage.getHeader("type",String.class);
MessageContentsList req = new MessageContentsList();
req.add(type);
req.add(ip);
inMessage.setBody(req);

In our example we get the ip address from the message body and the type out of a header. These values we will set when we implement our Camel route. It is likely that in a normal situation more than one field will be present in the body as some sort of type and a more sophisticated data mapping has to be implemented. However, in this example we are keeping it simple with a one-to-one mapping of the request body to one of the entries in the MessageContentsList.
The entire processor class looks like this:

package nl.rubix.cxfrs.test.transform;

import org.apache.camel.Exchange;
import org.apache.camel.ExchangePattern;
import org.apache.camel.Message;
import org.apache.camel.Processor;
import org.apache.camel.component.cxf.common.message.CxfConstants;
import org.apache.cxf.message.MessageContentsList;

public class RequestProcessor implements Processor{
	@Override 
	public void process(Exchange exchange) throws Exception {
	        exchange.setPattern(ExchangePattern.InOut);
	        Message inMessage = exchange.getIn();
	        // set the operation name
	        inMessage.setHeader(CxfConstants.OPERATION_NAME, "getGeoip");
	        // using the proxy client API
	        inMessage.setHeader(CxfConstants.CAMEL_CXF_RS_USING_HTTP_API, Boolean.FALSE);
	        
	        //creating the request
	        String ip = inMessage.getBody(String.class);
	        String type = inMessage.getHeader("type",String.class);
	        MessageContentsList req = new MessageContentsList();
	        req.add(type);
	        req.add(ip);
	        inMessage.setBody(req);

	    }
}

Now that our processor is finished we can implement the Camel route calling this processor and the actual REST endpoint.

Create a Camel route to call the CXFRS endpoint

 
We already created the Camel context and added the CXFRS endpoint to it in the step: “setup a CxfRsClient Endpoint in Camel” now we can implement the Camel route using the CxfRsClient endpoint and the processor we created earlier.
To start off the route we will just use the timer component so our route starts off automatically.

<from uri="timer://foo?period=5000"/>

Next up we need to prepare the request, so we need to set the header “type” containing either xml or json. And we need to set the body to the ip address we want to lookup in the REST API (note: I changed my personal ip address to 0.0.0.0.
<setHeader headerName="type">
  <constant>xml</constant>
</setHeader>
<setBody>
  <constant>0.0.0.0</constant>
</setBody>

Now that the request body and header are set in the Camel route we can call the processor we created in the previous step. (normally these values would not be hardcoded off course 😉 )
To call our processor we first need to declare this processor as a bean in our Blueprint xml. So outside the CamelContext xml tags add the bean declaration:

<bean id="requestProcessor" class="nl.rubix.cxfrs.test.transform.RequestProcessor"/>

After our bean is declared inside the Camel route call the processor:

<process ref="requestProcessor"/>

Now everything is setup properly to make the call to our CxFRsClientEndpoint:

<to uri="cxfrs:bean:rsClient"/>

The entire Blueprint xml file looks like this:

<?xml version="1.0" encoding="UTF-8"?>
<blueprint xmlns="http://www.osgi.org/xmlns/blueprint/v1.0.0"
       xmlns:camel="http://camel.apache.org/schema/blueprint"
       xmlns:xsi="http://www.w3.org/2001/XMLSchema-instance"
       xmlns:cxf="http://camel.apache.org/schema/blueprint/cxf"
       xsi:schemaLocation="http://www.osgi.org/xmlns/blueprint/v1.0.0 http://www.osgi.org/xmlns/blueprint/v1.0.0/blueprint.xsd
       http://camel.apache.org/schema/blueprint http://camel.apache.org/schema/blueprint/camel-blueprint.xsd">
       
       <bean id="requestProcessor" class="nl.rubix.cxfrs.test.transform.RequestProcessor"/>

  <camelContext trace="false" xmlns="http://camel.apache.org/schema/blueprint">
    <route>
        <from uri="timer://foo?period=5000"/>
        <log message="Starting Route with client proxy api"/>
        <setHeader headerName="type">
        	<constant>xml</constant>
        </setHeader>
        <setBody>
        	<constant>0.0.0.0</constant>
        </setBody>
        <process ref="requestProcessor"/>
        <to uri="cxfrs:bean:rsClient"/>
        <log message="${body}"/>
    </route>
</camelContext>

<cxf:rsClient id="rsClient" address="http://freegeoip.net" serviceClass="nl.rubix.cxfrs.test.endpoint.Freegeoip" loggingFeatureEnabled="true"/>
</blueprint>

Now when we run the route we see our log message (again I changed my personal ip and the coordinates in the response message to 0s):

[mel-2) thread #1 - timer://foo] LoggingOutInterceptor          INFO  Outbound Message
---------------------------
ID: 1
Address: http://freegeoip.net/xml/0.0.0.0
Http-Method: GET
Content-Type: application/xml
Headers: {Content-Type=[application/xml], Accept=[application/json, application/xml]}
--------------------------------------
[mel-2) thread #1 - timer://foo] LoggingInInterceptor           INFO  Inbound Message
----------------------------
ID: 1
Response-Code: 200
Encoding: ISO-8859-1
Content-Type: application/xml
Headers: {Access-Control-Allow-Method=[GET, HEAD, OPTIONS], Access-Control-Allow-Origin=[*], connection=[keep-alive], Content-Length=[367], content-type=[application/xml], Date=[Mon, 01 Dec 2014 11:11:05 GMT], Server=[nginx/1.4.6 (Ubuntu)], X-Database-Date=[Wed, 26 Nov 2014 13:21:26 GMT]}
Payload: <?xml version="1.0" encoding="UTF-8"?>
<Response>
	<IP>0.0.0.0</IP>
	<CountryCode>NL</CountryCode>
	<CountryName>Netherlands</CountryName>
	<RegionCode></RegionCode>
	<RegionName></RegionName>
	<City></City>
	<ZipCode></ZipCode>
	<TimeZone>Europe/Amsterdam</TimeZone>
	<Latitude>0.0</Latitude>
	<Longitude>0.0</Longitude>
	<MetroCode>0</MetroCode>
</Response>

And when we change the header type to json:

D: 1
Address: http://freegeoip.net/json/0.0.0.0
Http-Method: GET
Content-Type: application/xml
Headers: {Content-Type=[application/xml], Accept=[application/json, application/xml]}
--------------------------------------
[mel-2) thread #1 - timer://foo] LoggingInInterceptor           INFO  Inbound Message
----------------------------
ID: 1
Response-Code: 200
Encoding: ISO-8859-1
Content-Type: application/json
Headers: {Access-Control-Allow-Method=[GET, HEAD, OPTIONS], Access-Control-Allow-Origin=[*], connection=[keep-alive], Content-Length=[208], content-type=[application/json], Date=[Mon, 01 Dec 2014 11:16:03 GMT], Server=[nginx/1.4.6 (Ubuntu)], X-Database-Date=[Wed, 26 Nov 2014 13:21:26 GMT]}
Payload: {"ip":"0.0.0.0","country_code":"NL","country_name":"Netherlands","region_code":"","region_name":"","city":"","zip_code":"","time_zone":"Europe/Amsterdam","latitude":0.0,"longitude":0.0,"metro_code":0}
 
3 Comments

Posted by on 2014-12-01 in JBoss Fuse


Tags: , , , ,

Writing a Camel eventnotifier

There are numerous logging and monitoring options available in Apache Camel. The most obvious being the Log component and Log EIP.

http://camel.apache.org/log.html

http://camel.apache.org/logeip.html

However, a sometimes more overlooked option is the Camel Eventnotifier. The Eventnotifier can listen on various events sent by a Camel context. The eventnotifier will catch the Camel Exchanges puched by these events. So do note the eventnotifier is logging on a Exchange level. In this post I will explain an example of the Camel eventnotifier.

We are going to start with the default example which comes with the Blueprint archetype in JBoss Fuse.

camel-eventnotifier-1

As you can see in this example the log EIP is used. The log EIP in this example is configured like this:

camel-eventnotifier-2

When we run this example we see the following output in the log:

[ntext) thread #0 - timer://foo] timerToLog INFO The message contains Hi from Camel at 2014-10-10 13:37:27
[ntext) thread #0 - timer://foo] timerToLog INFO The message contains Hi from Camel at 2014-10-10 13:37:32
[ntext) thread #0 - timer://foo] timerToLog INFO The message contains Hi from Camel at 2014-10-10 13:37:37
[ntext) thread #0 - timer://foo] timerToLog INFO The message contains Hi from Camel at 2014-10-10 13:37:42

In this post we are going to recreate this logging output but instead of using the log EIP we are going to use a Camel Eventnotifier. After this I will show you how to extend the logging of the Camel Context further without making any changes to the route. It is this concept which makes the Eventnotifier very powerfull.

The first step is to create the Eventnotifier class.

Creating a custom EventNotifier class

Create a new Java class extending org.apache.camel.support.EventNotifierSupport (note there is also an EventNotifierSupport class in the management package but this one is deprecated).

We are going to implement two inherited methods:

isEnabled – here you can configure what types of events the eventnotifier can subscribe to

notify – this is the method who gets called when the event occures. Here you would implement the logic to handle the event.

In the isEnabled method we are going to enable the ExchangeSentEvent. This event is triggered after an exchange has been sent to and endpoint.

When this event occures the notify method is called with an abstract event object as the parameter. So in the notify method we need to first cast this extract event to the ExchangeSentEvent object so we can use this specialized object. Then we have to extract the Camel Exchange from this event, extract the body part of the in message (we use the in message since we are sending to a fire and forget style endpoint and want to have the message we sent to this endpoint).

The notify method looks like this:

// We are going to extract first the Camel Exchange from the event and after this extract the body from the Exchange
ExchangeSentEvent sentEvent = (ExchangeSentEvent) event;
Exchange exchange = sentEvent.getExchange();
String msgBody = (String) exchange.getIn().getBody();
log.info("The message contains " + msgBody);

The entire Java Class of our eventnotifier looks like this:


package nl.rubix.notifier.example.notifier;

import java.util.EventObject;
import org.apache.camel.Exchange;
import org.apache.camel.management.event.ExchangeSentEvent;
import org.apache.camel.support.EventNotifierSupport;

public class MyEventnotifier extends EventNotifierSupport{

	@Override
	public boolean isEnabled(EventObject event) {
		// We are going to enable the ExchangeSentEvent this event will be published after an exchange has been sent to an endpoint in the Camel route
		return event instanceof ExchangeSentEvent;
	}

	@Override
	public void notify(EventObject event) throws Exception {
		if(event instanceof ExchangeSentEvent){
			// We are going to extract first the Camel Exchange from the event and after this extract the body from the Exchange
			ExchangeSentEvent sentEvent = (ExchangeSentEvent) event;
			Exchange exchange = sentEvent.getExchange();
			String msgBody = (String) exchange.getIn().getBody();
			log.info("The message contains " + msgBody);
		}
	}
}


Next we have to instantiate the MyEventnotifier class as a bean in the Camel context, just you would instantiate any other beans.

<bean id="myEventNotifier" class="nl.rubix.notifier.example.notifier.MyEventnotifier"/>

When we run this example we see the following output in the log (note: we didn’t remove the log EIP in the Camel route):

[ntext) thread #0 - timer://foo] timerToLog                     INFO  The message contains Hi from Camel at 2014-10-10 14:32:46
[ntext) thread #0 - timer://foo] MyEventnotifier                INFO  The message contains Hi from Camel at 2014-10-10 14:32:46
[ntext) thread #0 - timer://foo] timerToLog                     INFO  The message contains Hi from Camel at 2014-10-10 14:32:51
[ntext) thread #0 - timer://foo] MyEventnotifier                INFO  The message contains Hi from Camel at 2014-10-10 14:32:51

Extending the example

As you can see the log entry of the EventNotifier contains MyEventnotifier in stead of timerToLog. In this case we have only one Camel Route so it is not a big deal the name of the route does not show up in the log. But what if we have multiple routes, in this case it would definitely be nice to know what route triggered the ExchangeSentEvent. Luckilly we can easily get the route name from the exchange using the ‘getFromRouteId()’ available on the Exchange object.

So when we extend our notify class with the route name will be logged:

String routeName = exchange.getFromRouteId();
log.info("The message contains " + msgBody + " route: " + routeName);

The log entry now looks like this:

[ntext) thread #0 - timer://foo] MyEventnotifier                INFO  The message contains Hi from Camel at 2014-10-10 14:38:58 route: timerToLog

But what if we want to use other types of events as well?

Extending the EventNotifier to use other events

First we need to enable the other types of events we want to receive in the isEnabled method. This can be done by simply adding them to the return statement:

return event instanceof ExchangeSentEvent || event instanceof CamelContextStartedEvent;

Next we need to implement some logic for handling the CamelContextStartedEvent in the notify mehtod. In this case we want to show the name of the Camel Context when it has been started. To do this simply add the following to the notify method:

else if(event instanceof CamelContextStartedEvent){
			CamelContextStartedEvent contextCreatedEvent = (CamelContextStartedEvent) event;
			String contextName = contextCreatedEvent.getContext().getName();
			log.info("Camel Context: " + contextName + " started");
		}

Now when we run the example we see the following entry in the log:

[         Blueprint Extender: 1] MyEventnotifier                INFO  Camel Context: blueprintContext started

The power of the EventNotifier lies in the fact you can extend the logging capabilities of Camel without changing individual routes and Contexts. Simply define your EventNotifier and instantiate it once in the CamelContexts you want to monitor. Another example of this is that all your Camel Contexts and Routes will have a standardised way of logging and log moments.

The final MyEventnotifier class looks like this:

package nl.rubix.notifier.example.notifier;

import java.util.EventObject;

import org.apache.camel.Exchange;
import org.apache.camel.management.event.ExchangeSentEvent;
import org.apache.camel.support.EventNotifierSupport;
import org.apache.camel.management.event.CamelContextStartedEvent;


public class MyEventnotifier extends EventNotifierSupport{

	@Override
	public boolean isEnabled(EventObject event) {
		// We are going to enable the ExchangeSentEvent this event will be published after an exchange has been sent to an endpoint in the Camel route
		return event instanceof ExchangeSentEvent || event instanceof CamelContextStartedEvent;
	}

	@Override
	public void notify(EventObject event) throws Exception {
		if(event instanceof ExchangeSentEvent){
			// We are going to extract first the Camel Exchange from the event and after this extract the body from the Exchange
			ExchangeSentEvent sentEvent = (ExchangeSentEvent) event;
			Exchange exchange = sentEvent.getExchange();
			String msgBody = (String) exchange.getIn().getBody();
			String routeName = exchange.getFromRouteId();
			log.info("The message contains " + msgBody + " route: " + routeName);
		}
		else if(event instanceof CamelContextStartedEvent){
			CamelContextStartedEvent contextCreatedEvent = (CamelContextStartedEvent) event;
			String contextName = contextCreatedEvent.getContext().getName();
			log.info("Camel Context: " + contextName + " started");
		}
		
	}

}
 
Leave a comment

Posted by on 2014-10-27 in JBoss Fuse


Tags: , , , ,

Deploying a Jboss Fuse project into a fabric8 container with maven

One of the great features of Jboss Fuse and the underlying Apache Camel is that it can be deployed virtually anywhere. However one of the runtime possibilities that comes out of the box with Jboss Fuse is Fuse Fabric, which uses fabric8 containers as a runtime.

In fabric8 the deployable unit is a fabric profile. In this post we will create a fabric profile containing a Jboss Fuse project. Then we will create and startup a fabric container and provision this container firstly with the Jboss Fuse runtime and finally with our fabric profile containing a camel route. We will use maven for most of the build and deployment steps.

Note this post will not go into detail how to setup your fabric8 environment and assumes you already have a running fabric with a running root container.

As mentioned above we are using the Fuse spring example which you get for free after creating a Fuse project using the spring archetype for Fuse. The only thing I changed in the Camel route of this example is the location of the directories used for reading and writing the files. I changed it so it no longer uses a directory in the project but just some location on my file system for quick testing.

Here is the example Camel route:deploying-into-fabric8-1

We are going to deploy the project containing this route as a fabric profile. This fabric profile can than be added to a fabric container which, in this case, acts as a karaf runtime for Fuse. We are going to use maven for all the build and deploy steps.

To deploy our project into a container we need to walk through the following steps:

  1. Update the pom.xml file
  2. do a Maven install
  3. deploy your project using maven
  4. create a fabric container
  5. add the fabric profile to the container

 Update the pom.xml file

To deploy our Fuse project using maven we need to make some changes to our pom file. We need to change the following:

  1. Add info for creating the OSGi bundle
  2. Add Apache Felix plugin
  3. Add Fabric8 plugin and properties

Add info for creating the OSGi bundle

To use an OSGi bundle we need to change two things in our pom file.

  • Change the packaging from jar to bundle
  • add Apache Felix plugin
<plugin>
   <groupId>org.apache.felix</groupId>
   <artifactId>maven-bundle-plugin</artifactId>
   <version>2.3.7</version>
   <extensions>true</extensions>
   <configuration>
      <instructions>
         <Bundle-SymbolicName>fabricdemo</Bundle-SymbolicName>
         <Private-Package>nl.rubix.fabricdemo.*</Private-Package>
         <Import-Package>*</Import-Package>
      </instructions>
   </configuration>
</plugin>

 Add Fabric8 plugin and properties

Next up is adding the fabric8 stuff to our pom file. This contains a the fabric8 plugin adding some fabric8 properties and removing the existing maven plugins.

Add Fabric8 maven plugin

<!-- fabric8 plugin for using deploying via mvn fabric:deploy -->
<plugin>
   <groupId>io.fabric8</groupId>
   <artifactId>fabric8-maven-plugin</artifactId>
</plugin>

 Add Fabric8 properties

there are a lot of fabric8 properties, for this simple demo we are going to use only one for setting the name of the fabric profile:

<fabric8.profile>fabricdemo</fabric8.profile>

Optionally you can add other fabric8 properties for adding specific features to your fabric profile or defining a parent profile for creating a profile hierarchy. For example:

<fabric8.features>camel camel-cxf</fabric8.features>
<fabric8.parentProfiles>feature-camel</fabric8.parentProfiles>

 Remove the existing maven plugin

finally we need to remove the existing maven plugins so no conflicts can arrise using the fabric plugin.
Remove the following plugins:

<plugin>
    <groupId>org.apache.maven.plugins</groupId>
    <artifactId>maven-compiler-plugin</artifactId>
    <version>2.5.1</version>
    <configuration>
        <source>1.6</source>
        <target>1.6</target>
    </configuration>
</plugin>
<plugin>
    <groupId>org.apache.maven.plugins</groupId>
    <artifactId>maven-resources-plugin</artifactId>
    <version>2.6</version>
    <configuration>
        <encoding>UTF-8</encoding>
    </configuration>
</plugin>

 Do a Maven install

execute the command ‘mvn install’

Note if you want to skip unit tests execute the command ‘mvn -Dmaven.test.skip=true install’

optional if you want to run your Camel route locally so you can do some manual testing execute the command: ‘mvn camel:run’

Deploy your project using Maven

Now we are ready to deploy our Fuse project as a fabric profile making it available in fabric8.
To do this simply execute the command: ‘mvn fabric8:deploy’

The first time you execute this command for a particular project it can take up some time when Maven is downloading all the nessecary jar files. After the deployment is successful the output should look something like this:

[INFO] Updating profile: fabricdemo with parent profile(s): [feature-camel] using OSGi resolver
[INFO] About to invoke mbean io.fabric8:type=ProjectDeployer on jolokia URL: http://localhost:8181/jolokia with user: admin
[INFO] Result: DeployResults{profileUrl='null', profileId='fabricdemo', versionId='1.0'}
[INFO] Uploading file ReadMe.txt to invoke mbean io.fabric8:type=Fabric on jolokia URL: http://localhost:8181/jolokia with user: admin
[INFO] No profile configuration file directory /home/jboss/workspace/fabricdemo/src/main/fabric8 is defined in this project; so not importing any other configuration files into the profile.
[INFO] Performing profile refresh on mbean: io.fabric8:type=Fabric version: 1.0 profile: fabricdemo
[INFO] ------------------------------------------------------------------------
[INFO] BUILD SUCCESS
[INFO] ------------------------------------------------------------------------
[INFO] Total time: 2:56.842s
[INFO] Finished at: Sun Sep 14 13:30:51 CEST 2014
[INFO] Final Memory: 28M/120M
[INFO] ------------------------------------------------------------------------
[jboss@localhost fabricdemo]$


Now we can switch to Hawtio for finalizing our deployment and starting our application.

Create a fabric container

We assume you have already created a fabric and your server is running.

In the karaf console the command ‘fabric:container-list’ should output something like this:

deploying-into-fabric8-2

Now we can switch to hawtio to finish up the deployment. Go to localhost:8181 (or, when using a remote server to the server address) to start up the hawtio console.

The startup screen (after you log in) should look something like this:

deploying-into-fabric8-3

now click the create button to create a new container which we will use to deploy our newly created fabric profile into.

Type a container name, in this example I am using fabric8 demo. Then enter ‘full’ into the search box and select jboss/fuse full. This will provision the container with the Fuse runtime (like Apache Camel, CXF and ActiveMQ). Now press ‘Create and Start Container’

deploying-into-fabric8-4

After some time our new container will be started:

deploying-into-fabric8-5

however we still need to provision this container with the fabric profile we created earlier.

Add the fabric profile to the container

After the new container is started click on the container -> now add the fabric profile we just deployed with maven. click Add -> expand ‘Uncategorized’ -> select your profile → click Add

deploying-into-fabric8-6

Now fabric8 will provision the container with our fabric profile. After it is done provisioning and the container is running you should see something like this:

deploying-into-fabric8-7

Note the little Camel after Services and the camel in the JMS Domains.

Now our Fuse project is correctly deployed and running in a fabric8 container. To open the container simply click the Open button and the Hawtio console of the container will open in a new browser tab.

When we go to the Camel tab we can expand the route we have just deployed to see how many messages the route has processed. After some test messages it seems our route is working!

deploying-into-fabric8-8The complete pom.xml file used for this project:

<?xml version="1.0" encoding="UTF-8"?>
<project xmlns="http://maven.apache.org/POM/4.0.0" xmlns:xsi="http://www.w3.org/2001/XMLSchema-instance"
         xsi:schemaLocation="http://maven.apache.org/POM/4.0.0 http://maven.apache.org/maven-v4_0_0.xsd">

  <modelVersion>4.0.0</modelVersion>

  <groupId>nl.rubix</groupId>
  <artifactId>fabricdemo</artifactId>
  <packaging>bundle</packaging>
  <version>1.0.0-SNAPSHOT</version>

  <name>A Camel Spring Route</name>
  <url>http://www.myorganization.org</url>

  <properties>
    <project.build.sourceEncoding>UTF-8</project.build.sourceEncoding>
    <project.reporting.outputEncoding>UTF-8</project.reporting.outputEncoding>
    <fabric8.profile>fabricdemo</fabric8.profile>
  </properties>

  <repositories>
    <repository>
      <id>release.fusesource.org</id>
      <name>FuseSource Release Repository</name>
      <url>http://repo.fusesource.com/nexus/content/repositories/releases</url>
      <snapshots>
        <enabled>false</enabled>
      </snapshots>
      <releases>
        <enabled>true</enabled>
      </releases>
    </repository>
    <repository>
     <id>ea.fusesource.org</id>
     <name>FuseSource Community Early Access Release Repository</name>
     <url>http://repo.fusesource.com/nexus/content/groups/ea</url>
     <snapshots>
      <enabled>false</enabled>
     </snapshots>
     <releases>
      <enabled>true</enabled>
     </releases>
    </repository>    
    <repository>
      <id>snapshot.fusesource.org</id>
      <name>FuseSource Snapshot Repository</name>
      <url>http://repo.fusesource.com/nexus/content/repositories/snapshots</url>
      <snapshots>
        <enabled>true</enabled>
      </snapshots>
      <releases>
        <enabled>false</enabled>
      </releases>
    </repository>
  </repositories>

  <pluginRepositories>
    <pluginRepository>
      <id>release.fusesource.org</id>
      <name>FuseSource Release Repository</name>
      <url>http://repo.fusesource.com/nexus/content/repositories/releases</url>
      <snapshots>
        <enabled>false</enabled>
      </snapshots>
      <releases>
        <enabled>true</enabled>
      </releases>
    </pluginRepository>
    <pluginRepository>
     <id>ea.fusesource.org</id>
     <name>FuseSource Community Early Access Release Repository</name>
     <url>http://repo.fusesource.com/nexus/content/groups/ea</url>
     <snapshots>
      <enabled>false</enabled>
     </snapshots>
     <releases>
      <enabled>true</enabled>
     </releases>
    </pluginRepository>      
    <pluginRepository>
      <id>snapshot.fusesource.org</id>
      <name>FuseSource Snapshot Repository</name>
      <url>http://repo.fusesource.com/nexus/content/repositories/snapshots</url>
      <snapshots>
        <enabled>true</enabled>
      </snapshots>
      <releases>
        <enabled>false</enabled>
      </releases>
    </pluginRepository>
  </pluginRepositories>

  <dependencies>
    <dependency>
      <groupId>org.apache.camel</groupId>
      <artifactId>camel-core</artifactId>
      <version>2.12.0.redhat-610379</version>
    </dependency>
    <dependency>
      <groupId>org.apache.camel</groupId>
      <artifactId>camel-spring</artifactId>
      <version>2.12.0.redhat-610379</version>
    </dependency>

    <!-- logging -->
    <dependency>
      <groupId>org.slf4j</groupId>
      <artifactId>slf4j-api</artifactId>
      <version>1.7.5</version>
    </dependency>
    <dependency>
      <groupId>org.slf4j</groupId>
      <artifactId>slf4j-log4j12</artifactId>
      <version>1.7.5</version>
    </dependency>
    <dependency>
      <groupId>log4j</groupId>
      <artifactId>log4j</artifactId>
      <version>1.2.17</version>
    </dependency>

    <!-- testing -->
    <dependency>
      <groupId>org.apache.camel</groupId>
      <artifactId>camel-test-spring</artifactId>
      <version>2.12.0.redhat-610379</version>
      <scope>test</scope>
    </dependency>

  </dependencies>

  <build>
    <defaultGoal>install</defaultGoal>

    <plugins>

      <!-- allows the route to be ran via 'mvn camel:run' -->
      <plugin>
        <groupId>org.apache.camel</groupId>
        <artifactId>camel-maven-plugin</artifactId>
        <version>2.12.0.redhat-610379</version>
      </plugin>
      
      <!-- apache felix plugin for creating OSGi bundle -->
      <plugin>
            <groupId>org.apache.felix</groupId>
            <artifactId>maven-bundle-plugin</artifactId>
            <version>2.3.7</version>
            <extensions>true</extensions>
            <configuration>
                <instructions>
                    <Bundle-SymbolicName>homeloan</Bundle-SymbolicName>
                    <Private-Package>nl.rubix.fabricdemo.*</Private-Package>
                    <Import-Package>*</Import-Package>
                </instructions>
            </configuration>
        </plugin>
        
        <!-- fabric8 plugin for using deploying via mvn fabric:deploy -->
        <plugin>
              <groupId>io.fabric8</groupId>
              <artifactId>fabric8-maven-plugin</artifactId>
          </plugin>
    </plugins>
  </build>

</project>


8 Comments

Posted by on 2014-10-10 in JBoss Fuse


Tags: , , , , ,

JMS request response patterns with TIBCO BusinessWorks and EMS

When using JMS for synchronous request response messaging there are some options and standards to consider. In this post I will explain the two most common patters for synchronous request response messaging and will provide some examples of how to implement these patterns in TIBCO BusinessWorks (BW) in combination with TIBCO Enterprise Messaging Service (EMS).

JMS request response patterns

The main problem with request response messaging is to correlate the response message to a particular request message. So if party A and party B both sends request messages the response to party B must be delivered to party B and the response messages to party A must be sent to party A.

There are two standard patterns in JMS for correlating request and response messages. These patterns are particularly used in synchronous request response messaging.

The two patterns are called:

  • MessageID Pattern
  • CorrelationID Pattern

MessageID pattern

n the MessageID pattern the service consumer (the party who initiates the request or invokes the service) must provide a unique MessageID and a JMS destination where the service consumer expects the response. This response destination is set in the JMS header property: ‘JMSReplyTo’

The Service provider will copy the MessageID it received in the request to the CorrelationID of the response message and send the response to the JMS destination provided by the service consumer in the JMSReplyTo property.

Graphically this can be viewed as:

EMS-patterns-1

CorrelationID pattern

In the CorrelationID pattern the service consumer must provide a unique CorrelationID. The service provider will copy the CorrelationID it received into the CorrelationID of the response message. All response messages will go to the same response destination.

EMS-patterns-2

 Mixed patterns

TIBCO BW and EMS are quite flexible when it comes to these patterns and also support a mix of both patterns. For instance using the CorrelationID in the request to correlate response messages, like the CorrelationID pattern, but also use dynamic response destinations using the JMSReplyTo property, like the MessageID pattern. It is difficult (read: impossible) to choose one best pattern for all circumstances. However, all things considered equal it is probably better to stick with one of the standard patterns. Especially when you have more than one system connected to your JMS server.

For more info about these JMS patterns:

http://www.eaipatterns.com/RequestReplyJmsExample.html

http://docs.oracle.com/cd/E13171_01/alsb/docs25/interopjms/MsgIDPatternforJMS.html

Below I will show some examples of these two patterns in TIBCO. Know that these are just a few possibilities to implement these patterns. As mentioned above TIBCO is quitte flexible when it comes to these patters and even implementing one pattern can be done in more than one way using TIBCO BW and EMS.

MessageID pattern in TIBCO

Below I will show an example of the MessageID pattern in TIBCO. I will provide an example of both a service consumer and a service provider.

Service consumer

When implementing the MessageID pattern in TIBCO I always like to use the ‘JMS Queue Sender’ activity in combination with the ‘Get JMS Queue Message’ activity.

Below we are looking at the input data of the JMS Queue Sender. Note the replyToQueue field is test the response queue we would like to receive our response, this field will translate to the JMSReplyTo property in our JMS message. (and yes, it would have probable made sense to also call the field JMSReplyTo….yeah…hmmz…) Also note the MessageID is not provided in TIBCO BW, this property is set by TIBCO EMS.

EMS-patterns-3

When looking at the input tab of the ‘Get JMS Queue Message’ we can see a selector selecting messages based on the JMSCorrelationID property which is set to the MessageID of the request message. (probably no coincidence the MessageID is the only output field of the JMS Queue Sender activity 🙂 )

EMS-patterns-4

When looking at the output of the Get JMS Queue Message activity we see the CorrelationID property is filled with: ‘ID:EMS-SERVER:EF854168E2C48:45’ And the JMSDestination is set to the value we provided in the request. EMS also provided a new unique MessageID property.

EMS-patterns-5

Service provider

Now we take our attention to the service provider. Which must copy the MessageID to the CorrelationID of the response and also send the response to the destination provided by the service consumer.

For the service provider I used a ‘JMS Queue Receiver’ process starter in combination with the ‘Reply To JMS Message’ activity.

Looking at the output of the JMS Queue Receiver we can see TIBCO EMS set the JMSMessageID property used for correlating the response message. This is the same MessageID we received in the response as the CorrelationID: ‘ID:EMS-SERVER:EF854168E2C48:45’. Also note the JMSReplyTo property is set to the value the service consumer provided in the request message.

EMS-patterns-6

Finally we take a look at the output of the ‘Reply To JMS Message’ activity. Here we can see none of the above properties, neither the JMSDestination nor the CorrelationID is set. This is because TIBCO BW and EMS set these properties in the background.

EMS-patterns-7

The way these properties are set by TIBCO BW is explained in the Pallette reference documentation available here: https://docs.tibco.com/pub/activematrix_businessworks/5.12.0/doc/pdf/tib_bw_palette_reference.pdf

at page 493 it states for setting the CorrelationID:

This ID is used to link a response message with its related request message. This property is usually set to the message ID of the message you are replying to, but any value can be used. For example, you may use another field in the body of the message (such as orderID) to correlate request and reply messages. The JMSCorrelationID of the reply message is set in this input element. If this element is not set, the correlation ID is set as follows: If the JMSCorrelationID input element is not set, the value of the JMSCorrelationID property in the message you are replying to is used.
• If neither this input element nor the JMSCorrelationID of the message you are replying to are set, the message ID of the message you are replying to is >used.

• If none of the above values are set, the JMSCorrelationID of the reply message is set to null.

CorrelationID pattern in TIBCO

Next up the CorrelationID pattern in TIBCO.

Service Consumer

For the service consumer in TIBCO BW I will show two possibilities for implementing the CorrelationID pattern.

JMS Queue Requestor

TIBCO BW provides one out of the box activity for synchronous request reply over JMS, the ‘JMS Queue Requestor’ (there is also a topic version, you guessed it, the ‘JMS Topic Requestor’).

Below we are looking at the input tab of this JMS Queue Requestor activity. We provide the correlationID we want to use for this message.

EMS-patterns-8

When looking at the output tab we can see our response message with the correlationID we provided in the request. This copying of the CorrelationID from the request to the response message does however, in opposite to the MessageID example we have seen above, not automatically. This will be apparrant when we take a look at the service provider.

EMS-patterns-9

There is also another word of caution when using the ‘JMS Queue Requestor’ activity. This activity uses temporary queues as a response channel. And it does not perform correlation on selecting the message like we have seen in the example of the MessageID pattern. While using temporary queues as response channels is fine in and of itself this behavior can be overridden using the JMSReplyTo property (creating in effect a mixed pattern). Since there is no other correlation or message selection taking place when the JMS Queue Requestor reads the message from the response destination it cannot be guaranteed that the job who created the request also gets his response.

So it is strongly advised when using the ‘JMS Queue Requestor’ to stick with temporary queues for the response channel.

Also make sure your response messages have an expiration set. If for one reason your service consumer dies and the response messages don’t have an expiration set temporary queues don’t clean themselves and need manual removal.

Queue Sender

For implementing a service consumer using the CorrelationID pattern we can also take a similair approach like we did with the MessageID pattern. Using a combination of the ‘JMS Queue Sender’ and ‘Get JMS Queue Message’ activities.

The only difference being that the ‘JMS Queue Sender’ activity does not output the CorrelationID. So we need to set up a common CorrelationID field we can use in both the ‘JMS Queue Sender’ and ‘Get JMS Queue Message’ activities. In the example below we use a Mapper activity for this.

EMS-patterns-10

Now this CorrelationID can be used in the ‘JMS Queue Sender’ activity.

EMS-patterns-11

And in the message selector of the ‘Get JMS Queue Message’ we need to correlate using the CorrelationID we set in our Mapper activity.

EMS-patterns-12

Service provider

For the service provider we use the same ‘JMS Queue Receiver’ and ‘Reply to JMS Message’ activities as we did in the MessageID pattern. However we have to make sure we copy the CorrelationID of the request message into our response message.

When this mapping is done we can see the following output:

EMS-patterns-13

EMS-patterns-14

 
2 Comments

Posted by on 2014-10-01 in TIBCO BusinessWorks


Tags: , , , ,

Stopping a fabric container after ‘container has not been created by fabric’ error message

When creating a new fabric sometimes there are still containers running in the background of the old fabric. These can cause conflicts with the ‘new’ containers. Especially when using the same ZooKeeper credentials as the old fabric in the new one.

Note this posts will only explain how to stop and delete a container after the ‘container has not been created by fabric’ error message. It may very well be that other configurations and background processes are running of the old fabric what may cause unexpected behavior. If you have the possibility to start your fabric from scratch (for intance a developer machine) it may be better to restart fuse with ./fuse -clean and create a new fabric with the command fabric:create –clean

for more information about the available commands see the Fuse documentation:

https://access.redhat.com/documentation/en-US/Red_Hat_JBoss_Fuse/6.1/html/Console_Reference/files/ConsoleRefIntro.html

One of the problems is that when trying to start, stop or delete a container you get the error message ‘container <<your container>> has not been created by fabric’.

container-stop-error-1

Also trying to stop/start/delete the container from the Fuse karaf console will result in the same message.

JBossFuse:karaf@root> fabric:container-list
[id] [version] [connected] [profiles] [provision status]
root* 1.0 true fabric, fabric-ensemble-0000-1 success
  demoContainer 1.0 true jboss-fuse-full, GettingStarted success
JBossFuse:karaf@root> fabric:container-stop demoContainer
Error executing command: Container demoContainer has not been created using Fabric

So how can we stop this container?

To stop this container we need to take two steps;

1) install the ‘zookeeper-commands’ feature in the root container

2) using zookeeper commands to find the PID of the container so we can kill it through the os.

1) installing the ‘zookeeper-commands’ feature in the root container

In fabric8 features are also controlled by fabric8, for this reason the good old ‘feature:install’ command will not work.

I resulted in installing the zookeeper-commands feature through the Hawtio console.

In the Hawtio console go to ‘Wiki’ → edit fabric features → search for zookeeper and select zookeeper-commands → click the ‘Add’ buttom and finally click ‘save’

In Hawtio console go to wiki and select the fabric profile.

container-stop-error-2

Then select the edit features button at the bottom of the features list:

container-stop-error-3

Search for zookeeper, select zookeeper-commands → click ‘Add’ → click ‘Save changes’

container-stop-error-42) Stopping the container

After installing the zookeeper-commands feature we can use the zookeeper commands in the Fuse/karaf shell:

finding the PID of the container we want to stop execute the following command:

JBossFuse:karaf@root> zk:list -r -d|grep demoContainer|grep pid
/fabric/registry/containers/status/demoContainer/pid = 7177

Now in a ‘regular’ shell we can kill the process (and thus the container) with this PID.

[jboss@localhost ]$ ps -ef|grep 7177
jboss     7177     1  2 12:30 pts/0    00:03:02 java -server -Dcom.sun.management.jmxremote -Dzookeeper.url=10.0.2.15:2181 -Dzookeeper.password.encode=true -Dzookeeper.password=ZKENC=YWRtaW4= -Xmx512m -XX:+UnlockDiagnosticVMOptions -XX:+UnsyncloadClass -Dbind.address=0.0.0.0 -Dio.fabric8.datastore.component.name=io.fabric8.datastore -Dio.fabric8.datastore.type=caching-git -Dio.fabric8.datastore.felix.fileinstall.filename=file:/home/jboss/Apps/jboss-fuse-6.1.0.redhat-379/etc/io.fabric8.datastore.cfg -Dio.fabric8.datastore.service.pid=io.fabric8.datastore -Dio.fabric8.datastore.gitPullPeriod=1000 -Djava.util.logging.config.file=/home/jboss/Apps/jboss-fuse-6.1.0.redhat-379/instances/demoContainer/etc/java.util.logging.properties -Djava.endorsed.dirs=/usr/lib/jvm/java-1.7.0-openjdk-1.7.0.60-2.4.7.0.fc20.x86_64/jre/jre/lib/endorsed:/usr/lib/jvm/java-1.7.0-openjdk-1.7.0.60-2.4.7.0.fc20.x86_64/jre/lib/endorsed:/home/jboss/Apps/jboss-fuse-6.1.0.redhat-379/lib/endorsed -Djava.ext.dirs=/usr/lib/jvm/java-1.7.0-openjdk-1.7.0.60-2.4.7.0.fc20.x86_64/jre/jre/lib/ext:/usr/lib/jvm/java-1.7.0-openjdk-1.7.0.60-2.4.7.0.fc20.x86_64/jre/lib/ext:/home/jboss/Apps/jboss-fuse-6.1.0.redhat-379/lib/ext -Dkaraf.home=/home/jboss/Apps/jboss-fuse-6.1.0.redhat-379 -Dkaraf.base=/home/jboss/Apps/jboss-fuse-6.1.0.redhat-379/instances/demoContainer -Dkaraf.data=/home/jboss/Apps/jboss-fuse-6.1.0.redhat-379/instances/demoContainer/data -Dkaraf.etc=/home/jboss/Apps/jboss-fuse-6.1.0.redhat-379/instances/demoContainer/etc -Dkaraf.startLocalConsole=false -Dkaraf.startRemoteShell=true -classpath /home/jboss/Apps/jboss-fuse-6.1.0.redhat-379/lib/org.apache.servicemix.specs.activator-2.3.0.redhat-610379.jar:/home/jboss/Apps/jboss-fuse-6.1.0.redhat-379/lib/karaf.jar:/home/jboss/Apps/jboss-fuse-6.1.0.redhat-379/lib/karaf-jaas-boot.jar:/home/jboss/Apps/jboss-fuse-6.1.0.redhat-379/lib/esb-version.jar org.apache.karaf.main.Main
[jboss@localhost ]$ kill -9 7177

Now the container is stopped, but it still exists. And we still can’t start it and stop it through the regular process. So in the next step I’ll explain how to delete the container.

deleting the container

To remove the container from the fabric we need to remove all the zookeeper entries. To do this first we first need to know what entries we need te remove.

We can use the zk:list command again for retrieving the zookeeper entries.

JBossFuse:karaf@root> zk:list -r|grep demo
/fabric/configs/containers/demoContainer
/fabric/configs/versions/1.0/containers/demoContainer
/fabric/registry/containers/config/demoContainer
/fabric/registry/containers/config/demoContainer/bindaddress
/fabric/registry/containers/config/demoContainer/maximumport
/fabric/registry/containers/config/demoContainer/localhostname
/fabric/registry/containers/config/demoContainer/localip
/fabric/registry/containers/config/demoContainer/publicip
/fabric/registry/containers/config/demoContainer/parent
/fabric/registry/containers/config/demoContainer/resolver
/fabric/registry/containers/config/demoContainer/minimumport
/fabric/registry/containers/config/demoContainer/manualip
/fabric/registry/containers/config/demoContainer/ip
/fabric/registry/ports/containers/demoContainer
/fabric/registry/ports/containers/demoContainer/org.apache.karaf.shell
/fabric/registry/ports/containers/demoContainer/org.apache.karaf.shell/sshPort
/fabric/registry/ports/containers/demoContainer/org.apache.karaf.management
/fabric/registry/ports/containers/demoContainer/org.apache.karaf.management/rmiServerPort
/fabric/registry/ports/containers/demoContainer/org.apache.karaf.management/rmiRegistryPort
/fabric/registry/ports/containers/demoContainer/org.ops4j.pax.web
/fabric/registry/ports/containers/demoContainer/org.ops4j.pax.web/org.osgi.service.http.port

Now we know all the entries of the container we want te delete we can delete the entries using the zk:delete command. Make sure you use the -r parameter to recursively remove alle entries.

JBossFuse:karaf@root> zk:delete -r /fabric/configs/containers/demoContainer
JBossFuse:karaf@root> zk:delete -r /fabric/configs/versions/1.0/containers/demoContainer
JBossFuse:karaf@root> zk:delete -r /fabric/registry/containers/config/demoContainer
JBossFuse:karaf@root> zk:delete -r /fabric/registry/ports/containers/demoContainer

Now when we execute the fabric:container-lists command the demoContainer is no longer in the list.

JBossFuse:karaf@root> fabric:container-list
[id]                           [version] [connected] [profiles]                                         [provision status]
root*                          1.0       true        fabric, fabric-ensemble-0000-1                     success
 
Leave a comment

Posted by on 2014-09-20 in JBoss Fuse


Tags: , , , ,

Terminate failed in JBDS

When running my Fuse projects from within JBDS it sometimes happened the process wont terminate properly. When this occurs the error message ‘Terminate Failed’ pops up.

TerminateFailed-1

And even though most of the times the process does get killed eventually I have had a couple of times this did not happen (or I was too impatient to wait for this ;)). Restarting JBDS will resolve this, but I have found this rather time consuming. Luckily there is an easy way to terminate the process manually.

In the Fuse Integration perspective there is the ‘Fuse JMX Navigator’ view. In here you can view all local processes running.

TerminateFailed-2

Here we can see a maven process still running, and the PID of this process is provided inside the []. Now we can easilly kill this process in the terminal.

[jboss@localhost bin]$ kill -9 2911
 
Leave a comment

Posted by on 2014-09-18 in JBoss Fuse


Tags: , , , , ,

TIBCO BusinessWorks Receiving a http 500 status code in a one-way operation Soap service

In a project using TIBCO BusinessWorks we had to call a webservice with a one-way operation (this means only a request message is defined in the operation in the WSDL) to deliver messages to a back-end system. During development we discovered a ‘feature’ of this asynchronous use of webservices in TIBCO BusinessWorks. We noticed that when the response http status code was 500 (internal server error of the service provider) BusinessWorks did not raise an exception.

bw-500-1

In TCPmon (http://ws.apache.org/tcpmon/) we can see the http status code 500 is returned.


bw-500-2

When we take a look at the SOAP 1.1 specification we can see the reason for this behaviour. In the SOAP specification section 6.2 it states:

“SOAP HTTP follows the semantics of the HTTP Status codes for communicating status information in HTTP. For example, a 2xx status code indicates that the client’s request including the SOAP component was successfully received, understood, and accepted etc.

In case of a SOAP error while processing the request, the SOAP HTTP server MUST issue an HTTP 500 “Internal Server Error” response and include a SOAP message in the response containing a SOAP Fault element (see section 4.4) indicating the SOAP processing error. ”

http://www.w3.org/TR/2000/NOTE-SOAP-20000508/
Since a one-way operation can not return any soap message including a soap fault the 500 status code is actually not conform specifications.

This also means that a one-way operation should be treated as a truly asynchronous message exchange pattern, even though a http response is returned. If there are requirements for guaranteed delivery this behaviour should be considered if you want to use a one-way soap interaction.

 
Leave a comment

Posted by on 2014-09-17 in TIBCO BusinessWorks


Tags: , , , ,